Remember that scent of freshly cut grass mixed with the aroma of blooming lilac on a warm June evening? This scent is the quintessence of summer, a time when the soul craves space, sun, and beauty. What if you could not only admire this beauty but also create it, even on the most modest plot? Today, we’ll talk about how to give your garden a new dimension, literally – upwards. Vertical gardening is not just a trend; it’s a real key to transforming your dacha space, allowing you to place more greenery, flowers, and even edible crops where there seems to be no room at all. This is a story about how to turn a blank fence wall, a dull house facade, or even a small balcony into a lush, living oasis. Get ready, we’re embarking on an exciting journey into the world of vertical gardens!
Why You Need a Vertical Garden at Your Dacha: Ideas for Inspiration and Space Saving
The idea of vertical gardening might seem complicated or even unnecessary, but let me share why I myself am delighted with this direction and why it fits so well with our dacha realities. Firstly, it’s, of course, space saving. Every one of us has plots where every centimeter counts. A vertical garden allows you to grow many times more plants in the same area. Instead of cluttering the ground with bushes and flowerbeds, you utilize walls, fences, railings, and even hanging structures. It’s the perfect solution for small plots where you want to have a relaxation area, a bed for your favorite herbs, and, of course, blooming compositions.
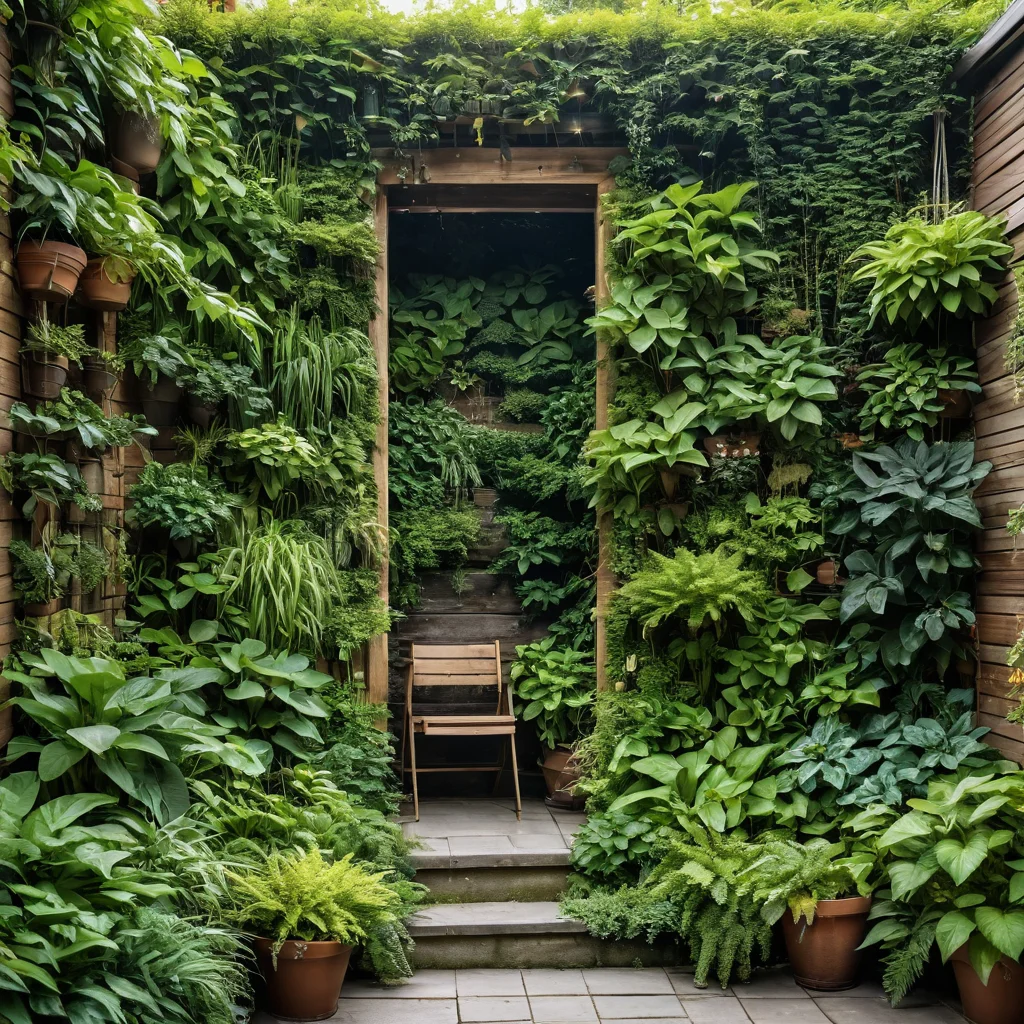
Secondly, it offers incredible aesthetic possibilities. Imagine: a blank shed wall that previously only pleased the eye with peeling paint is now covered with a cascade of blooming petunias or sweet peas. A balcony that used to be a storage space for junk is transformed into a cozy green corner with fragrant mint and strawberries. Vertical gardens can become a true work of art, changing the appearance of your plot depending on the season and your mood. It’s like a living painting that is constantly being updated.
In addition, vertical gardens can also perform practical functions:
- Space zoning: with the help of green walls, you can create cozy relaxation corners, shield yourself from prying eyes, or visually divide the plot into functional zones.
- Creating a microclimate: dense greenery helps reduce temperature on a hot day, protects house walls from overheating, and improves air quality.
- Improving sound insulation: plants can absorb noise, which is especially relevant if your plot is close to a road or noisy neighbors.
- Masking unsightly objects: old fences, utility buildings, unattractive corners – all of these can be hidden behind lush greenery.
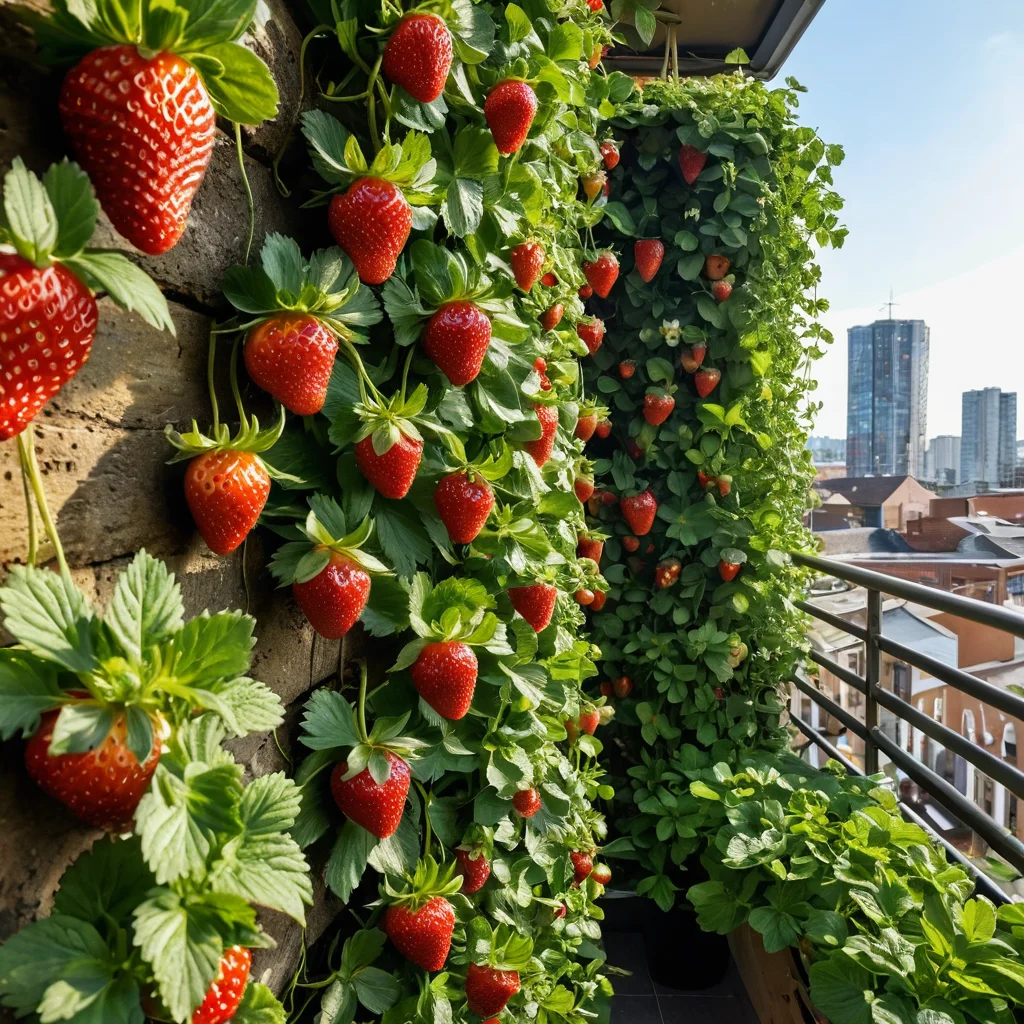
- Growing crops: some crops, such as strawberries, herbs, salads, and even miniature vegetable varieties, thrive in vertical structures, allowing you to get an additional harvest.
I always tell my dacha-dwelling friends: don’t be afraid to experiment! Vertical gardening is an accessible way to give your garden individuality, make it more lively, cozy, and functional. It’s an opportunity to express your creative nature and create a place that will delight you all year round.
Types of Vertical Gardens: Choosing Structures and Materials
When we talk about a vertical garden, don’t think it’s just one universal structure. In fact, there are many options, and the choice depends on your goals, budget, available materials, and, of course, imagination. I’d like to highlight a few main types that you can easily implement on your plot.
1. Hanging Planters and Pots
This is perhaps the simplest and most accessible method. You will need:
- Planters: plastic, ceramic, metal, woven – the choice is huge. It’s important that they have drainage holes.
- Brackets and hooks: for attaching planters to walls, fences, arches.
- Chains or ropes: for hanging planters one after another or at different heights.
Advantages: mobility, ease of installation, ability to create multi-tiered compositions. You can easily change the arrangement of planters, update the composition, or move it to another location. I love combining different sizes and shapes of planters to create dynamic vertical structures.
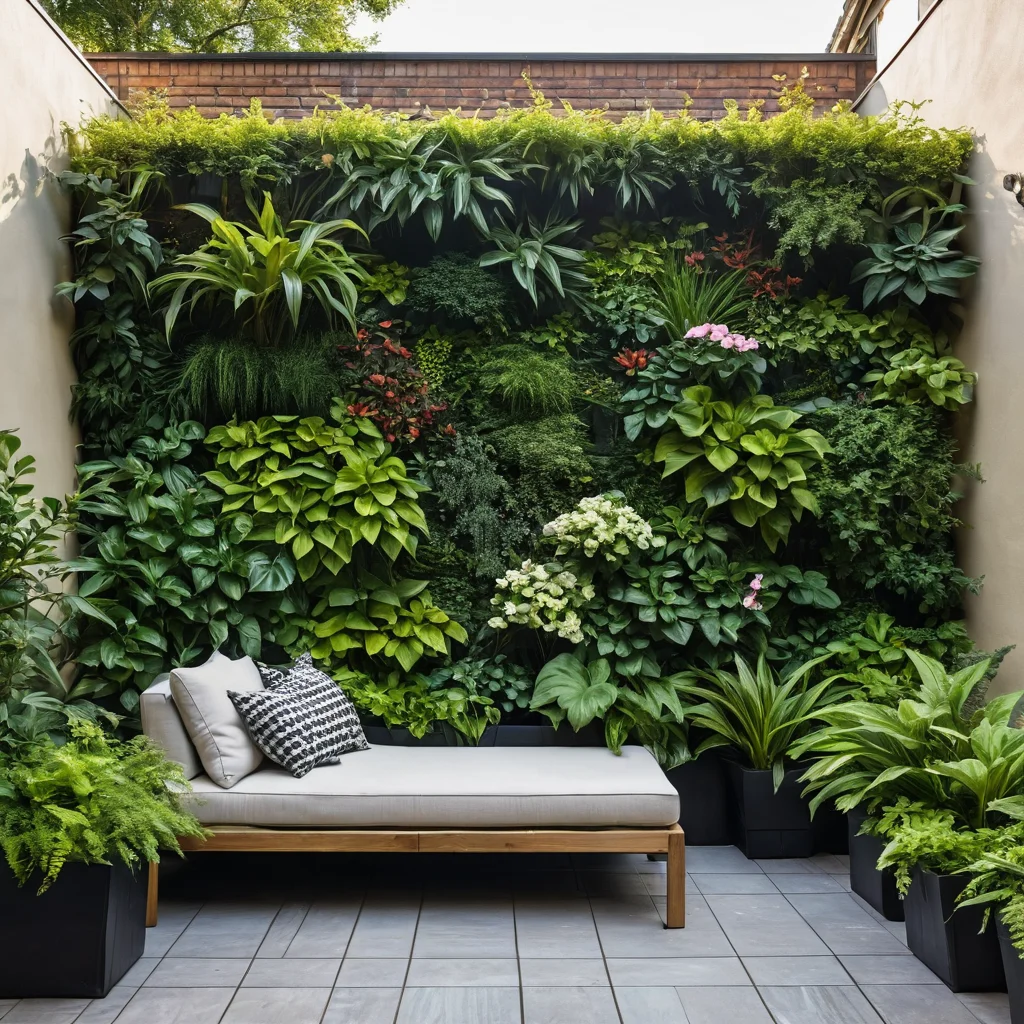
2. Modular Systems and Fabric Pockets
These are more modern and often very striking solutions. Such systems are vertical panels with ready-made pockets or cells for plants. The materials can be different:
- Geotextile or dense felt: such ‘pocket’ flowerbeds are lightweight, allow good air and moisture permeability, but require regular watering as the soil dries out quickly.
- Plastic or metal modules: more durable and robust, often with a built-in irrigation system.
Advantages: neat appearance, ability to quickly create a ‘green wall’, often equipped with systems for uniform water distribution. I’ve seen amazing examples where such systems completely covered house walls, turning them into living paintings.
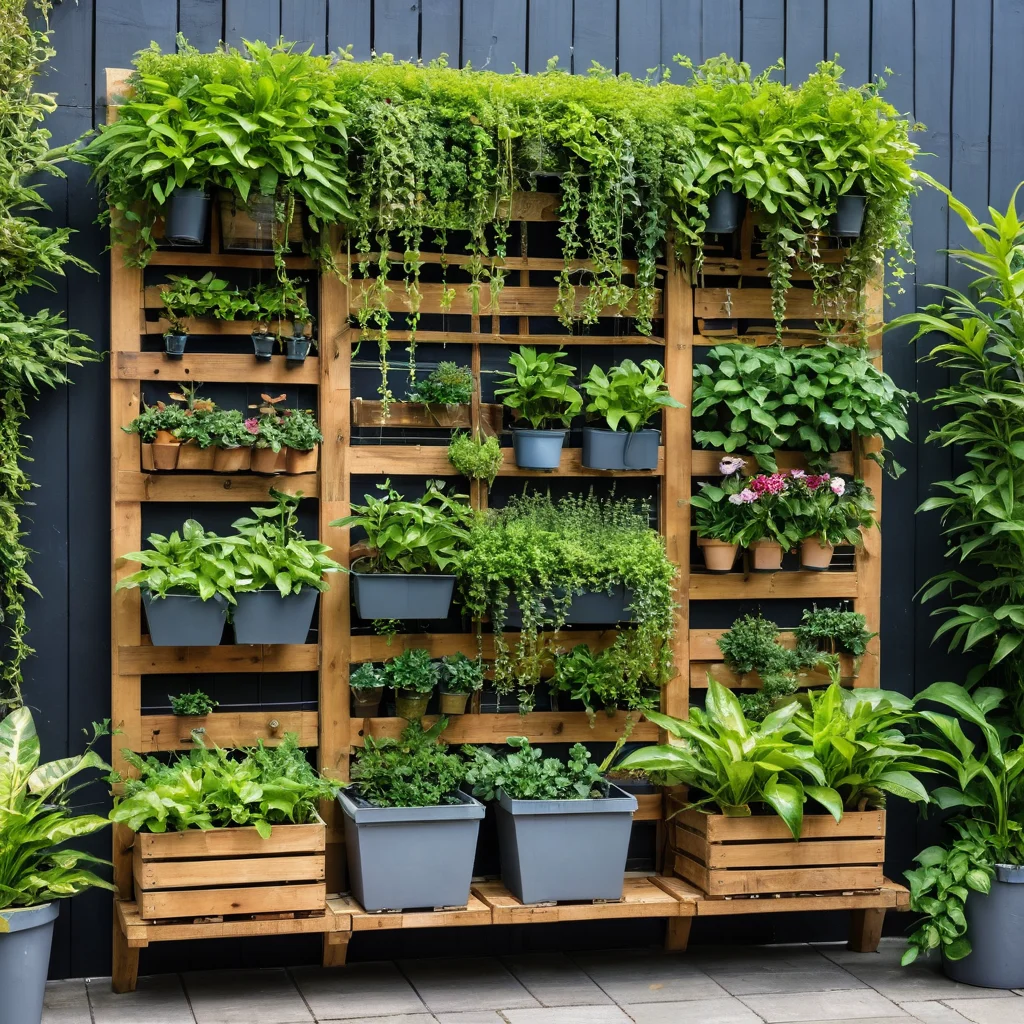
3. Pallet Structures
This is a real find for lovers of DIY garden decor and those looking for budget-friendly solutions. Old wooden pallets can be transformed into stylish vertical flowerbeds.
- Choosing a pallet: look for pallets without visible damage, preferably made of untreated wood.
- Preparation: clean the pallet of dust, sand if necessary.
- Creating ‘pockets’: use boards and a stapler or nails to create a back wall and bottom for the cells where soil will be placed.
- Lining: geotextile can be placed inside the cells to prevent soil from falling out while maintaining air circulation.
Advantages: eco-friendliness, material availability, customization options. Such pallet flowerbeds look great in rustic or country styles.
4. Pergolas, Arches, and Trellises
These are classic structures for vertical gardening, perfect for climbing plants. They not only create a green wall but also serve as support for vines.
- Materials: wood, metal, wrought iron elements.
- Purpose: creating green tunnels, arches over paths, dividing zones, decorating walls.
Advantages: durability, creating structure and volume in the garden, can be used for climbing roses, clematis, grapes.
5. Hydroponic Systems
This is a more technological option where plants grow without soil, in a nutrient solution. These systems can be both industrial and DIY.
- Structure: vertical pipes or panels where plant roots are immersed in a solution.
- Nutrition: special fertilizers dissolved in water.
Advantages: rapid plant growth, water saving, ability to grow greens and berries almost year-round. This is closer to modern urban gardening trends.
When choosing a structure, consider where it will be located, what load it should bear, and what appearance you want to achieve. Don’t be afraid to combine different materials and ideas – this is how the most unique and beautiful solutions are born!
DIY Vertical Garden: Step-by-Step Instructions for Beginners
Creating a DIY vertical garden is not as difficult as it may seem at first glance. The main thing is to prepare properly and follow simple steps. I’ll show you how to make a simple but effective vertical flowerbed from readily available materials, such as wooden crates or an old frame.
Step 1: Choosing and Preparing the Base
First, decide what will be the base of your vertical garden. It can be:
- Wooden crates or pallets: they can be placed vertically, creating niches for plants.
- Old window frame: it can be painted and attached to the wall, and then small pots can be built in or compartments for soil created.
- Large diameter plastic pipes: cut lengthwise, they can form the basis for containers.
- Metal mesh: it can be attached to the wall and used for climbing plants or as a support for hanging pots.
Important: If you are using wood, treat it with an antiseptic and protective coating to extend its lifespan. If the structure will be heavy, ensure it is securely fastened to the wall or post.
Step 2: Creating Plant Containers
Depending on the chosen base, you will need to create containers where the soil will be placed. For example:
- For crates/pallets: close the back and bottom of the crate with boards or dense geotextile so that the soil does not fall out. Ensure there are drainage holes.
- For a window frame: you can create small compartments using slats or use ready-made mini-pots that will fit into the frame.
- For mesh: attach small pots or special hanging planters to the mesh.
Tip: I prefer to use geotextile inside wooden structures. It allows water to pass through but retains soil, and also allows roots to breathe.
Step 3: Soil and Drainage
Since the soil volume in vertical structures is limited, choosing the right soil is very important. It should be:
- Light and loose: to ensure air access to the roots. Mixtures based on peat with added perlite or vermiculite work well.
- Nutritious: add compost or biohumus.
- Moisture-retentive: but without waterlogging.
Drainage is essential! Place a layer of expanded clay, small gravel, or broken brick at the bottom of each container. This will prevent root rot.
Step 4: Planting
Now for the most enjoyable part – planting! Start from the top, gradually filling the tiers. If your structure will stand vertically, fill the lower tiers first, then move upwards.
- Placement: consider the lighting of each tier. More light-loving plants at the top, shade-tolerant ones at the bottom.
- Planting density: do not plant too densely, give them space to grow.
- Watering after planting: water all plants thoroughly so the soil settles and the roots get moisture.
Life hack: To make planting in narrow containers easier, use a root ball without excess soil or special tools.
Step 5: Installation and First Use
Carefully place your vertical flowerbed in the chosen location. If the structure is large and heavy, it’s best to do this with two people. Make sure it is securely fastened and does not wobble.
After installation, check the composition again. If necessary, add a little soil or adjust the plants. Now your vertical garden is ready to delight you!
Believe my experience, the process of creating such beauty with your own hands brings immense pleasure. It’s not just work; it’s creativity that transforms both you and your garden.
Choosing Plants for a Vertical Garden: The Best Flowers, Greens, and Berries
The most important thing in a vertical garden is, of course, its inhabitants. The appearance and longevity of your composition depend on the correct choice of plants. I recommend paying attention to a few key aspects: root system size, light and moisture requirements, and decorative qualities.
Flowering Plants
For creating bright and lush compositions, the following are ideal:
- Petunias: trailing varieties are simply magnificent! They bloom profusely all summer and create the effect of cascading waterfalls.
- Lobelia: small flowers gathered in clusters create airy clouds. Looks great in lower tiers.
- Pansies (Viola): early blooming and a variety of colors. They tolerate cool weather well.
- Begonias: both tuberous and ever-blooming. They create bright color spots.
- Fuchsias: especially trailing varieties, with their elegant bell-shaped flowers. They like partial shade.
- Calibrachoa: similar to petunias but with smaller flowers. Very abundant blooming.
- Verbena: trailing varieties create lush cascades.
- Sweet peas: for those who love fragrant flowers and climbing forms.
Herbs and Greens
A vertical garden can be not only beautiful but also useful! Growing greens and herbs is a pleasure:
- Mint: spreads quickly, has a pleasant aroma.
- Lemon balm: similar to mint but with a more delicate lemon scent.
- Basil: loves sun and warmth. A variety of cultivars with different leaf colors.
- Parsley: curly or flat-leaf – always useful in the kitchen.
- Dill: fragrant and healthy.
- Sage: ornamental varieties with beautiful leaves.
- Thyme: low-growing varieties with small leaves.
- Rosemary: loves sun and well-drained soil.
- Lettuces: leafy varieties like lettuce or arugula grow quickly and don’t require much space.
Tip: When growing herbs, consider their lighting requirements. Some (like basil) love sun, while others (mint, lemon balm) prefer partial shade.
Berries and Mini-Vegetables
Yes, that’s possible too! You can get a decent harvest from some types:
- Strawberries (garden strawberries): trailing varieties that hang down look very impressive and yield fruit.
- Cherry tomatoes (determinate varieties): low-growing, compact varieties can be tried in large containers.
- Dwarf peppers: ornamental varieties with small fruits.
Important: Berries and vegetables will require deeper containers and regular feeding.
Ornamental Foliage Plants
They help create volume and texture, even when flowers aren’t blooming:
- Hostas: shade-tolerant, with beautiful patterned leaves. Choose compact varieties.
- Heucheras: a variety of leaf colors – from lime green to burgundy and almost black.
- Succulents: unpretentious, love sun and dry air. Create interesting textural compositions.
- Ferns: for shady areas, create lush greenery.
When choosing plants, always read the information on the label: light requirements, adult plant size, care specifics. Combine different species by color, leaf shape, and flowering time to keep your vertical garden looking its best for as long as possible!
Creating an Irrigation System for a Vertical Garden: From Simple to Automatic
Watering is perhaps the most critical aspect of caring for a vertical garden. Due to the limited soil volume and constant air exposure, the soil dries out much faster than in regular flowerbeds. Lack of moisture is detrimental to plants, and excess leads to root rot. Therefore, a well-organized watering system is the key to success.
1. Manual Watering: The Simplest Option
If you have a small vertical structure, manual watering is perfectly fine. You will need:
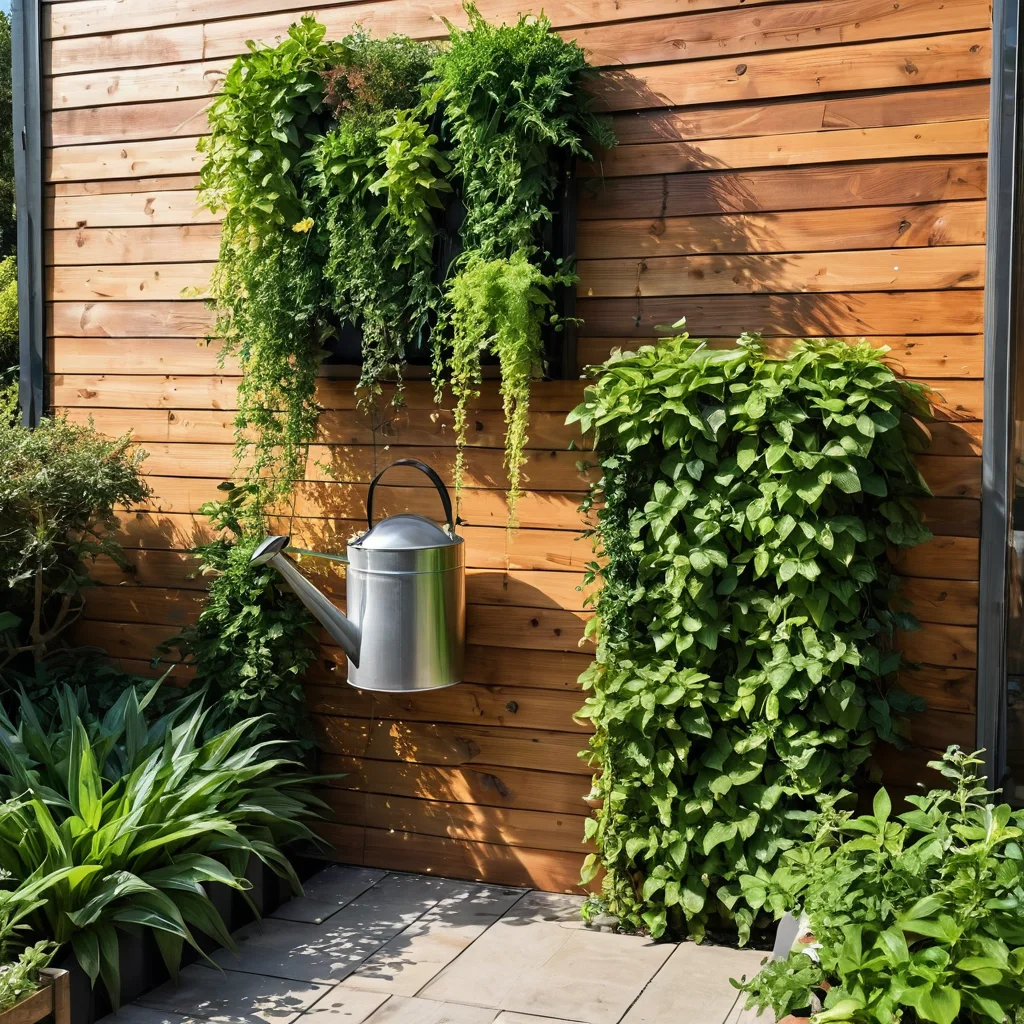
- Watering can with a thin spout: it will allow you to water each plant carefully without washing away the soil.
- Sprayer: for moistening the foliage, which is especially important for some plants in hot weather.
Watering technique:
- Water in the morning or evening: avoid watering in direct sunlight.
- Check soil moisture: use your finger to check how dry the soil is at a depth of 2-3 cm. If it’s dry, water.
- Water thoroughly, but avoid waterlogging: the water should have time to soak in, and excess should drain out through the drainage holes.
- Consider weather conditions: water more frequently in hot weather, less often in cool weather.
Disadvantages: Labor-intensive, especially with a large number of plants. There’s a risk of forgetting to water or, conversely, overwatering.
2. Drip Irrigation: An Effective Solution
Drip irrigation is a system that delivers water directly to plant roots in small doses, but regularly. It is ideal for vertical gardens.
- System components:
- Pump or connection to water supply: for water delivery.
- Hoses: main and distribution (thin tubes with drippers).
- Filter: for cleaning water from impurities.
- Timer (optional): for automating watering.
How it works: Water is delivered under low pressure through hoses to each plant via special drippers located at the base of the stem. Thus, moisture goes exactly where it’s needed, with minimal evaporation.
Advantages: water saving (up to 50%), uniform moisture, reduced risk of fungal diseases (leaves remain dry), possibility of automation.
Tip: For vertical structures, it’s convenient to use special hoses with built-in drippers.
3. Automatic Irrigation Systems
This is the most advanced option, which takes almost all the watering worries off your shoulders. The system includes:
- Controller (timer): programs the time and duration of watering.
- Sensors: soil moisture, rain (disable watering when necessary).
- Pump, valves, hoses, drippers: as in a drip irrigation system.
Advantages: Full automation, ideal watering regime for each plant, saving time and effort. You can go on vacation with peace of mind, knowing your garden is receiving the necessary moisture.
4. DIY Systems
Some dacha owners come up with original solutions:
- Plastic bottles: cut and inserted into the ground neck down, they slowly release water.
- Systems with a reservoir: for example, a large container of water placed above the garden level, from which water flows by gravity to the plants through thin tubes.
Important: When creating any irrigation system, ensure it is suitable for the specific structure of your vertical garden and provides adequate drainage to avoid waterlogging.
I recommend starting with simple drip irrigation – it’s the golden mean between effort and efficiency. And if possible, automation is a real lifesaver for busy dacha owners.
Caring for a Vertical Garden: How to Extend Plant Life and Maintain Beauty
Creating a vertical garden is only half the battle. For it to delight you with its lushness and beauty for as long as possible, it needs regular and proper care. Don’t be intimidated; it’s not as difficult as it seems, especially if you’ve already set up an irrigation system. I would highlight a few key aspects.
1. Regular Inspection
This is the foundation. Daily, or at least every 2-3 days, dedicate a few minutes to your vertical garden:
- Check the condition of the plants: look for wilting leaves, spots, signs of pests or diseases.
- Remove faded flowers and dried leaves: this stimulates further blooming and gives a neat appearance.
- Inspect the structure: ensure everything is securely fastened, check for cracks or damage.
Tip: The sooner you notice a problem, the easier it will be to solve.
2. Fertilization
Since the soil volume is limited, nutrients are quickly depleted. Plants need regular fertilization:
- Types of fertilizers: use complex mineral fertilizers for flowering plants, greens, or berries – depending on what you are growing.
- Form: liquid fertilizers are easiest to dose and apply, especially if you have an irrigation system.
- Frequency: during the active growth and flowering period (spring-summer), fertilize every 10-14 days. In autumn, less often; stop before winter.
- Dosage: strictly follow the instructions on the packaging. It’s better to underfeed than overfeed.
Life hack: You can alternate mineral and organic fertilizers (e.g., biohumus).
3. Pruning and Shaping
Some plants may require pruning:
- Pinching: to stimulate branching in young plants.
- Sanitary pruning: removing damaged or diseased shoots.
- Formative pruning: to maintain the desired shape of the composition, especially if plants start to grow excessively.
4. Pest and Disease Control
Vertical gardens, like any other, can suffer from pests (aphids, spider mites) and diseases (powdery mildew, rot).
- Prevention: proper watering, regular ventilation, removal of plant debris.
- Control measures: use appropriate insecticides and fungicides, but always start with milder, biological preparations. Soapy water, herb infusions (garlic, onion) work well.
Important: Treat plants early in the morning or late in the evening to avoid burns.
5. Winter Preparation
Depending on the climate and plant types, winter protection may be necessary:
- Container plants: perennials that do not overwinter outdoors can be moved to a cool place (basement, greenhouse).
- Structures: some structures (e.g., fabric ones) are best removed for the winter and stored in a dry place. Wooden structures can be additionally treated with protective compounds.
- Heat-loving plants: annuals will need to be removed, and the soil in the containers refreshed.
Regular, but not excessive, care will allow your vertical garden to remain lush, healthy, and beautiful throughout the season. This is an investment of your time that pays off handsomely – with the beauty and joy that living greenery provides.
Common Mistakes When Creating and Caring for a Vertical Garden: How to Avoid Them

Even experienced gardeners sometimes make mistakes, and when creating something new like a vertical garden, they happen quite often. I’ve compiled the most common ones for you so you can avoid unpleasant surprises and get excellent results right away.
1. Incorrect Location Choice
Mistake: Placing a vertical garden in a location that doesn’t meet the plants’ lighting requirements. For example, planting shade-tolerant hostas on a sunny south-facing wall, or light-loving basil in full shade.
How to avoid: Before creating the garden, carefully study the light needs of each plant. Determine which part of your plot is the sunniest and which is the shadiest, and choose plants accordingly.
2. Ignoring Drainage
Mistake: Lack of drainage holes in containers or their blockage. This leads to waterlogging and root rot, especially in limited soil volumes.
How to avoid: Ensure that each compartment or pot in your vertical garden has holes for excess water to drain. Always place a layer of drainage material (expanded clay, gravel) at the bottom.
3. Incorrect Soil Choice
Mistake: Using heavy garden soil that poorly allows air and water to pass through, or, conversely, soil that is too light, dries out quickly, and leaches nutrients.
How to avoid: Use light, loose, nutritious mixtures enriched with peat, perlite, or vermiculite. You can buy ready-made soil for seedlings or flowering plants.
4. Overcrowding
Mistake: Planting as many plants as possible in a limited space, leaving them no room to grow. This leads to plants competing with each other for light, water, and nutrients, becoming weak and unhealthy.
How to avoid: Plan your planting, considering the size of mature plants. Leave enough space between them. It’s better for the garden to look a bit sparse initially than to suffer from overcrowding later.
5. Insufficient or Excessive Watering
Mistake: As we’ve discussed, this is one of the most common problems. Either you forget to water, and the plants wilt, or you overwater, and the roots start to rot.
How to avoid: Use a drip irrigation system or an automatic timer. Regularly check the soil moisture with your finger. Get into a routine for watering, but be prepared to adjust it based on the weather.
6. Neglecting Fertilization
Mistake: Thinking that the soil will last for a long time. In a limited volume, nutrients are quickly depleted, which affects flowering and the overall condition of the plants.
How to avoid: Regularly (every 10-14 days during the growing season) fertilize plants with complex fertilizers, adhering to the dosage.
7. Using Unsuitable Plants
Mistake: Choosing plants with strong root systems that require a lot of space for a vertical garden, or those that cannot tolerate drying out or waterlogging.
How to avoid: Prefer compact, unpretentious plants, trailing varieties, herbs, and succulents.
8. Unreliable Structure Mounting
Mistake: Mounting a heavy structure on a weak support or using flimsy fasteners. This can lead to falls and injuries.
How to avoid: Before installation, ensure that the wall or support can bear the weight of the structure filled with soil and plants. Use reliable fasteners.
Remember that the ideal vertical garden is the result of patience and attention. Don’t be afraid to learn from your mistakes, observe your plants, and they will surely reward you with lush blooms and a healthy appearance!
Vertical Garden as a Landscape Design Element: Examples and Stylish Solutions
A vertical garden is not just a way to arrange plants; it’s a powerful tool in the hands of a landscape designer. It allows you to solve many problems: from zoning space to creating focal points and enlivening the most unattractive corners of the plot. Let’s look at how to stylishly integrate vertical gardens into the overall concept of your dacha landscape.
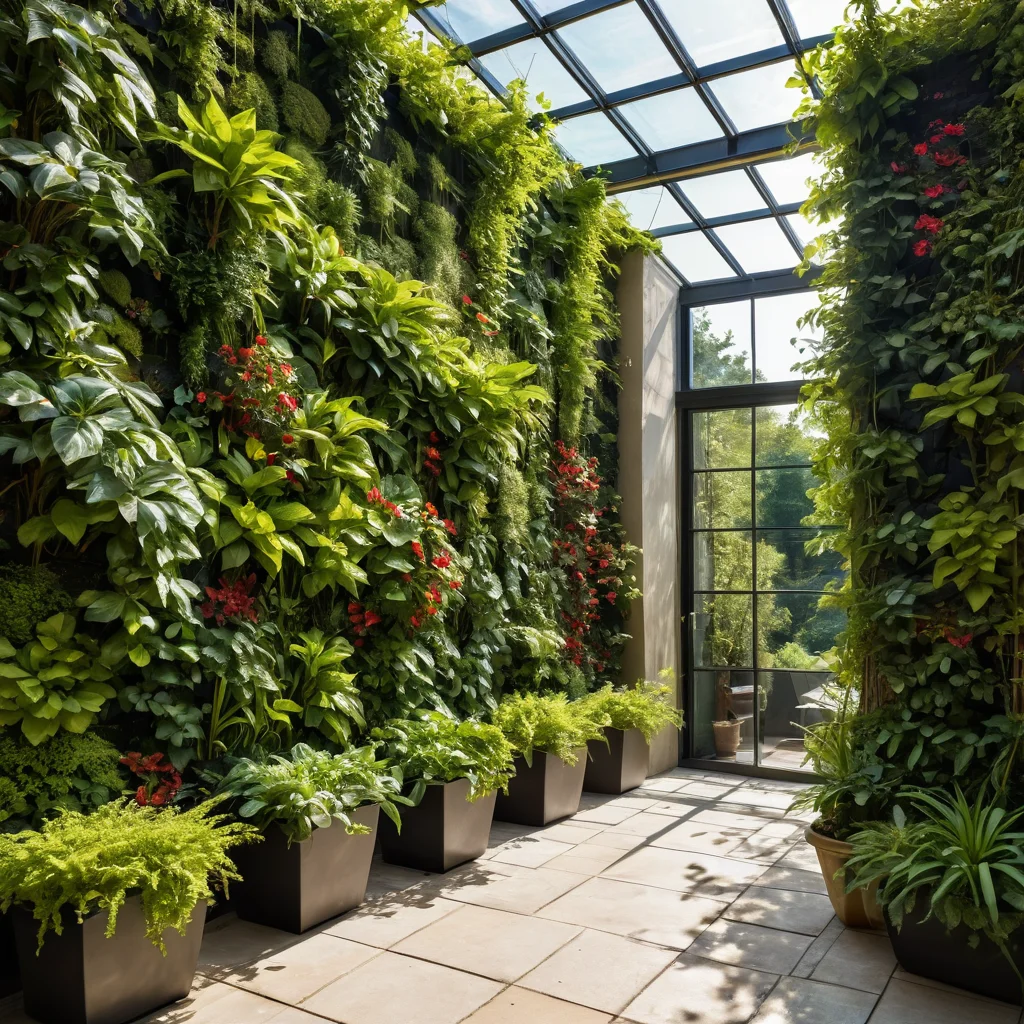
1. Vertical Wall as an Accent
Imagine a blank house wall, fence, or utility building. Instead of painting it or leaving it bare, you can turn it into a living, constantly changing picture.
- Options: Use modular systems, fabric pockets, or trellises with climbing plants.
- Solution: For maximum impact, choose plants with contrasting colors and leaf textures. Climbing roses, clematis, and ornamental vines will create a lush green carpet. Flowering annuals (petunias, lobelia) will add brightness.
- Style: This can be either a modern minimalist style (monochromatic greenery) or a more lush, romantic style (a mix of colors and textures).
2. Vertical Gardening as a Living Hedge or Screen
Small plots often need zoning. Vertical structures can be an excellent alternative to traditional hedges.
- Options: Pergolas, arches, tall trellises, modular systems arranged in a row.
- Solution: Plant fast-growing climbing plants (clematis, climbing roses, sweet peas) along the structure to create a dense green wall. You can use plants of different heights and shapes to give the hedge texture.
- Style: Creates a sense of coziness, privacy, and gives the garden a finished look.
3. Vertical Flowerbeds for Creating Volume
Even on a flat plot, you can create a sense of layering and volume with vertical flowerbeds.
- Options: Pallet structures, multi-tiered planters, pyramid structures.
- Solution: Place vertical flowerbeds near the entrance to a relaxation area, next to a gazebo, or as a standalone element in the center of a lawn. Combine plants by color and height to create a harmonious composition.
- Style: Adds dynamism and interest to the garden.
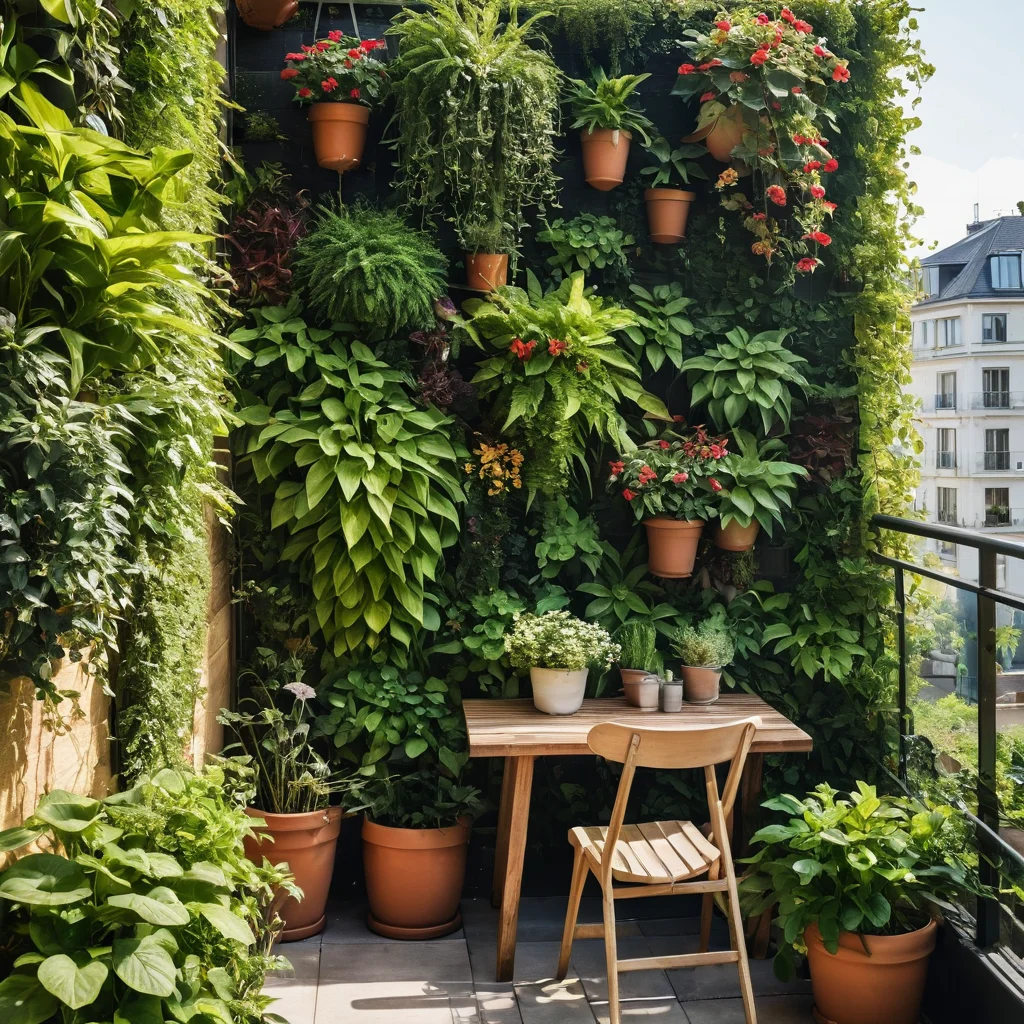
4. Vertical Garden on a Balcony or Terrace
For apartment dwellers or homeowners with small terraces, vertical gardening is a real gift.
- Options: Hanging planters, fabric structures, small modular systems, trellises for climbing plants.
- Solution: Green up railings, walls, create a green “wall” by a window. Use trailing flowers, herbs, and strawberries.
- Style: Transforms even the most modest balcony into a cozy green corner where it’s pleasant to enjoy morning coffee.
5. Using Vertical Gardens for Camouflage
Hiding imperfections: old pipes, unsightly corners, utility buildings.
- Options: Use tall trellises, pergolas, or densely planted plants in containers.
- Solution: Choose plants that grow quickly and effectively mask surfaces.
Stylish Techniques:
- Contrast: Combine green mass with bright flowers or leaves of contrasting colors.
- Rhythm: Repeat elements (e.g., identical planters or groups of plants) to create rhythm.
- Color Palette: Choose plants in a unified color scheme to create a harmonious look.
- Texture: Combine plants with different leaf shapes and textures (large, small, serrated, smooth).
- Lighting: Vertical gardens look especially impressive with lighting in the evening.
A vertical garden is a versatile solution that can be adapted to any style and plot size. The main thing is not to be afraid to experiment and put a piece of your soul into creating this beauty. Then your garden will surely come alive and sparkle with new colors!