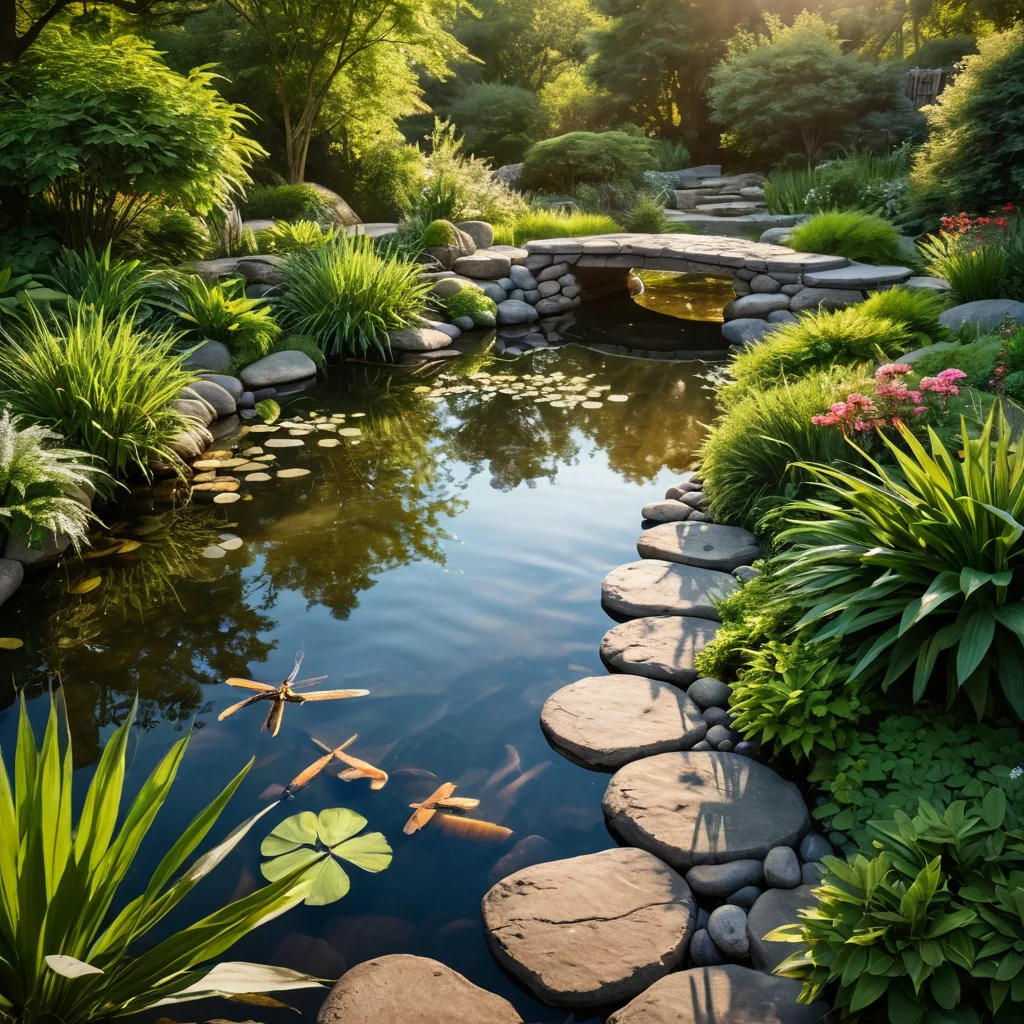
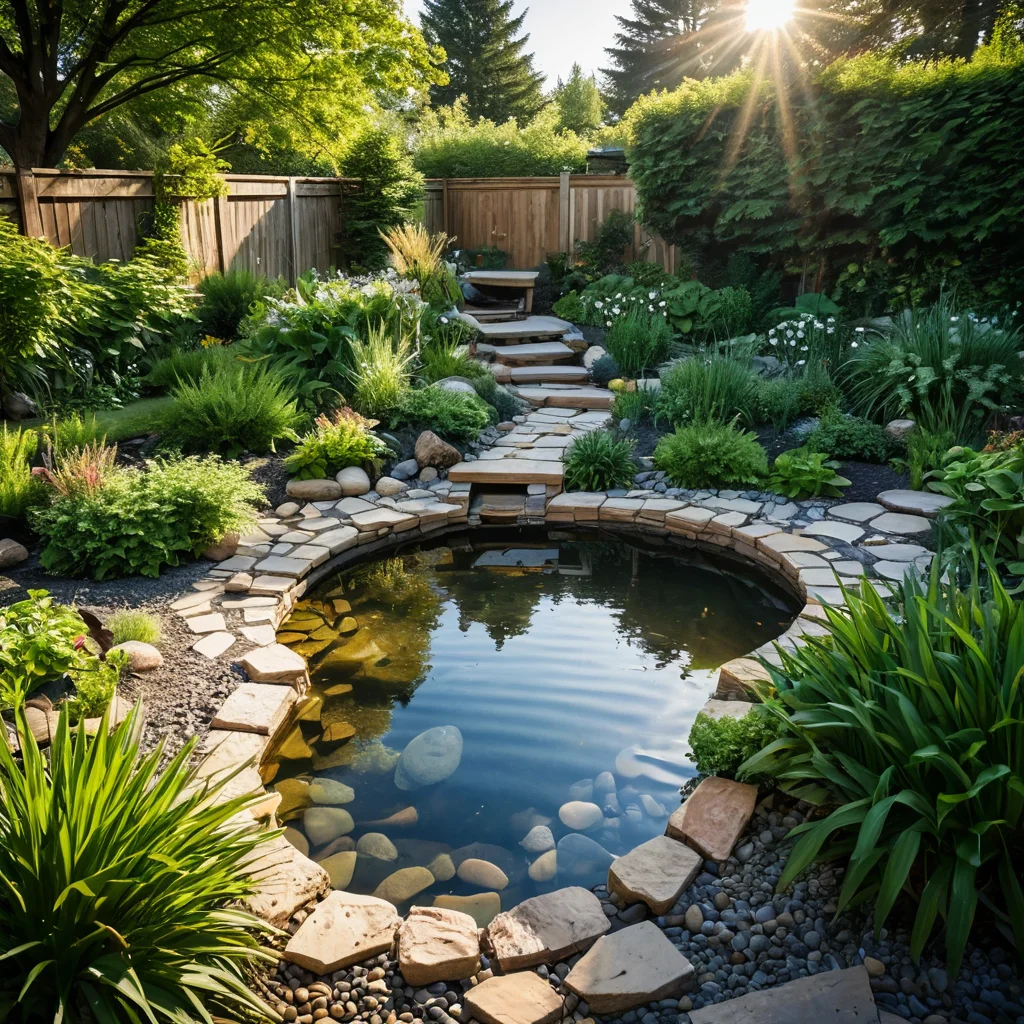
Remember that feeling: the summer heat recedes, and you hear the gentle murmur of water, see the sun’s glare playing on the pond’s surface, and dragonflies flitting around. This is not just a picture; it’s an invitation to create your own oasis of tranquility right at your dacha. A water garden is not just a decorative element; it’s the living heart of your plot, a place where nature unfolds in all its beauty, bringing peace and inspiration. As a long-time admirer of everything related to earth and water, I always say: you can start small, but the result will exceed all your expectations. Let’s embark on this fascinating journey of creating your paradise corner together.
Why You Need a Water Garden: Ideas for Creating a Paradise Corner at Your Dacha
Many people think that a water garden is something grand, requiring huge investments and professional skills. But believe my experience, it’s not like that at all. A water garden is, first and foremost, an idea, and it can be brought to life in various ways, from a simple mini-pond in an old bathtub to an elegant stream winding through flowers. Why do we need it, you ask?
Firstly, it’s an incredible aesthetic pleasure. Water itself has a mesmerizing quality. Its sparkle, movement, reflection of the sky and greenery – all this creates a unique atmosphere. A water garden becomes the main accent, attracting gazes and evoking admiration.
Secondly, it’s a place for rest and relaxation. Imagine: a hot day, you’re sitting on a comfortable bench by the pond, listening to the quiet splash of water, watching the fish, or simply breathing in the fresh, moist air. It’s the best way to relieve stress after a work week and recharge your energy.
Thirdly, it’s a unique ecosystem. Your water garden will become home to many living creatures: frogs, dragonflies, tadpoles, and, if you wish, fish. Observing this little life is incredibly fascinating, especially for children. Moreover, the water body helps maintain air humidity, which is beneficial for the growth of many plants.
Fourthly, it’s an opportunity for creativity. You can decorate the shoreline with stones, snags, plant moisture-loving plants, add decorative elements – in short, create a composition that reflects your own style. The ideas for garden decor related to water are endless!
The ideas for your water garden can be very diverse:
- Mini-pond: The ideal option for small plots or if you’re just starting. It can be made from a ready-made form, an old bathtub, or even a plastic container.
- Medium-sized pond: Allows for more plants, perhaps even fish. Requires a more serious approach to waterproofing.
- Stream: Adds dynamism and naturalness to the plot. It can start at a small height difference or imitate it with a pump.
- Waterfall: Adds picturesque beauty and sound. It can be part of a stream or a standalone element, for example, cascading from a rock.
- Bog or wet zone: Ideal for areas with high groundwater levels. Certain types of plants thrive here.
- Fountain: Adds playfulness and movement, especially on hot days. Requires an electrical connection.
Creating a water garden is not just work; it’s an opportunity to bring a piece of nature’s magic into your life, to make your dacha truly unique and beloved.
Types of Water Bodies for the Garden: From Mini-Pond to Stream
Choosing the type of water body is the first and perhaps the most important step towards creating your water corner. Much depends on this decision: the complexity of the work, the choice of plants, further care, and, of course, the overall appearance of your garden. Let’s analyze the most popular options so you can choose the one that is perfect for you.
1. Mini-pond (bog, basin)
This is the most accessible and easy-to-implement option. A mini-pond is a small container, dug into the ground or even just placed on the surface. It can be:
- From a ready-made form: Plastic or fiberglass bowls of various sizes and shapes are the easiest way. The main thing is to dig a hole the size of the form, install it, level it, and fill the surrounding area with soil.
- From an old bathtub or basin: A great option for budget decor. An old cast-iron bathtub can be buried, masking the edges with stones or plants.
- From a watering can or a large bucket: Suitable for very small gardens or as a temporary solution.
Advantages: Ease of installation, low cost, suitable for any plot size, ability to quickly create a water feature.
Disadvantages: Limited number of plants, difficulty in keeping fish (if they even fit), less natural appearance.
2. Stationary pond (with waterproofing)
This is a more serious structure that looks as natural as possible. Such a pond is created by digging a pit and waterproofing it with special materials.
- Materials: PVC film, EPDM membrane (rubber), or concrete are most commonly used. Each material has its pros and cons (we’ll discuss them in more detail later).
- Shape: Can be absolutely any – oval, round, irregular, mimicking the curves of a natural body of water.
- Depth: It’s important to provide different bottom levels – a shallow zone for marginal plants, a main depth for aquatic species, and, if necessary, a wintering pit for fish.
Advantages: Maximum naturalness, ability to create diverse zones for plants, possibility of keeping fish, durability.
Disadvantages: More labor-intensive and costly creation process, requires certain skills.
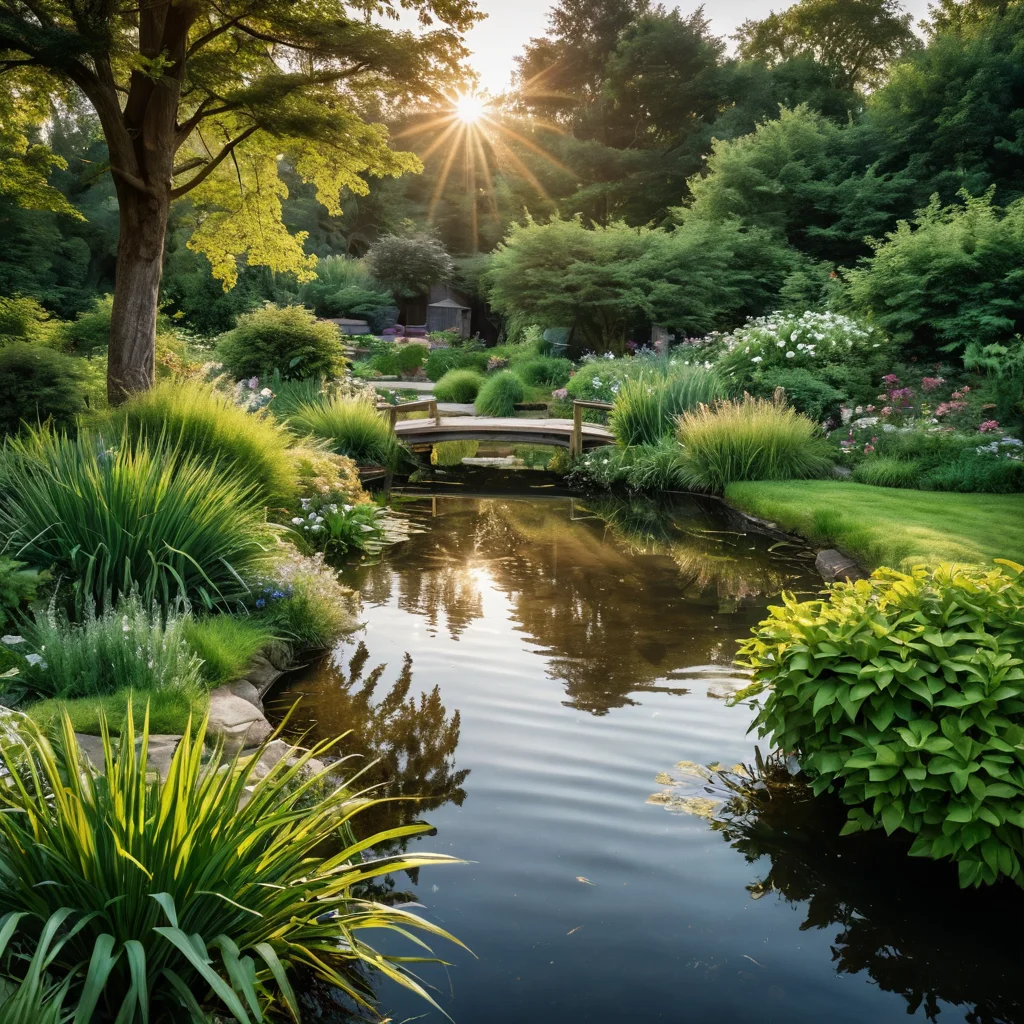
3. Stream
A stream adds liveliness and dynamism to the plot. It can be short and turbulent or long and calm, imitating a mountain stream or a lowland river.
- Creation: A stream is essentially an elongated pond with waterproofing. It’s important to create height differences using stones to make the water murmur. A pump is installed to maintain circulation and prevent water stagnation, which pumps water from the lower reservoir (e.g., a small pond) to the upper one.
- Decoration: The banks of the stream can be decorated with stones of various sizes, gravel, and moisture-loving plants, and bridges can be imitated.
Advantages: Dynamism, sound design, visual enlargement of space, naturalness.
Disadvantages: Requires a pump and electricity, more difficult to create than a stationary pond.
4. Waterfall
A waterfall can be a standalone element or part of a stream or pond. It adds magic and enchantment, and its sound is soothing and mesmerizing.
- Construction: Waterfalls are most often imitated using stones laid in a cascade, and a pump that supplies water to the upper level. It’s important to design the stone arrangement so that water flows over them rather than around them.
- Size: A waterfall can be small and barely noticeable, or impressive, becoming the main decoration of the garden.
Advantages: Sound and visual design, creation of a special atmosphere, ability to hide technical elements (e.g., pump).
Disadvantages: Requires a pump and electricity, can be complex to implement.
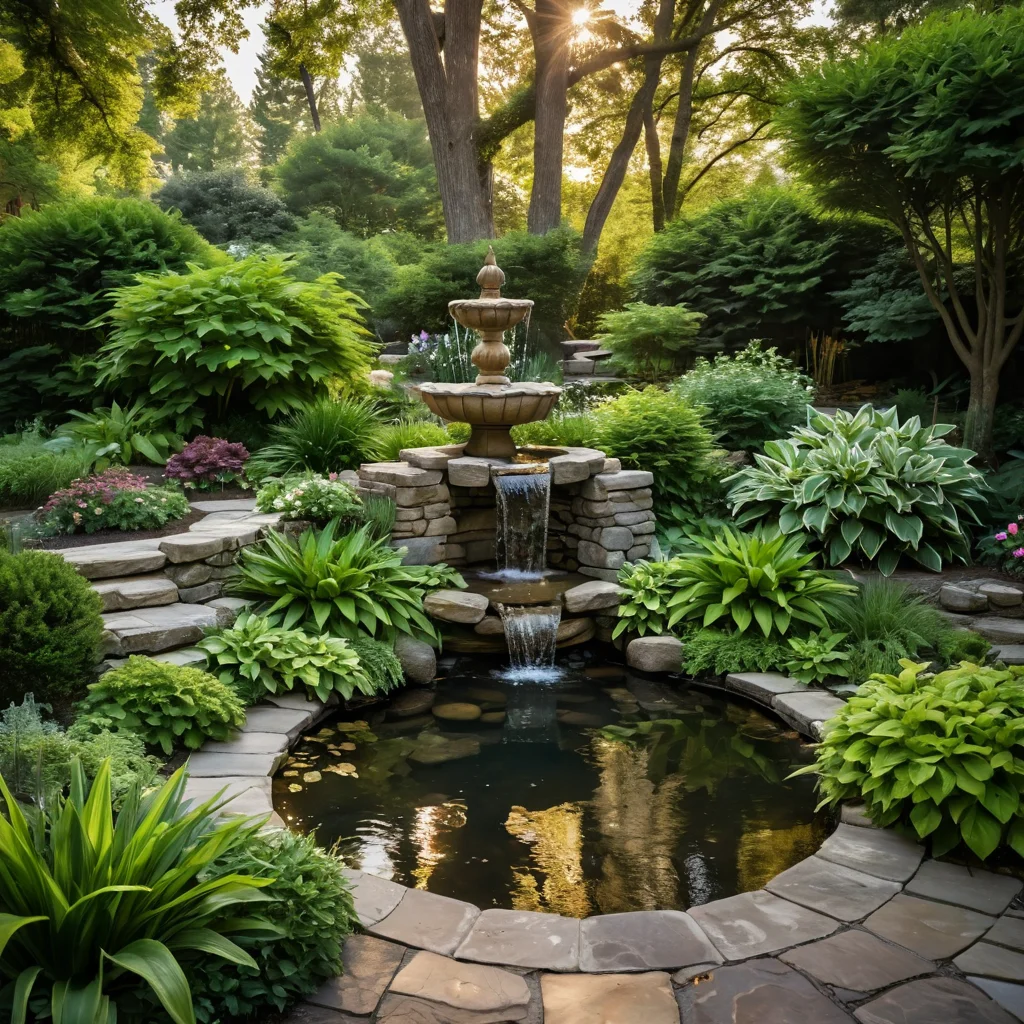
5. Fountain
A fountain is the choice for those who love movement and the play of water. It can be simple or complex, with various jets and lighting.
- Types: Above-ground (in a basin), built into a pond, jet fountains.
- Features: Requires a pump, water filtration, and an electrical connection. Often used to create the effect of a “mysterious” spring.
Advantages: Dynamism, playfulness, ability to create beautiful water features, improved water aeration.
Disadvantages: Requires constant maintenance, electricity, can be noisy.
When choosing the type of water body, be sure to consider the size of your plot, your budget, the time you have for maintenance, and, of course, your personal preferences. Believe me, even the most modest pond can become the highlight of your garden!
Choosing a Location for Your Water Garden: Where to Place the Pond to Make It a Joy
A correctly chosen location is the key to a successful and long-lasting water garden. An unfortunate placement can lead to many problems: from water overheating to excessive overgrowth and maintenance difficulties. How to find the ideal spot for your future pond or stream?
1. Sun and Shade – The Golden Mean
This is perhaps the most important aspect. The ideal location receives 4-6 hours of sunlight per day. Why is this important?
- Lack of sun (more than 70% shade): Leads to poor growth and flowering of many aquatic plants, such as water lilies. The water can be too cold.
- Excessive sun (more than 70% illumination): Leads to water overheating, especially in the summer months. This provokes rapid algae growth (water bloom) and can be detrimental to fish and some plants.
My advice: It’s best if the pond is illuminated by the sun in the first half of the day and is in light shade in the second half. Or vice versa. This will help avoid critical temperature fluctuations.
2. Consider the Terrain
Wherever you plan to place the water body, it should be as level as possible. A slight slope is acceptable, but it must be manageable. Avoid low-lying areas where rainwater and meltwater naturally flow from the plot. This can lead to debris, fertilizers, and dirt entering the pond, causing water quality problems.
Exception: If you plan to create a stream or cascade, a slight height difference will be necessary. But in this case, you need to carefully consider the system for draining excess water so as not to flood neighboring plots.
3. Proximity to Trees and Shrubs
It might seem that shade from trees is good. But in practice, it can be a big problem.
- Falling leaves: In autumn, leaves will actively fall into the water. They rot, polluting the water and causing excess nutrients, which provokes algae growth. Constantly removing leaves from the pond is very labor-intensive work.
- Tree roots: The powerful root system of trees can damage the pond’s waterproofing, especially if it’s made of film.
- Shade: As mentioned, excessive shade can hinder plant development.
Recommendation: Try to place the pond at a distance of at least 3-5 meters from large trees and shrubs. If this is impossible, be sure to use protective nets in the fall and be prepared for more thorough care.
4. Accessibility for Maintenance
Think about how you will care for your water garden. It should have easy access for:
- Cleaning: Removing fallen leaves, debris, faded plants.
- Equipment maintenance: Cleaning filters, pumps, checking the system.
- Winterization: If necessary – catching fish, installing a compressor.
Practical advice: Place the pond so that it’s convenient to approach it with a wheelbarrow, hose, or net. Don’t hide it in a secluded corner that’s hard to reach.
5. Utilities
If you plan to use a pump, filters, lighting, or a waterfall, think in advance about bringing electricity. This should be done by a qualified specialist, observing all safety rules for wet areas. It’s best to plan for this during the design phase.
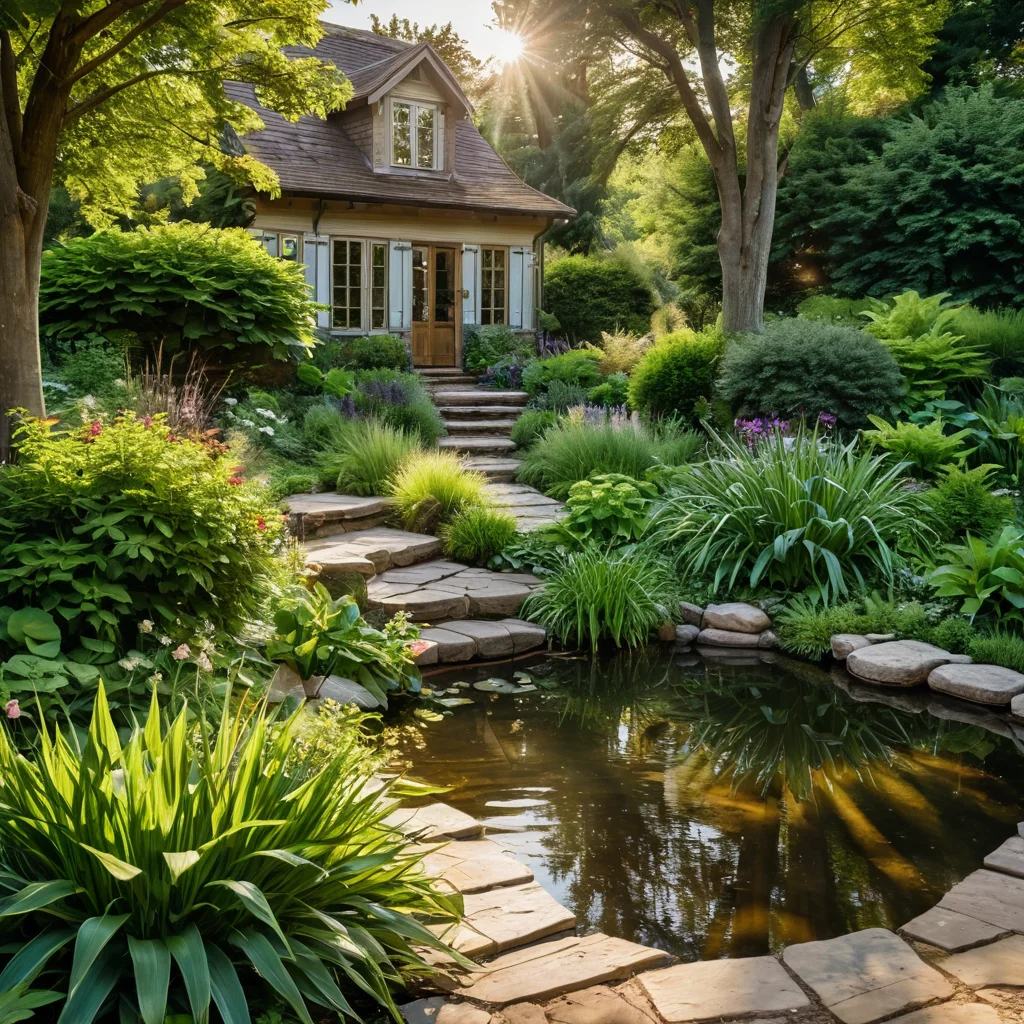
6. Visual Perception
Consider where you will admire your water garden from. Place it so that it is visible from the house, the terrace, or the relaxation area. A pond hidden behind bushes won’t bring you as much joy as one that is in plain sight.
In summary: The ideal location for a water garden is an open or semi-shaded area with a level surface, away from trees, with easy access for maintenance, and, if possible, near an electricity source.
Materials for Creating a Water Garden: What You Need for Construction
Creating a water garden is a kind of construction, and like any construction, the right materials are important. The durability, safety, and appearance of your water body depend on their quality and correct selection. Let’s figure out what you’ll need.
1. Waterproofing – The Foundation of Everything
This is the most critical stage. The quality of waterproofing determines whether your pond will hold water.
- PVC film: The most popular and affordable option. Easy to lay, weldable, available in a wide range of colors (black, brown, green). Thickness is an important indicator. For a mini-pond, 0.5 mm is sufficient; for medium and large ponds, it’s better to choose film with a thickness of 1 mm. Lifespan – about 10-15 years.
- EPDM membrane (rubber): A more expensive but also more durable material. It is characterized by high elasticity, resistance to UV radiation, temperature fluctuations, and mechanical damage. Lifespan – 30-50 years. Installation is more complex and requires special adhesive.
- Fiberglass or plastic form: Ready-made basins for mini-ponds. Easy installation, but limited in shape and size.
- Concrete: The most durable but also the most complex option to work with. Requires professional skills, time for pouring, and waterproofing. Used for stationary, capital ponds.
Don’t forget the underlayment! Geotextile or an old carpet must be laid under the film or membrane. It protects the waterproofing layer from punctures by sharp stones or roots.
2. Soil and Sand
These materials will be needed for:
- Leveling the bottom: Sand is used to create a level base for waterproofing.
- Forming the banks: The soil removed from the pit can be used to create relief on the shoreline.
- Backfilling: Soil is used to cover the edges of the film to mask it.
3. Stones and Gravel
These are decorative but very important elements:
- Large stones: Used for decorating banks, creating waterfalls, streams, and masking the edges of the film. It’s best to choose natural stones that do not alter the water’s pH (granite, slate). Avoid limestone and shell rock.
- Small gravel and pebbles: Used for decorating the bottom in shallow areas and for creating a natural look for the bank.
4. Equipment (for medium and large ponds, streams, waterfalls)
- Pump: Necessary for water circulation, operating fountains, waterfalls, and streams. Choose a pump based on the volume of your water body and the water lift height (for waterfalls).
- Filter: Essential for maintaining water clarity, especially if there will be fish in the pond. There are mechanical filters (remove debris) and biological filters (break down organic matter).
- UV sterilizer: Helps combat water bloom by killing microscopic algae.
- Compressor (for winter): Provides water aeration in cold weather, preventing complete freezing and ensuring oxygen supply.
5. Plants
We’ll discuss this in more detail in a separate section, but it’s worth mentioning right away that plants are the soul of a water garden. You will need:
- Marginal plants: For decorating the shallow areas.
- Deepwater plants: With floating leaves and flowers.
- Floating plants: For creating shade and enriching the water with oxygen.
6. Tools
You may need:
- Shovel (spade and scoop)
- Wheelbarrow
- Level (spirit level)
- Tape measure
- Scissors or knife for cutting film
- String for marking
- Gloves
Important: Do not skimp on the quality of waterproofing and pumping equipment. These are the elements on which the durability and functionality of your water garden depend. When starting work, make a detailed list of necessary materials based on the size and type of your water body. This will help avoid unnecessary expenses and forgotten purchases.
Step-by-Step Guide: How to Make a Mini-Pond with Your Own Hands
Creating a mini-pond is a great way to start exploring the world of water gardens. It’s an engaging process that anyone can do. I started with such a small pond myself, and believe me, it brought me a lot of joy! Follow these steps, and you’ll succeed.
Step 1: Planning and Site Selection
As we’ve discussed, choosing the location is key. Find a level spot that gets 4-6 hours of sunlight a day, and preferably not too close to trees. Decide on the shape and size of your future pond. For a mini-pond, dimensions of 1.5 x 2 meters or a circle with a diameter of 1.5 meters are ideal.
Step 2: Preparing the Pit
- Marking: Use string and stakes to outline the pond’s contours.
- Digging: Start digging. The depth of a mini-pond is usually 40-60 cm. It’s important to create levels:
- Shallow zone (10-15 cm): Along the edges, for planting marginal plants.
- Main depth (40-60 cm): For deeper aquatic plants or simply to create volume.
- Leveling: Carefully level the bottom and sides of the pit. Remove all sharp stones, roots, and glass.
- Compacting: The bottom and sides can be lightly compacted.
Step 3: Laying the Underlayment
Lay a protective material on the bottom and sides of the pit. This can be dense geotextile, an old thick carpet, or several layers of newspaper. The underlayment protects the waterproofing layer from punctures.
Step 4: Laying the Waterproofing
Now for the most critical moment – laying the film or ready-made form.
- If using film: Choose a film of the required size (with an overlap of 30-50 cm on each side). Carefully spread it in the pit, trying to avoid sharp folds. Gradually, as the pond fills with water, the film will straighten under its weight.
- If using a ready-made form: Install it in the pit, level it, and secure it.
Step 5: Securing the Edges
The edges of the film (or the sides of the ready-made form) need to be secured so they don’t slip. You can do this by:
- Backfilling with soil: Fold the film edges onto the bank and cover them with soil and stones.
- Decorating with stones: Lay large stones around the perimeter to hold down the film and serve as decoration.
Step 6: Filling with Water
Start slowly filling the pond with water from a hose. As it fills, the film will straighten, and you can carefully smooth out excess folds.
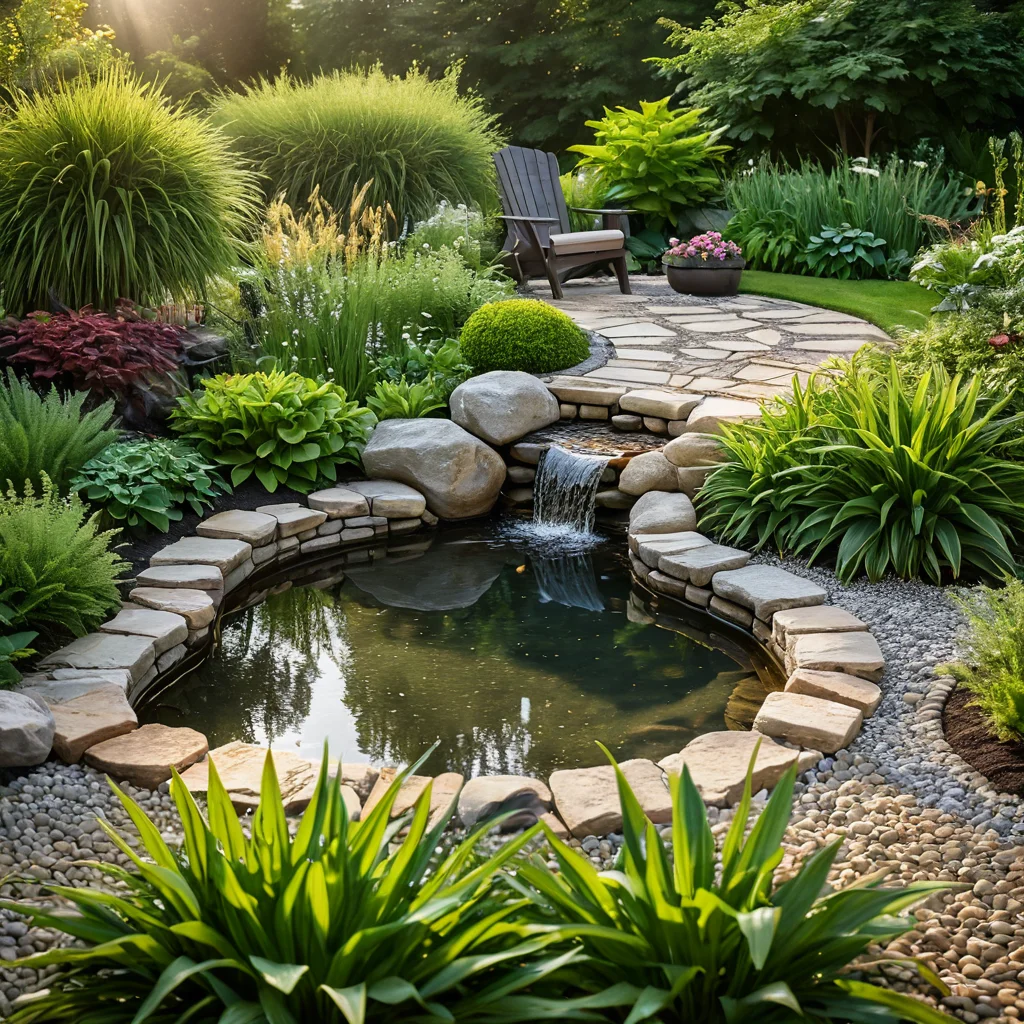
Step 7: Decorating the Banks and Planting
Once the pond is full, you can start decorating:
- Stones: Arrange stones of various sizes along the banks, creating a natural look.
- Gravel: You can add a layer of gravel in the shallow areas.
- Plants: Now you can plant your plants. I usually start with marginal plants, then plant aquatic species.
Approximate plant list for a mini-pond:
- Marginal plants: Sweet flag, marsh marigold, marsh iris, sedge.
- Aquatic plants: Water lily (small varieties), nymphaea.
- Floating plants: Duckweed, frogbit.
Step 8: Introducing Fish (Optional)
If your pond is deep enough (at least 50 cm) and you want to have fish, wait a few days for the water to “mature” a bit. Introduce fish in small schools, without overcrowding the pond. Unpretentious species are suitable for a mini-pond, for example, goldfish (but they require care and good filtration) or small carp.
A few important tips:
- Don’t rush: Each stage requires care.
- Use quality materials: Especially the film.
- Ensure safety: If there are small children on the plot, install a fence or make the pond shallower.
- Be prepared for maintenance: A mini-pond also requires attention – removing debris, weeding.
Creating a mini-pond is a true act of creativity that will bring you much joy and satisfaction. Your little water world will begin to live its own life, delighting you with beauty and tranquility.
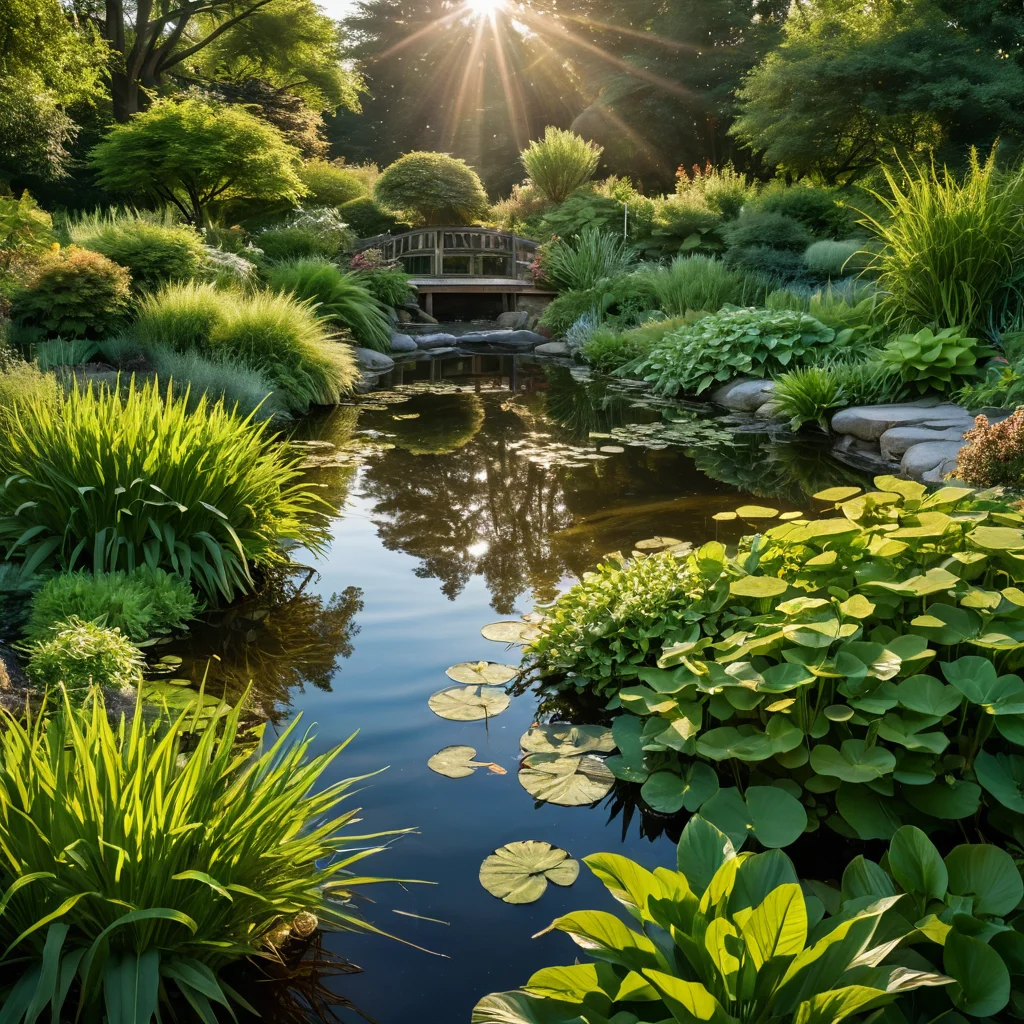
Plants for a Water Garden: Selection and Planting
Plants are the soul of a water garden. They are what give it life, color, fragrance, and create a unique atmosphere. The right selection and proper planting are the key to ensuring your water corner delights the eye from spring to autumn. I love experimenting with plants, and today I’ll share with you the secrets of their selection and planting.
Water Garden Zoning
Before choosing plants, it’s important to understand that a water garden is a whole ecosystem with different conditions for plant life. They are usually divided into several zones:
- Terrestrial zone (bank): Plants that prefer moist soil but cannot tolerate constant flooding.
- Marginal zone (shallow water): Plants whose roots are submerged in water at a depth of 10-30 cm.
- Deepwater plant zone: Plants with floating leaves and flowers, whose roots are at the bottom, and leaves and flowers are on the water surface. The depth here can reach 1-2 meters.
- Floating plants: Plants that float freely on the water surface.
Popular Plants for Each Zone
1. Marginal Zone
These plants love moisture, but their roots should not be constantly in water.
- Marsh Iris (Iris pseudacorus): Bright blue, yellow, or white flowers. Unpretentious, grows well.
- Bog Calla (Calla palustris): Elegant white spathe flowers. Requires moist soil.
- Sweet Flag (Acorus calamus): Decorative, ornate leaves, pleasant aroma. Cleans water well.
- Water Mint (Mentha aquatica): Unpretentious, has a pleasant aroma, spreads well.
- Meadowsweet (Filipendula): Fluffy inflorescences resembling panicles.
- Sedge (Carex): Many species exist with different leaf colors and shapes.
- Ligularia: Large, beautiful leaves and bright flowers.
2. Shallow Water Zone (depth 10-30 cm)
Here, plants are planted whose roots like to be submerged in water.
- Deschampsia (Deschampsia cespitosa): Beautiful, often ornate leaves.
- Caltha (Caltha palustris): Bright yellow flowers.
- Bogbean (Menyanthes trifoliata): Decorative leaves and delicate flowers.
- Water Soldier (Stratiotes aloides): A plant with rosettes of leaves resembling a pineapple.
- Cattail (dwarf varieties): Decorative “ears”.
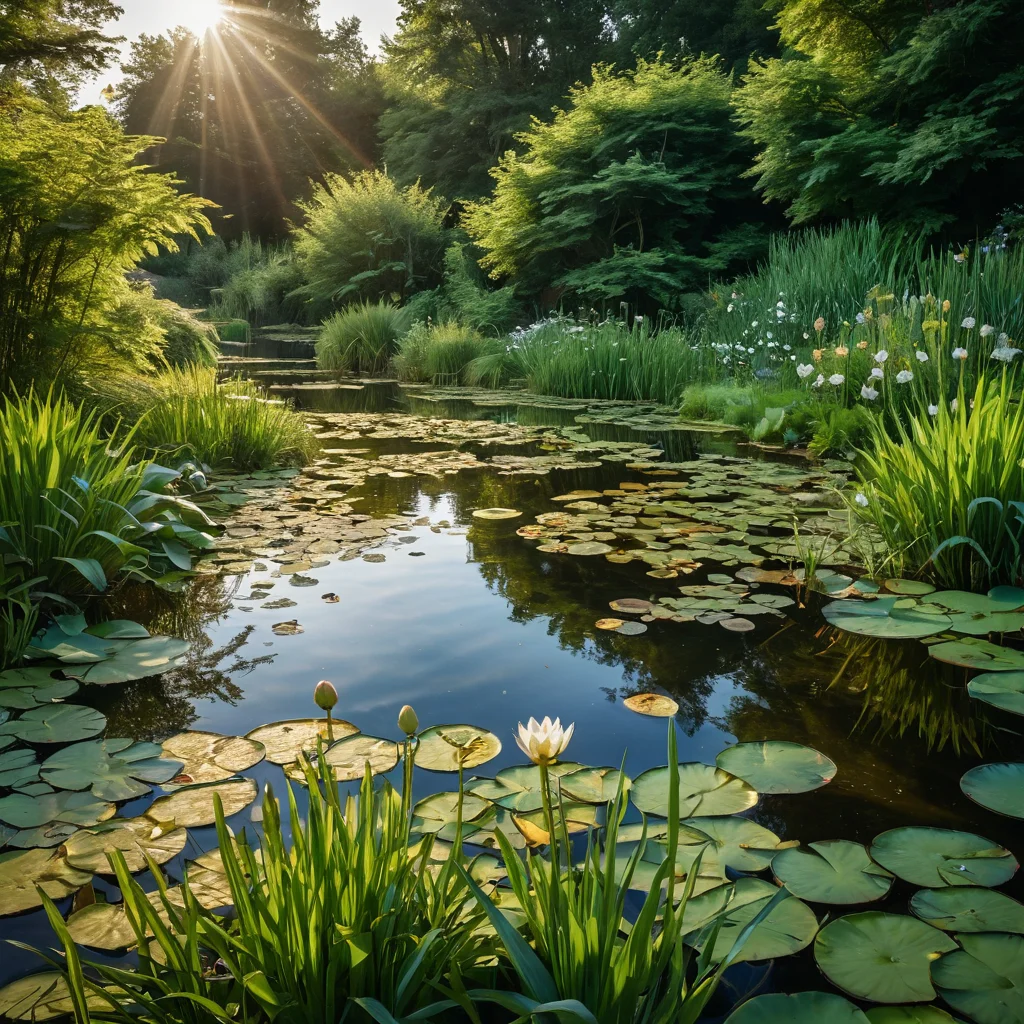
3. Deepwater Plant Zone (depth 1-2 m)
The main stars of this zone are water lilies and nymphaeas.
- Water Lily (Nymphaea): There is a huge variety of cultivars with different sizes, shapes, and colors of flowers – from white and pink to red and even blue. Choose varieties that match the size of your pond.
- Lotus: Majestic flowers, but require deeper planting and a warm climate.
- Water Chestnut (Trapa natans): Decorative leaves, but can be aggressive in growth.
4. Floating Plants
These plants do not require planting in the soil; they simply float on the surface.
- Duckweed (Lemna): Reproduces very quickly, forming a dense green carpet. It shades the water well but can interfere with other plants.
- Frogbit (Hydrocharis morsus-ranae): Beautiful round leaves and small white flowers.
- Water Hyacinth (Eichhornia crassipes): A very beautiful plant with blue flowers and air bladders on its stems. In warm regions, it can overwinter in the pond; in colder regions, it needs to be brought indoors.
- Salvinia: A floating fern that forms beautiful rosettes of leaves.
Planting Features
It is best to plant in special containers for aquatic plants. This makes maintenance easier and prevents excessive spreading.
- Containers: Plastic pots with holes or special fabric bags.
- Soil: Use heavy clay soil or special soil for pond plants. Do not add peat or compost – they pollute the water.
- Planting: The plant is carefully placed in the container, and the roots are covered with soil. A layer of gravel can be added on top to prevent the soil from washing out.
- Placement: Containers with plants are placed at the corresponding levels of the pond. Deepwater plants are placed at the bottom, and marginal plants in the shallow areas.
- Planting time: The best time is spring, when the soil has warmed up and the risk of frost has passed.
Tips from an experienced gardener:
- Start small: Don’t try to plant the entire pond at once. Start with a few species, observe their growth.
- Balance: Try to create a balance between different types of plants. Floating plants will help create shade and prevent water bloom.
- Decorative appeal: Choose plants not only for their flowers but also for the shape of their leaves and bush.
- Wintering: If you have cold winters, think about how your plants will overwinter. Some (like water lilies) require a wintering pit, while others (like water hyacinths) need to be brought indoors.
- Purchasing: Buy plants from specialized nurseries where you can get qualified advice.
Creating a plant world in your water garden is an exciting process. With each new plant, your pond will become more alive and harmonious. Experiment, observe, and enjoy the beauty you’ve created with your own hands!
Water Garden Care: Clean Water and Healthy Plants
Creating a water garden is only half the battle. To ensure it delights you with its beauty and cleanliness for years to come, it needs regular and proper care. Don’t be intimidated; it’s not as difficult as it might seem at first glance. The main thing is to understand the basic principles and perform simple actions on time. I regularly care for my pond myself, and it only brings me pleasure.
1. Maintaining Water Clarity
Clean water is the key to the health of the entire water body.
- Removing debris: Regularly (once a week or as needed), remove fallen leaves, faded flowers, branches, and other debris from the pond. Use a long-handled net for this.
- Combating algae: Green water (algal bloom) is a common problem, especially in hot, sunny weather.
- Natural methods: Increase the number of aquatic plants, especially floating ones (duckweed, frogbit), which shade the water and absorb excess nutrients.
- Mechanical cleaning: Periodically, you can gently remove algae buildup from the walls and decorative elements.
- Biological preparations: There are special products for combating algae that are safe for fish and plants.
- UV sterilizer: If the problem of algal bloom is severe, consider installing a UV sterilizer – it kills microscopic algae without harming other flora and fauna.
- Filtration: If your pond has fish or is large enough, installing a filter is mandatory. Regularly rinse the filter elements according to the manufacturer’s instructions.
- Water changes: Complete water changes in the pond are undesirable as they disrupt the biological balance. Only top up evaporated water. Partial changes (10-20% of the volume) can be done in spring or autumn if the water is heavily polluted.
2. Plant Care
Plants in a water garden also require attention.
- Fertilization: Aquatic plants need nutrients. Use special fertilizers for pond plants in tablet or granule form, which are applied to the soil in containers.
- Pruning: Remove faded flowers and yellowed leaves. This stimulates new blooms and prevents rotting.
- Weeding: Remove weeds that can compete with cultivated plants.
- Repotting: Every 2-3 years, aquatic plants (especially water lilies) should be repotted into fresh soil for better growth and flowering.
- Dividing clumps: Overgrown clumps of marginal plants can be divided and transplanted.
3. Equipment Maintenance
If your water garden is equipped with a pump, filter, or fountain, they also need maintenance.
- Checking: Regularly check the equipment’s functionality and for any blockages.
- Cleaning: Clean filters and pump parts according to the instructions.
- Winterization: Before the onset of frost, pumps and filters must be dismantled, cleaned, and stored indoors to prevent damage.
Seasonal Care
Spring:
- Cleaning the pond of winter debris.
- Dismantling winter protection (if any).
- Installing equipment (pumps, filters).
- Planting or repotting plants.
- First plant fertilization.
Summer:
- Regular removal of debris and algae.
- Plant fertilization.
- Monitoring water level (topping up).
- Equipment maintenance.
Autumn:
- Removing faded plants and leaves.
- Preparing for winter:
- Installing an aerator (compressor) to prevent complete freezing and ensure oxygen supply.
- Removing non-winter-hardy plants.
- Installing leaf nets.
- Dismantling and winterizing equipment.
Winter:
- Maintaining the compressor’s operation.
- Monitoring the ice (if necessary, breaking ice holes).
Practical tips:
- Observe: Your pond is a living organism. Observe it, and you’ll better understand its needs.
- Do not overfeed fish: If you have fish, feed them moderately to avoid excessive water pollution.
- Use natural remedies: Avoid harsh chemicals whenever possible.
- Plan: Have a simple care plan for each week or month.
Caring for a water garden is not a chore but a pleasant ritual that allows you to be closer to nature and enjoy the beauty of your water body. Believe me, the effort is rewarded manifold when you see your little world flourish.
Common Mistakes When Creating a Water Garden and How to Avoid Them
Creating a water garden is a creative and engaging process, but like any endeavor, it has its pitfalls. To ensure your pond brings you joy rather than hassle, it’s important to be aware of common mistakes and try to avoid them. I made some of them myself early in my gardening career, and now I’m ready to share my experience so you can avoid my mistakes.
Mistake 1: Incorrect Site Selection
Problem: The pond is in direct sunlight all day or, conversely, in complete shade. Or too close to trees.
Consequences: Water overheating, rampant algae growth, death of fish and plants (with excessive sun). Poor plant growth, cold water (with excessive shade). Constant falling leaves, water pollution, root damage (when close to trees).
How to avoid: Choose a location that receives 4-6 hours of sunlight per day (preferably in the morning). Stay at least 3-5 meters away from large trees. If there’s no other option, be prepared for autumn leaf cleanup and potential root damage.
Mistake 2: Underestimating the Size
Problem: Creating a pond that is too small or, conversely, too large.
Consequences: A small pond overheats quickly, the water stagnates, and it’s difficult to accommodate enough plants. A large pond requires more materials, time, and effort for maintenance. There can also be problems with maintaining the biological balance.
How to avoid: Realistically assess your capabilities, budget, and plot size. For beginners, a mini-pond or a pond of 3×4 meters is ideal. It’s better to make a slightly smaller pond, but do it well, than a large one and not be able to manage it.
Mistake 3: Skimping on Waterproofing
Problem: Using thin, low-quality film or skipping the underlayment.
Consequences: The film tears quickly, leading to leaks. Water drains away, and the pond loses its function. This necessitates complete dismantling and reinstallation, which is much more expensive than choosing quality materials from the start.
How to avoid: Choose film with a thickness of at least 0.8-1 mm or an EPDM membrane. Always use an underlayment (geotextile, old carpet) to protect the waterproofing.
Mistake 4: Lack of Bottom Levels
Problem: The pond has the same depth across its entire area.
Consequences: It’s difficult to place different types of plants. A shallow zone is necessary for marginal plants, and a deep zone for wintering fish and some deepwater species. Without levels, the pond’s ecosystem is disrupted.
How to avoid: When digging the pit, be sure to create several levels: shallow (10-20 cm), main depth (40-60 cm), and, if necessary, a wintering pit (1-1.5 m).
Mistake 5: Ignoring the Need for Water Circulation
Problem: Lack of a pump and filtration in medium and large ponds with fish or planned waterfalls/fountains.
Consequences: Water stagnates, becomes cloudy, and an unpleasant odor appears. Oxygen starvation for fish. Rapid algae growth.
How to avoid: If the pond has fish or you want to create dynamic water features, be sure to install a pump and filter. Select them based on the volume of your water body.
Mistake 6: Incorrect Plant Selection
Problem: Planting species that are not suited to the water body’s zone, or too many fast-growing species.
Consequences: Plants don’t take root, they die. Fast-growing species (like duckweed) can completely cover the water surface, hindering photosynthesis and oxygen access.
How to avoid: Study the needs of each plant. Use containers for planting. Create a balance between different types of plants. Prevent uncontrolled spread of floating species.
Mistake 7: Overfeeding Fish
Problem: Feeding fish too abundantly.
Consequences: Uneaten food rots, polluting the water and causing algae growth. Overfeeding is also harmful to the fish themselves.
How to avoid: Feed fish small portions 1-2 times a day, only the amount of food they can eat in 5-10 minutes. It’s better to underfeed than overfeed.
Mistake 8: Lack of Winter Preparation
Problem: The pond is not ready for winter.
Consequences: Water freezing, death of fish and plants, damage to equipment.
How to avoid: Before winter, remove non-winter-hardy plants from the pond, install an aerator (compressor) to prevent complete freezing and ensure oxygen supply, and remove and winterize pumps and filters. Special ice preventers can be used.
By avoiding these common mistakes, you can create a beautiful, healthy, and long-lasting water garden that will be a true decoration for your dacha and a source of inspiration for many years to come. Good luck with your gardening endeavors!