Cosmonautics Day is not just a date on the calendar; it’s an occasion to remember the boundlessness of dreams, courage, and great discoveries. And, of course, it’s a wonderful opportunity to transform your home, filling it with the atmosphere of mysterious planets, twinkling stars, and swift rockets. We, the team at magicofdecor.ru, are confident that you don’t need to spend a fortune to create true intergalactic coziness. All you need is inspiration, a bit of cardboard, and a couple of evenings dedicated to creativity. Let’s embark on this exciting DIY journey together!
Cosmonautics Day at Home: Creating an Intergalactic Holiday Atmosphere ✨
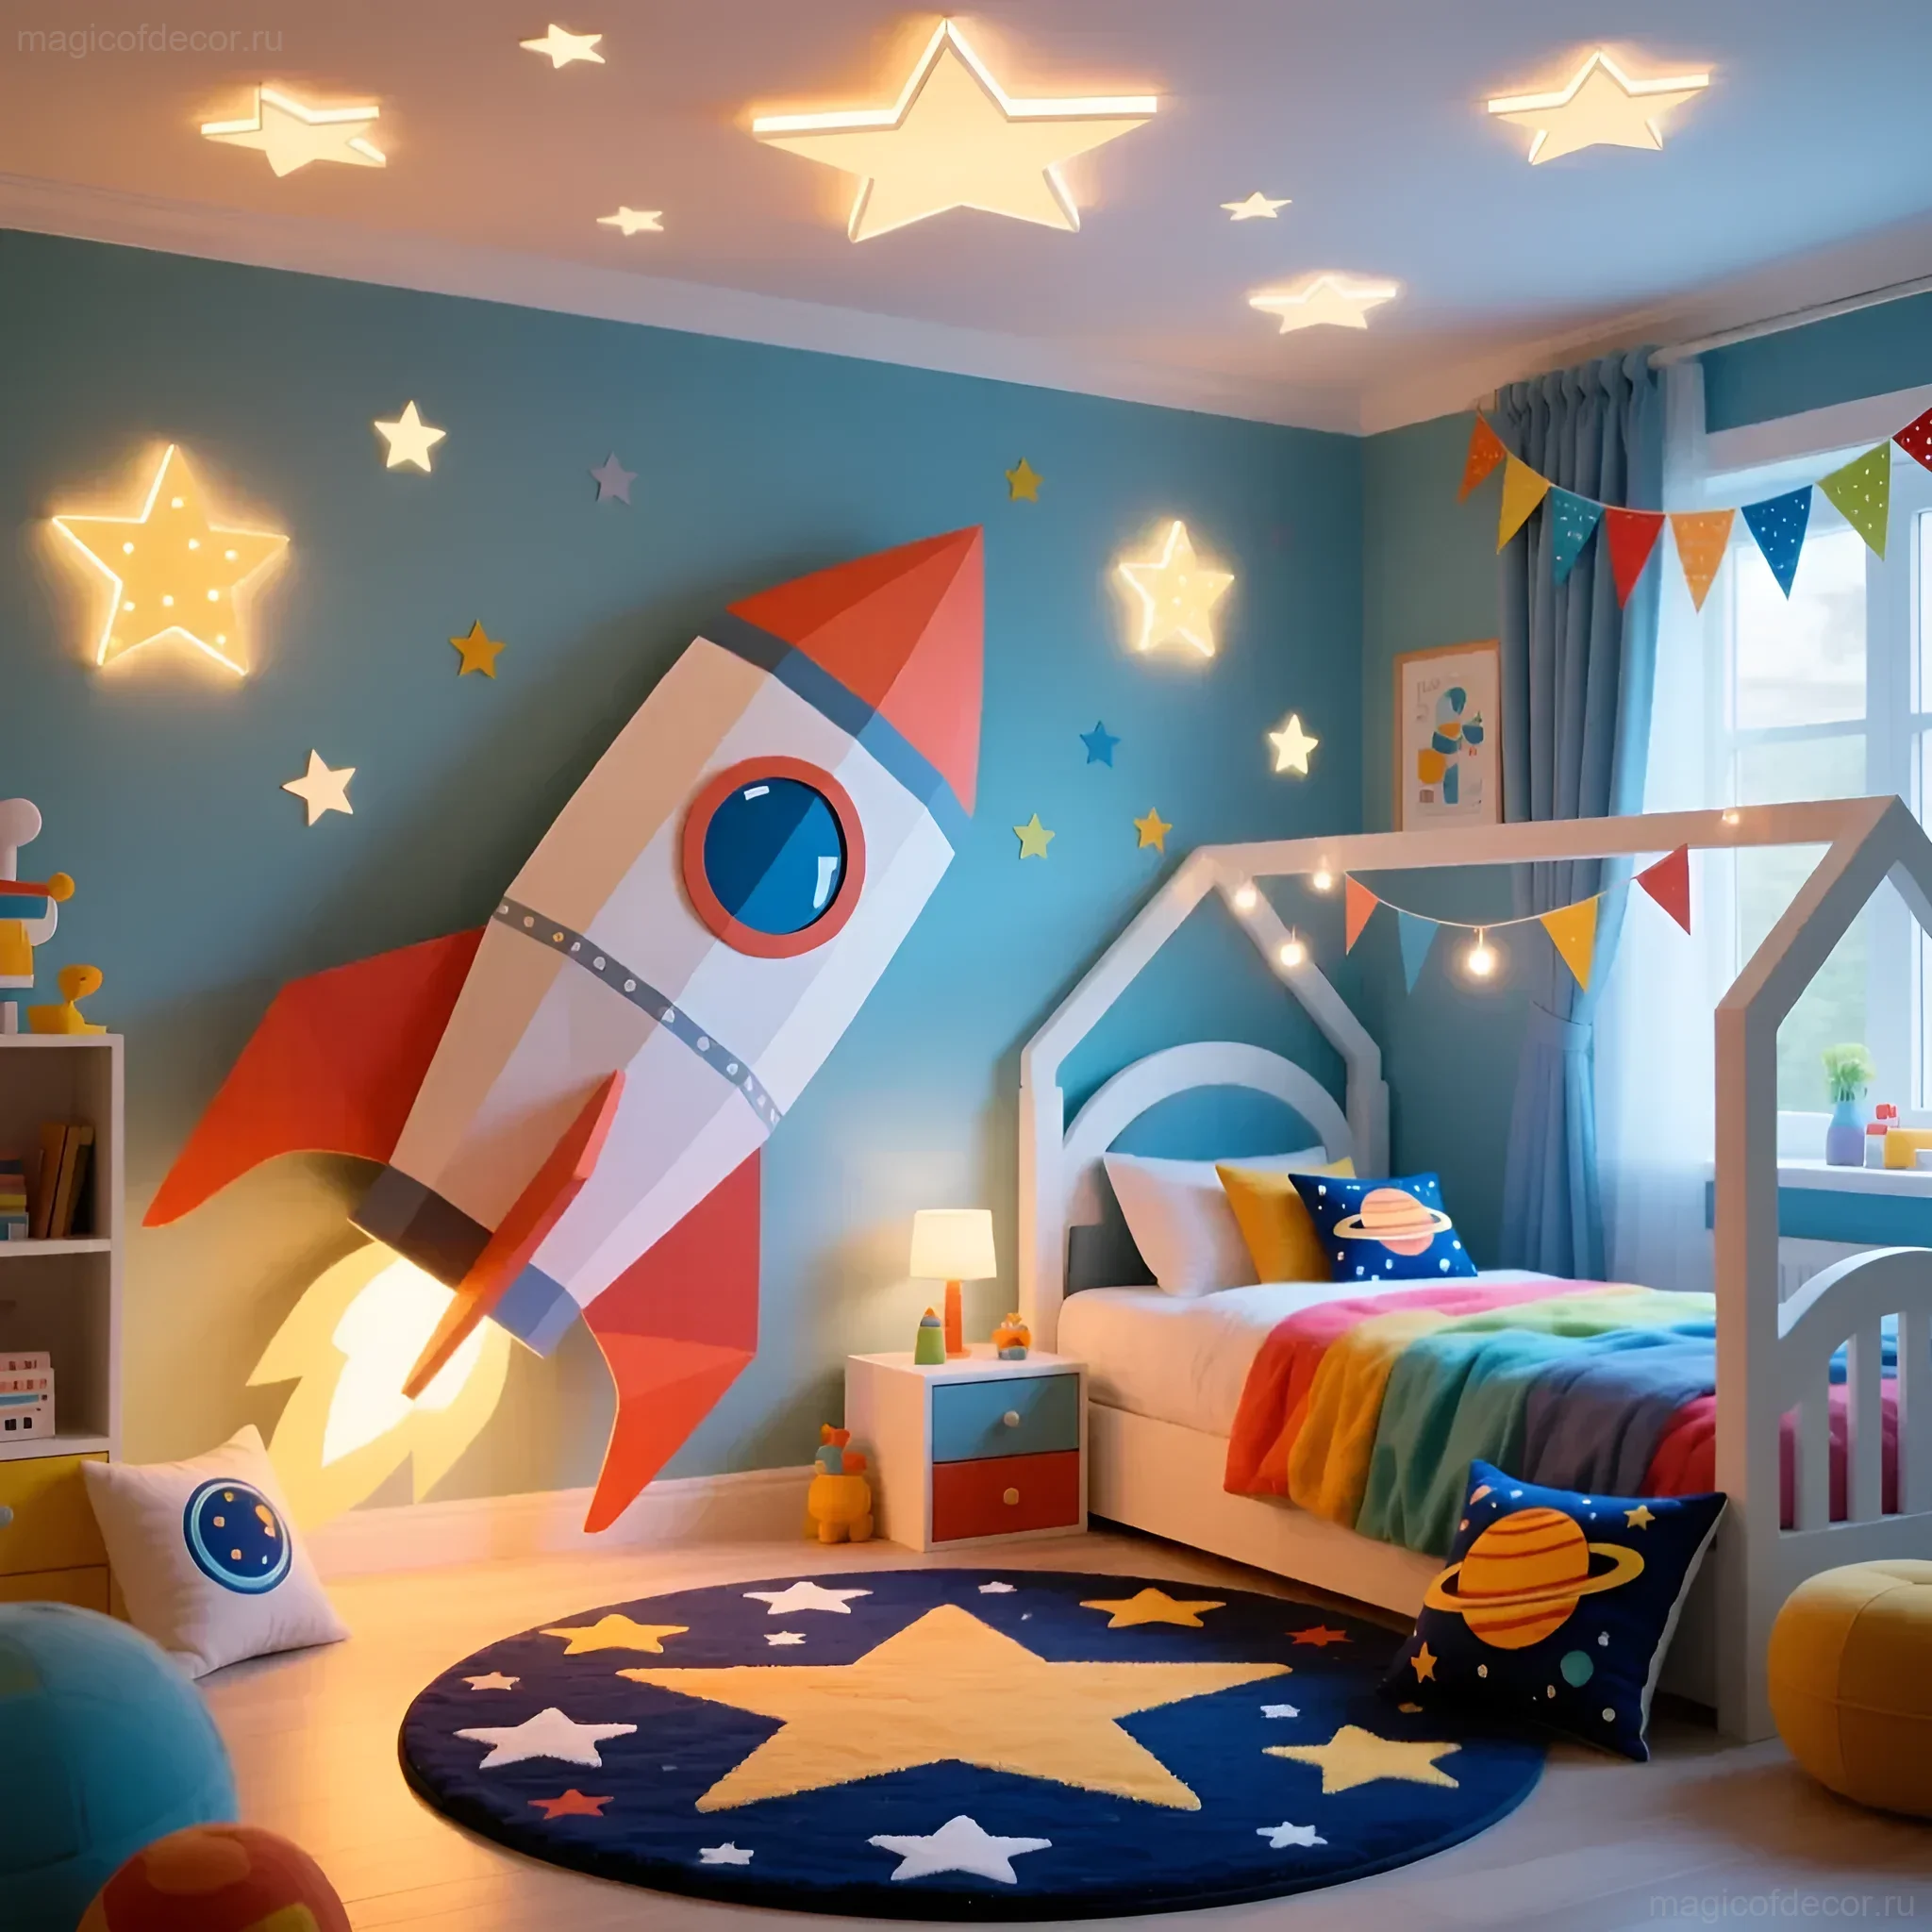
When we talk about cosmic decor, we’re not just talking about figurines, but about creating a feeling of depth and mystery. Your task is to turn an ordinary room into a command center or a spaceship porthole with a view of the Milky Way. And you should start with the foundation – color.
The Universe’s Palette:
- Deep Blue and Indigo: This is the base, the color of the night sky and infinite space. Use it in textiles or as a background for compositions.
- Purple and Magenta: The colors of nebulae and distant galaxies. They will add drama and depth.
- Silver, Gold, and Copper: Metallic accents imitating spaceship hulls, starlight, and dust. Foil is your best friend!
- Neon Flashes: A bit of lime green, orange, or bright pink to imitate alien glow or laser beams.
Remember that cosmic decor should be dynamic. Use different levels: hang something from the ceiling (planets), place something on the walls (stars), and put something on shelves (rockets).
DIY Cosmic Decor: What We’ll Need 🚀
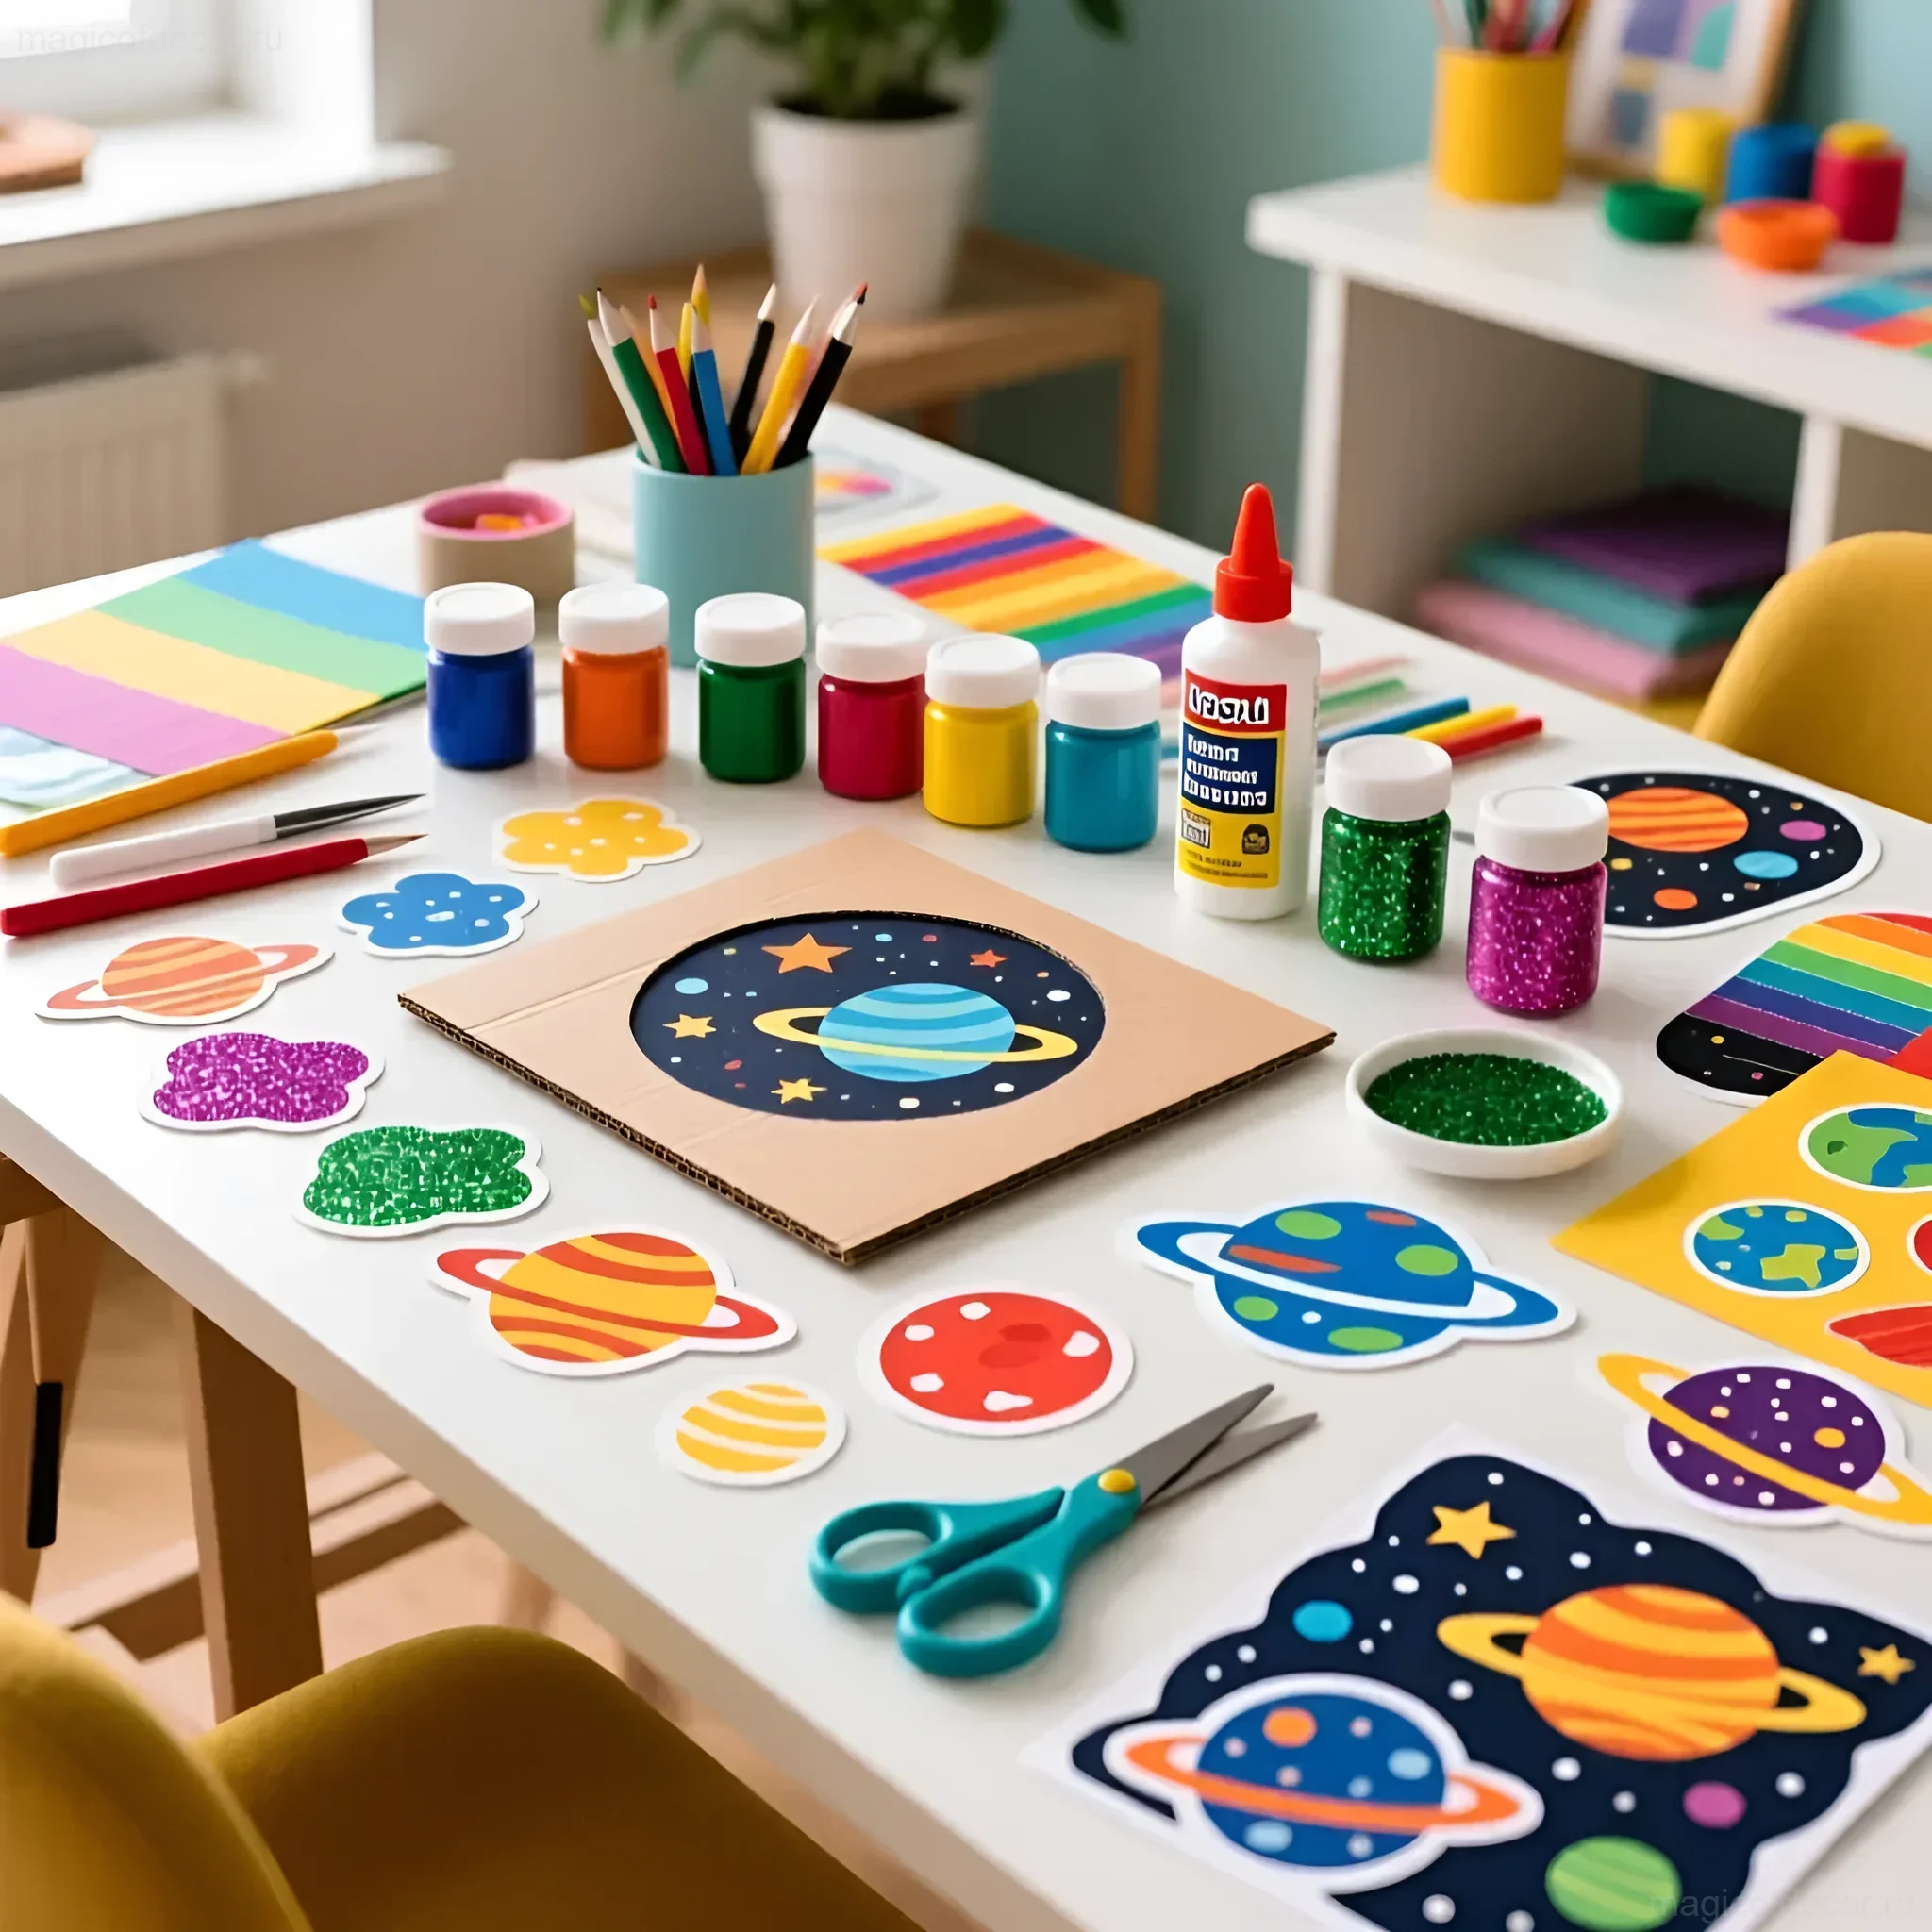
The beauty of this decor lies in its accessibility. You’ll find most of the materials at your nearest craft store or even at home. The main rule: “The more sparkle and texture, the better!”
List of Necessary Materials for Budget Cosmic Transformation:
- Cardboard and Cardboard Tubes: The base for rockets, satellites, and even planetary rings. Save rolls from paper towels and foil.
- Foil and Metallic Paper: Ideal for imitating rocket hulls, creating shiny stars and asteroids.
- Paints: Acrylics (matte and metallic: silver, gold) and fluorescent paints (for glow-in-the-dark effect).
- Styrofoam Balls or Old Christmas Ornaments: The base for planets. If you don’t have these, crumpled newspaper wrapped with tape will work.
- Hot Glue Gun: An indispensable tool for quick and secure fastening of parts.
- Fishing Line or Transparent Thread: For hanging decor to create a weightless effect.
- LED String Lights: “Dewdrop” or “string” lights – they create the effect of twinkling stars.
- Glitter: Lots of glitter! Different sizes and colors.
Decorator’s Tip: Don’t throw away old or unwanted dark-colored clothing. You can cut out star silhouettes from it or apply glow-in-the-dark paint to it, turning it into cosmic pillows or curtains.
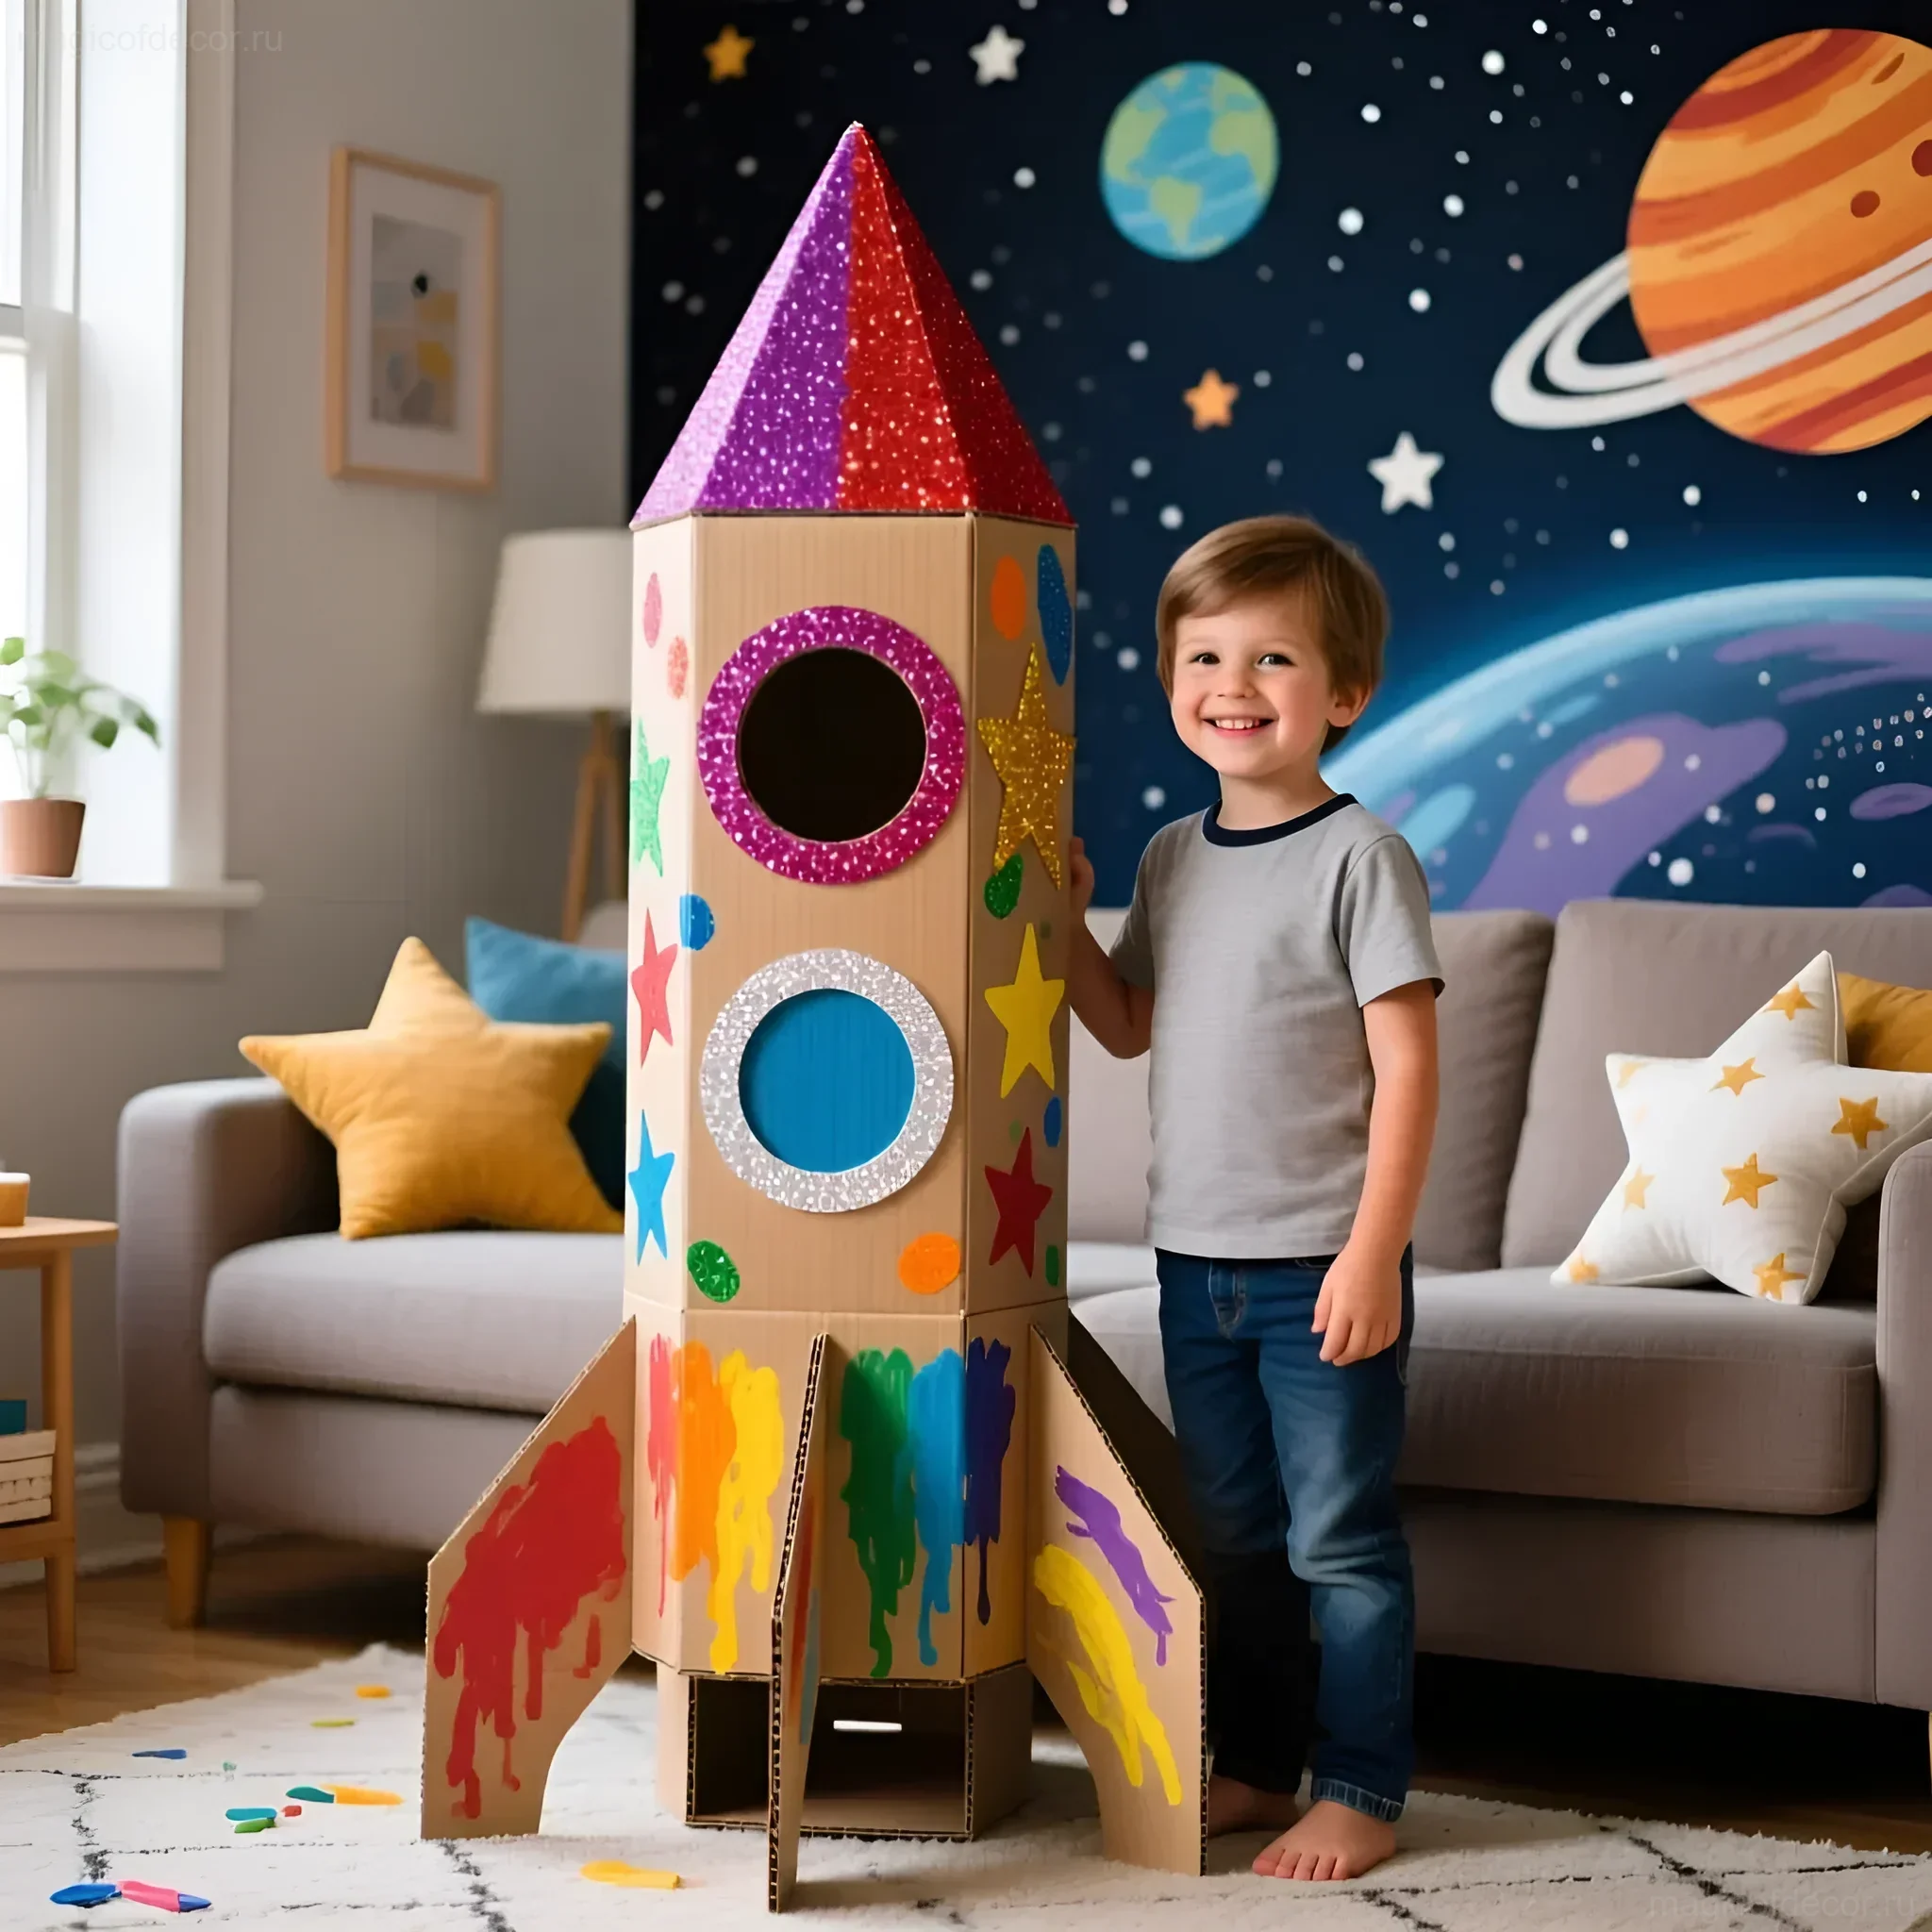
Master Class: Cardboard Rocket – Launching into Space! 🌠
A rocket is the central element of Cosmonautics Day decor. It should be immediately visible, symbolizing aspiration upwards and forwards. We’ll make it from readily available materials, making it as stylish and stable as possible.
Step 1: Creating the Body (Basic Cylinder)
Take a large cardboard tube (e.g., from linoleum rolls or thick cardboard rolled into a cylinder). If you need a large rocket (e.g., for a children’s game), use a box, wrapping it into a cylindrical shape.
Step 2: Nose Cone (Cone)
Draw a semicircle on thick cardboard and roll it into a cone. Secure the edges with a hot glue gun. Attach the cone to the top of the body. Stability Secret: to make the cone look neat, make small cuts along the edge of the cone’s base before gluing; this will allow it to fit more snugly against the cylinder.
Step 3: Stabilizers (Fins)
Draw 3 or 4 symmetrical stabilizers (triangular or trapezoidal shape) on thick cardboard. Cut them out and wrap them in foil. Make slits in the lower part of the rocket body and insert the stabilizers, securing them from the inside with hot glue. This will give the rocket a futuristic look.
Step 4: Detailing and Finishing
- Hull: Wrap the body with silver or gold foil. If you want a more vintage look, paint the rocket with white or red acrylic paint, and then add contrasting stripes.
- Portholes: Cut out circles from black paper or, even better, from transparent plastic. Outline them with a silver marker.
- Inscriptions: Add inscriptions like “Vostok,” “Soyuz,” or “SSSR” (if it’s a retro style) or simply “Launch Pad 1” for a modern look.
Step 5: Flame Effect (DIY Fire)
To create a launch effect, use orange, yellow, and red tissue paper or organza. Cut it into long strips, crumple it, and glue it to the base of the rocket. You can hide a small LED string light inside the tube so the “flame” is beautifully illuminated from below.
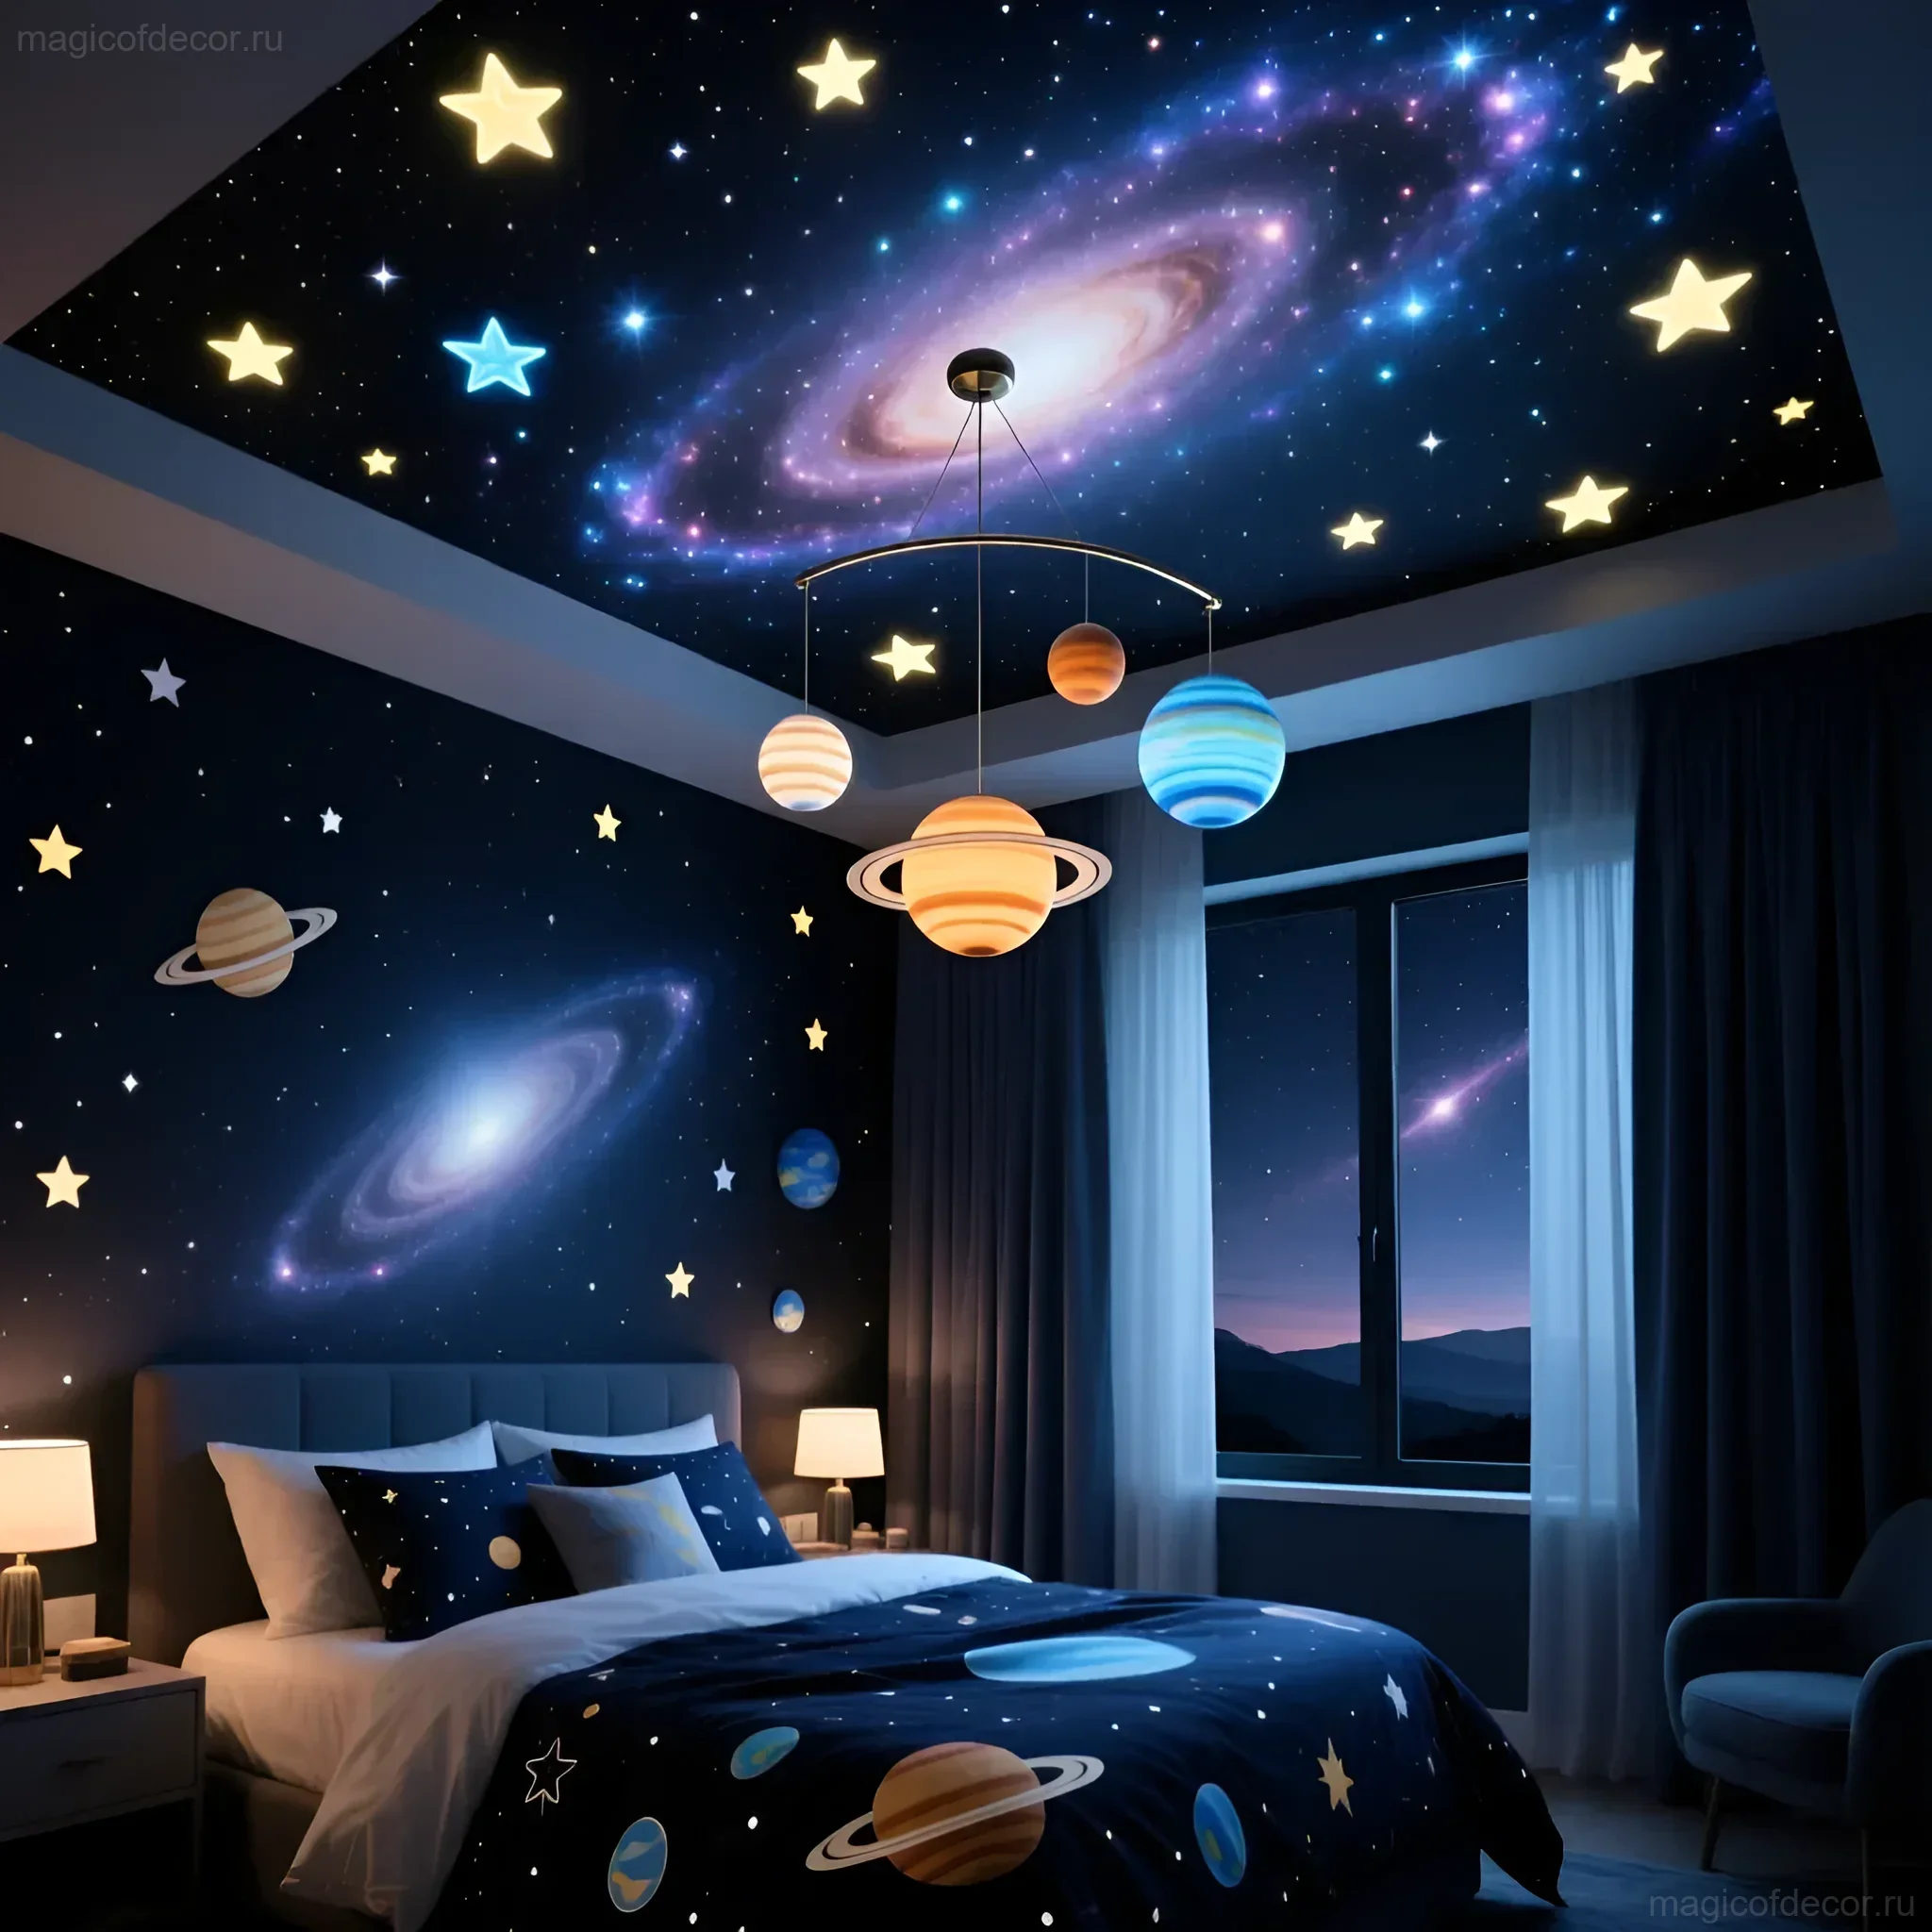
Planets and Stars: Creating a Galaxy in Your Room 🪐
To create a complete galaxy, we need planets to hang at different levels, creating a sense of depth and volume. Forget flat cutouts – we’re creating 3D models!
Planets from Papier-Mâché and Styrofoam
The easiest and most budget-friendly way to create planets is to use styrofoam balls or old Christmas ornaments that you don’t mind sacrificing. If you don’t have these, papier-mâché will come to the rescue:
- Inflate a balloon to the desired size.
- Cover it with pieces of newspaper dipped in PVA glue (at least 3-4 layers). Leave a space to later remove the balloon.
- After drying, deflate the balloon and carefully remove it.
- Paint the planets in corresponding colors: orange for Mars, blue and white for Earth, add rings for Saturn (rings can be cut from thin cardboard and glued around the equator).
- Finishing Touch: Mix paint with a little glitter or brush over the surface with a dry brush and white or silver paint to create the effect of clouds and craters.
Star Garlands and Scatterings
There should be stars everywhere!
- Volumetric 3D Stars: Make stars from thick foil or metallic cardboard. Fold them along the lines to give them volume. Hang them on thin fishing line from curtain rods or chandeliers.
- Glow-in-the-Dark Stars (Phosphor): Buy special phosphor paint (glows in the dark). Draw stars on the ceiling or on thick paper with it, then attach the paper. This will create an amazing effect when you turn off the lights.
- Star Garlands: Cut out many small stars from gold and silver paper, sew them on a machine or glue them onto a long thread. Hang such garlands vertically in doorways or by the window.
Installation: Use suction cups with hooks or special adhesive mounts for hanging planets and stars from the ceiling. Place them randomly to imitate a real galaxy.
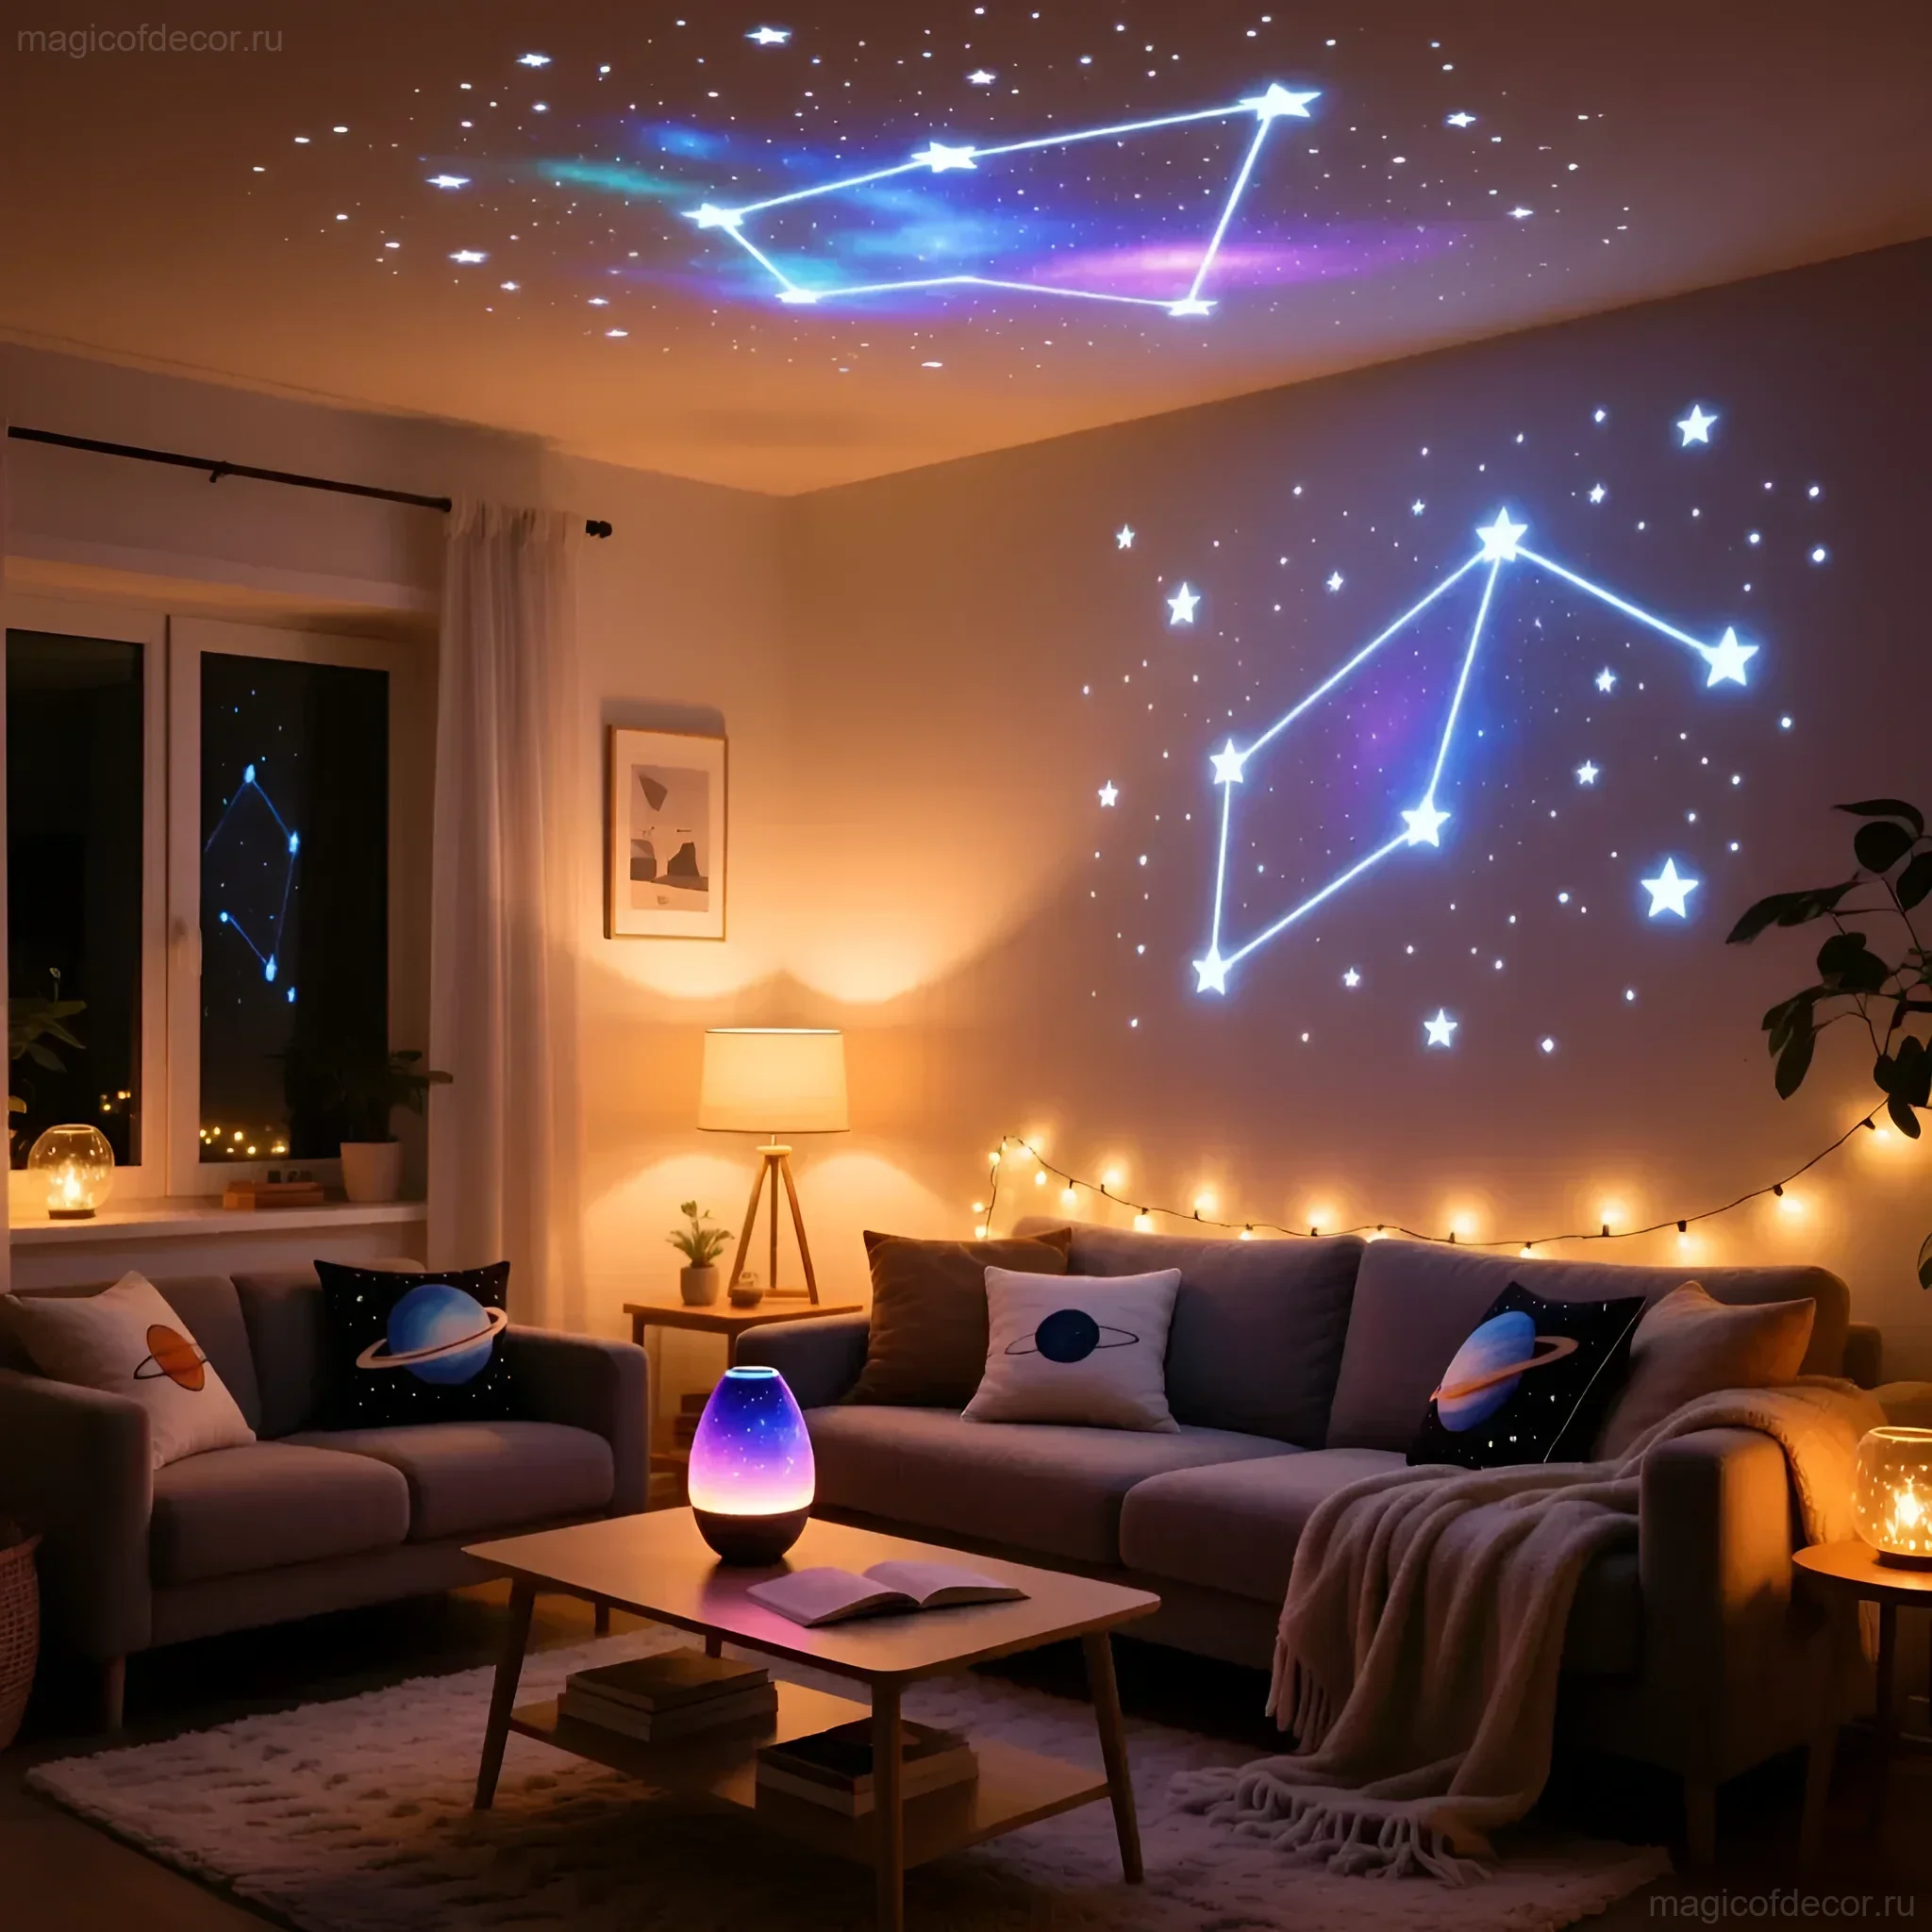
Cosmic Lighting: Creating an Atmosphere of Mystery ✨
Light is 80% of the success in creating a cosmic mood. We need to move away from bright, central lighting and switch to soft, diffused, and spot lighting that imitates distant radiance.
The Magic of LED String Lights
The easiest and most effective way is to use “Dewdrop” or “String” lights. They are battery-powered, easy to hide, and provide a soft, warm or cool flicker.
- Star Curtain: Attach long vertical string lights to a window or wall to create a meteor shower effect.
- Decor Illumination: Wrap the cardboard rocket with string lights to make it look like it’s ready for launch. Place part of the string lights in glass jars.
DIY Constellation Projector
You’ll need an old tin can (e.g., from coffee) and a small battery-powered light (or a small flashlight).
- Thoroughly clean the can.
- Draw constellations on it (e.g., Ursa Major or Cassiopeia).
- Using a nail and hammer (or a thick needle), make holes along the outlines of the constellations.
- Place a flashlight or light bulb inside.
- When you turn on the light, projections of stars will appear on the walls and ceiling. This is an incredibly cozy and budget-friendly solution!
Colored Filters
If you have a floor lamp or a desk lamp, use colored filters (you can use regular blue or purple film) on the lampshade. This will instantly change the lighting color in the room, immersing it in a nebula atmosphere.
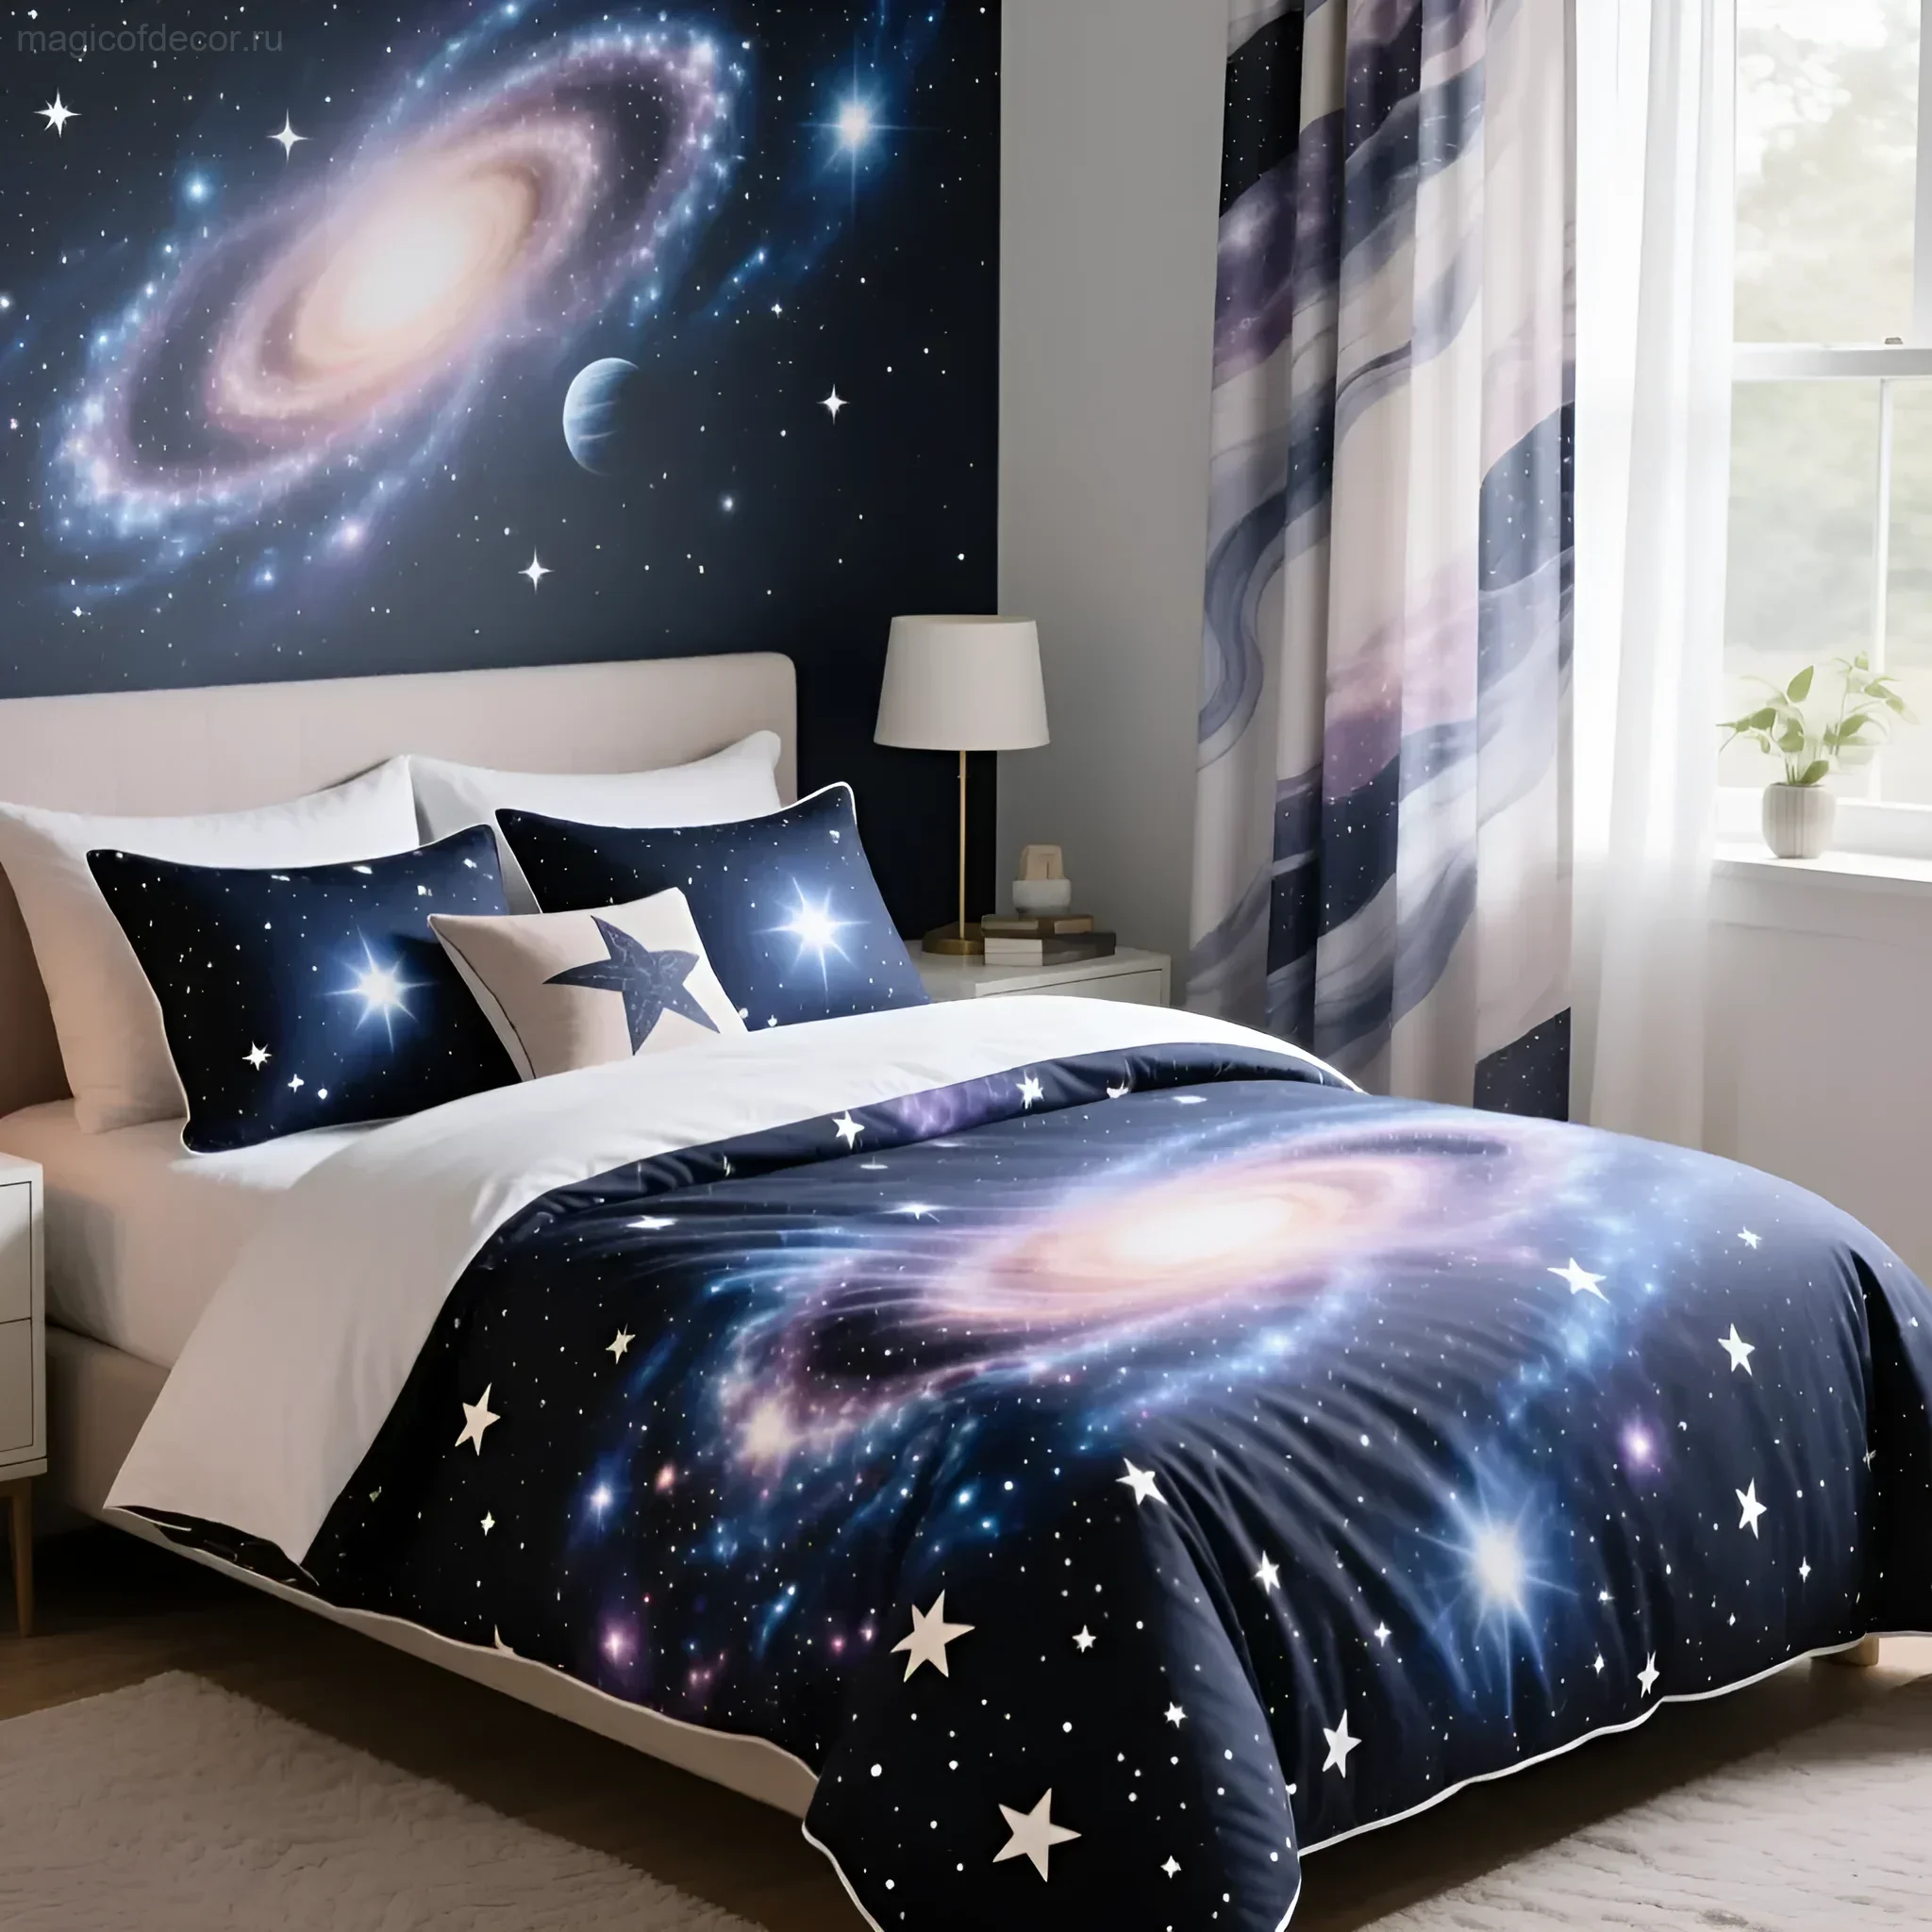
Cosmic Textiles: Adding Coziness and Style 🌌

Decor is not just what hangs, but also what is felt. Textiles are responsible for coziness and tactile sensations. In a cosmic theme, they should be deep in color and perhaps a little shiny.
Planet and Star Pillows:
- DIY Printing: Buy plain pillowcases in dark blue or black. Use stencils (ready-made or cut from cardboard) to apply constellations with white or silver acrylic paint.
- Appliqué: Cut out rocket, star, and comet shapes from felt or fleece and sew them onto the pillows.
- Texture: Use velvet or velour in deep shades. These fabrics absorb light beautifully and look luxurious, like dark matter.
Throws and Blankets:
It’s ideal if you have a throw with a gradient from blue to purple. If not, you can create your own “galactic” textile using the tie-dye technique.
Take a white sheet or an old blanket:
- Tie the fabric into knots or twist it.
- Dip it in dark blue, purple, and pink fabric dyes.
- Unfold and dry. You’ll get the effect of an incredibly beautiful, chaotic nebula that will become a central accent in your “cosmic” living room or bedroom.
Cosmic Curtains: If your curtains are light-colored, simply hang a thin, translucent blue or purple fabric over them, imitating the night sky. Attach a few small LED string lights to it.
FAQ: Answers to the Most Popular Questions About Cosmic Decor ❓
1. How to Make the Decor Not Too “Childish”?
To avoid the feeling of being in a children’s room, focus on texture and light, rather than cartoonish images. Use deep, noble colors (indigo, metallic, black). Prefer abstract images of nebulae and realistic star maps over bright drawings. For example, instead of plastic alien figurines, use stylized metal rocket models.
2. How to Store Such Bulky DIY Decor After the Holiday?
Many elements, such as cardboard rockets or papier-mâché planets, can be quite fragile. Store them in separate boxes, padding them with soft paper or fabric. DIY star garlands are best stored by winding them around a flat piece of cardboard to avoid tangling. Remember: LED string lights and textiles can be used year-round, so this is not just seasonal decor.
3. Can Live Plants Be Used in Cosmic Decor?
Of course! Plants will add contrast and life. Choose succulents or cacti – they resemble alien flora. Place them in pots wrapped in foil, or in pots painted the color of the moon (gray with white streaks) to create a lunar landscape effect.
4. How to Create a Weightless Effect for Hanging Planets?
Use thin fishing line. It’s practically invisible. Secure the fishing line not only to the ceiling but also at several points to walls or furniture (if safe) so that the planets don’t spin but hang stably. Place them at different heights to create multi-level depth.
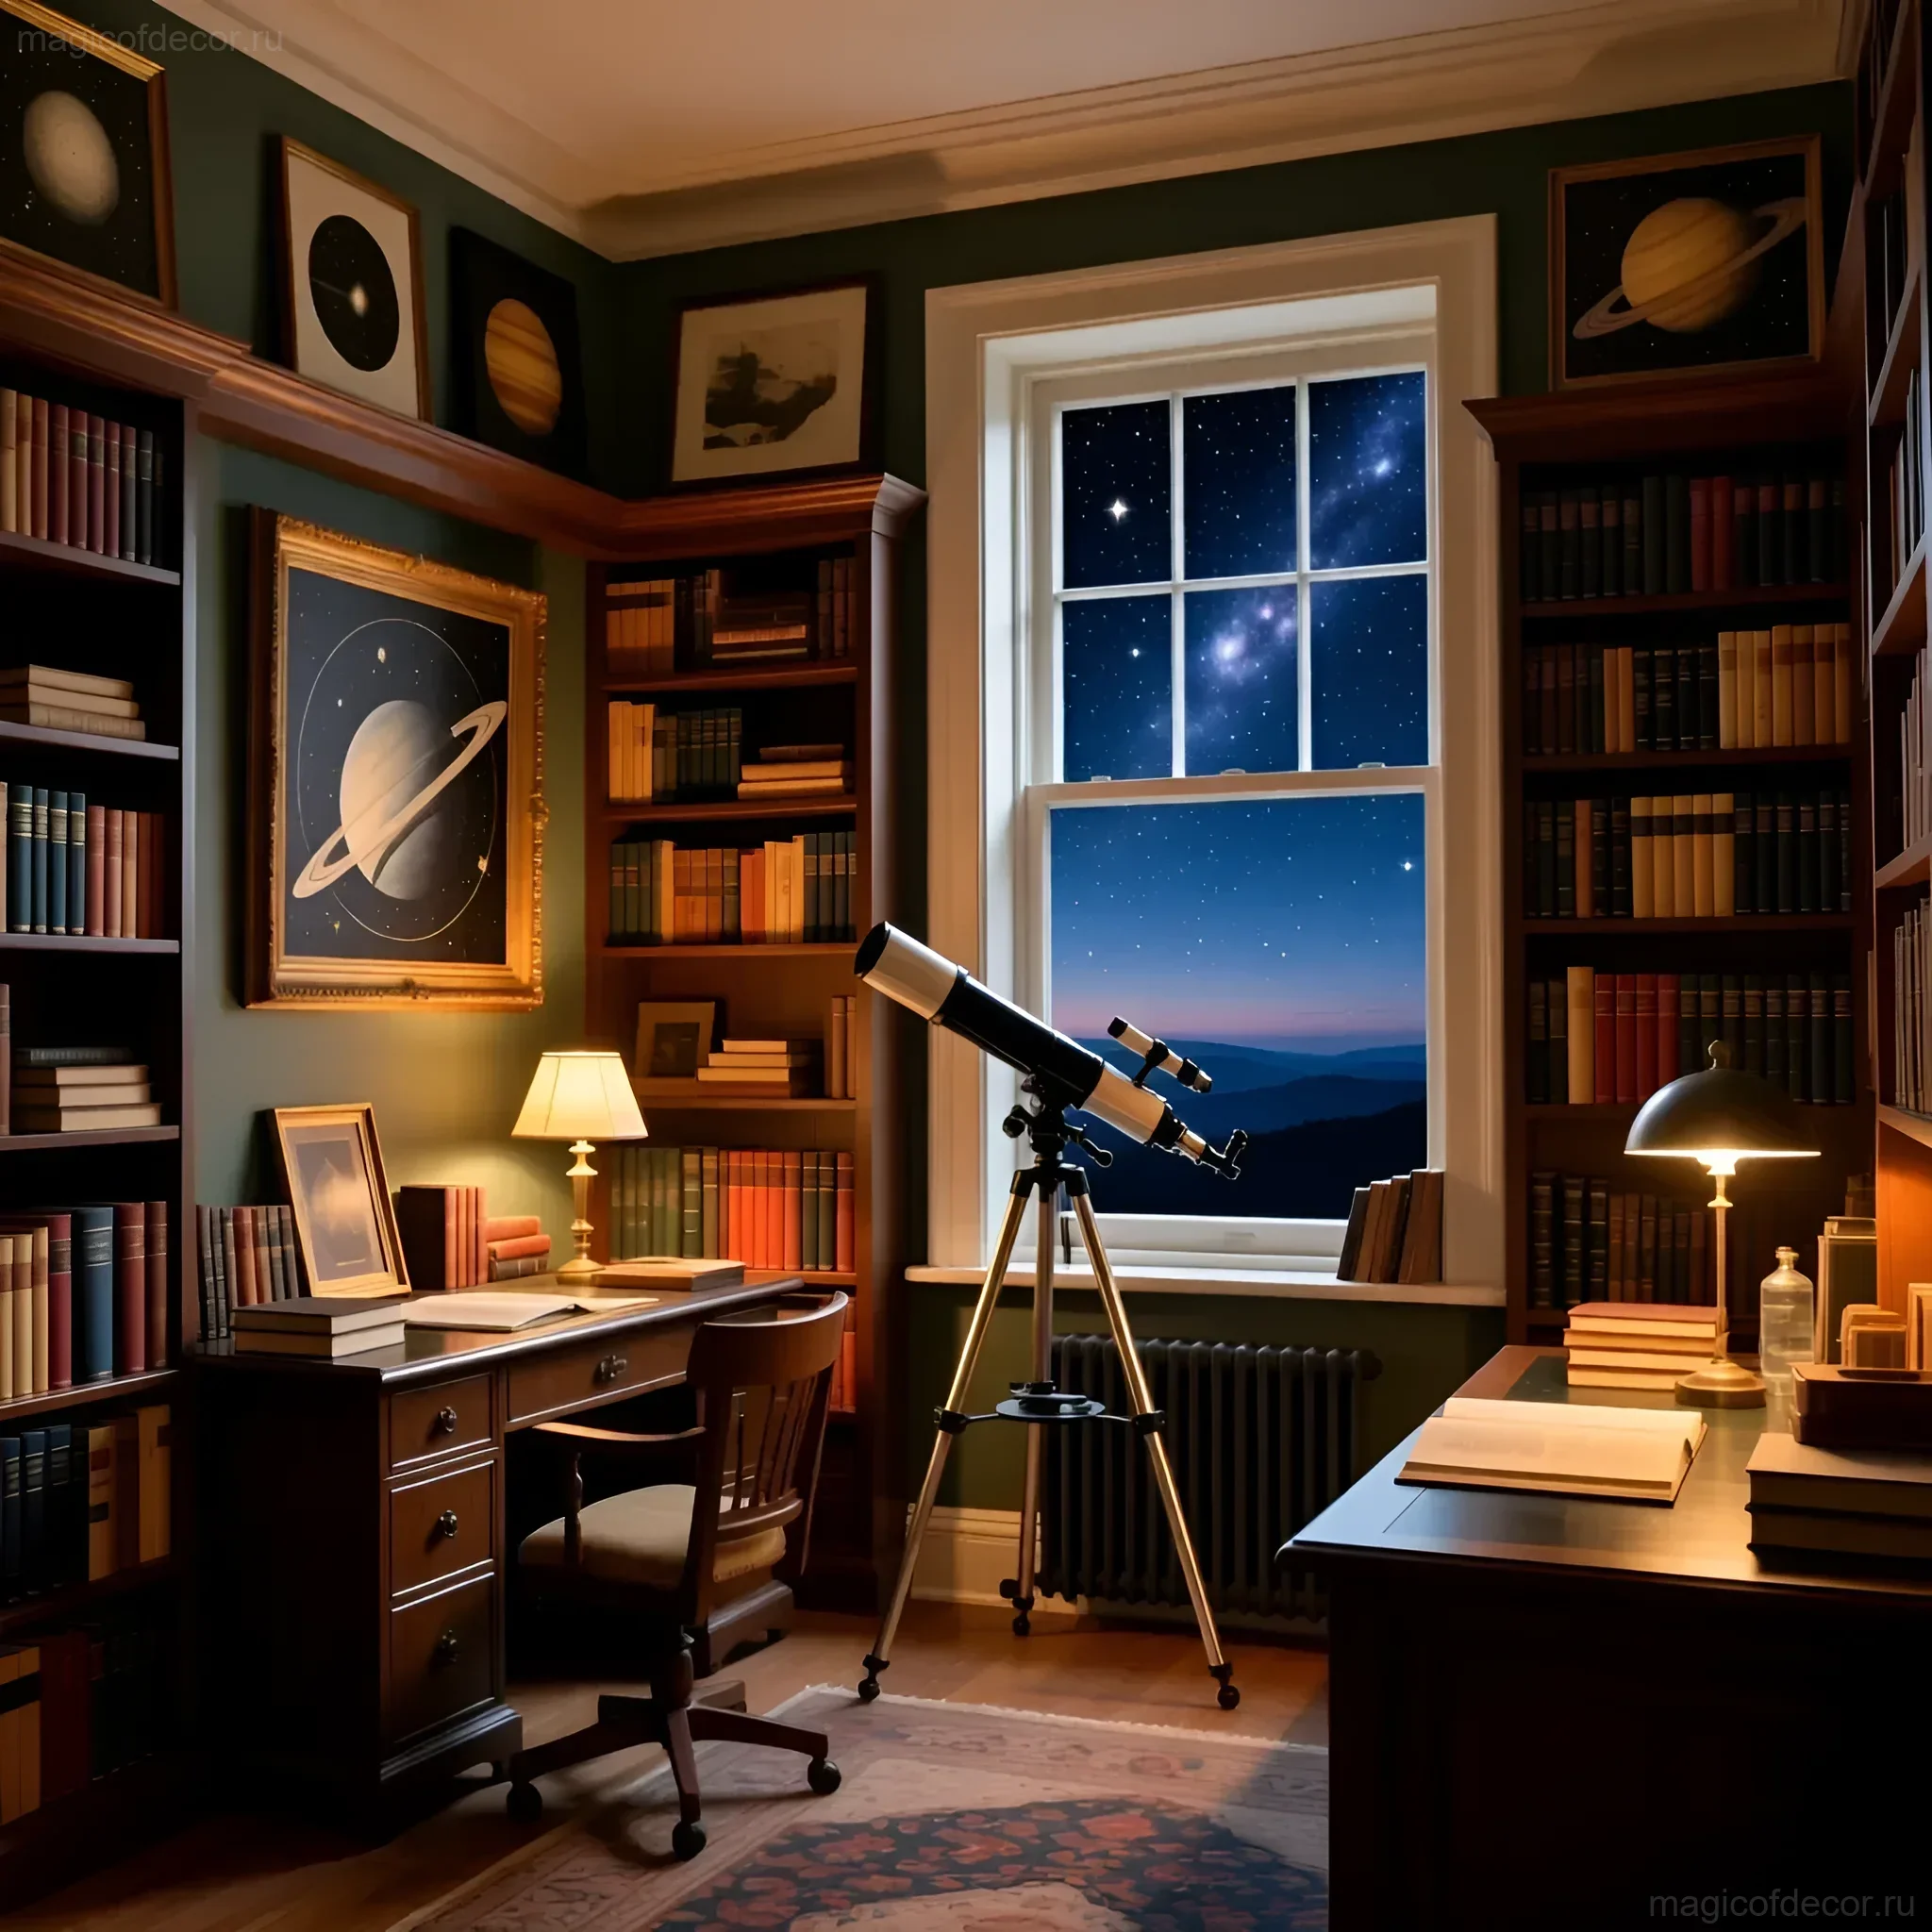
Interesting Facts About Space and Decor: Inspired by History and Science 🔭
Decor becomes truly deep and meaningful when it’s based on real facts. Use these ideas for additional inspiration and detail in your interior:
- Nebula Colors: Nebulae are huge clouds of dust and gas. Their colors, which we see in photographs, are often the result of chemical elements. For example, red is often given by hydrogen, and blue by oxygen. Use these combinations (red + blue + purple) in your DIY gradients.
- Gagarin and Orange: Spacesuits were often orange to make them easier to spot after landing. Add a bright orange accent to your decor (e.g., in the form of a small pillow or rocket trim) to pay tribute to the first flights.
- Sputnik’s Influence: The first artificial satellite of Earth, “Sputnik-1,” had a simple spherical shape with four long antennas. Creating a minimalist model of such a satellite from a styrofoam ball and wire can be a stylish, retro-futuristic accent that will fit perfectly into a modern interior.
- Earth from Space: When astronauts look at Earth, they see a thin blue atmosphere. Try using blue and light blue tulle or organza to imitate this effect by draping them over a lamp or window.
Creating cosmic decor is a creative process that allows you to temporarily become an artist, engineer, and astronaut all at once. Don’t be afraid to experiment with materials, because even the most ordinary cardboard can turn into an intergalactic ship full of dreams and coziness. May your home on Cosmonautics Day become the coziest corner of the Universe!