I remember as a child, being very young, I would spend hours at my grandmother’s dacha, observing the life that bustled around. I was captivated not only by the scent of blooming peonies and the chirping of birds, but also by the tiny world living in the grass and on the leaves. Dragonflies, busy beetles, bees diligently flying from flower to flower… It seemed like just a cute landscape. But over the years, I realized that it wasn’t just cute, but incredibly important. These little inhabitants are our main allies in the fight for a healthy and beautiful garden. Today, I want to share with you how to make your plot a real magnet for these tiny helpers who work for free and with incredible benefit.
Why Attract Beneficial Insects to Your Dacha Plot?
Many of us, dacha owners, are used to fighting any insects on our plots, seeing them only as enemies. However, this is far from the truth. There are many species of insects that bring invaluable benefits to our gardens and vegetable patches. Attracting such helpers is not just a trendy landscaping fad, but a sensible and ecological approach to gardening. It’s an opportunity to create a balanced ecosystem where some organisms help others, and you get a healthy harvest and lush blooms without tons of chemicals.
Beneficial insects perform a number of critically important functions:
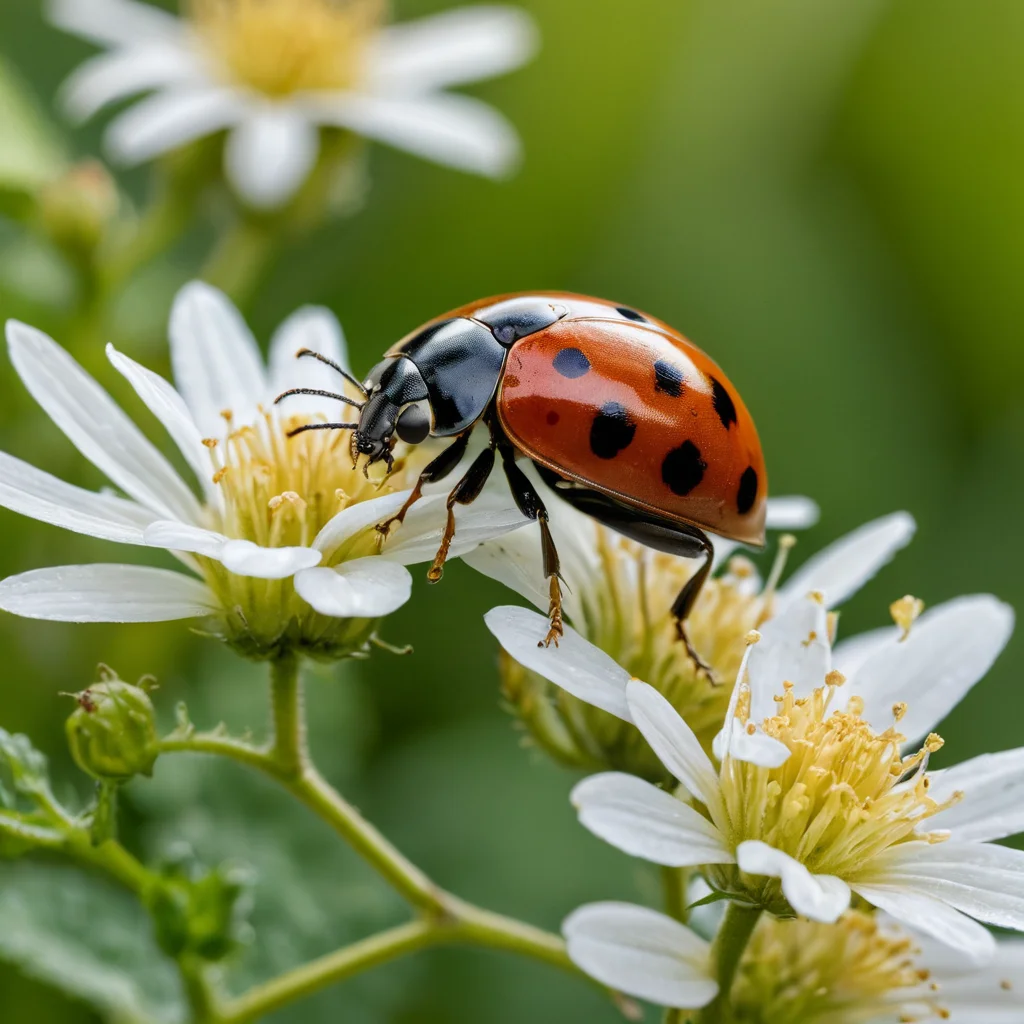
- Natural Enemies of Pests: Many insects, such as ladybugs, lacewings, hoverflies, and predatory mites, are predators. They feed on aphids, spider mites, Colorado potato beetle eggs, and other pests that damage our plants. By attracting them, you create a natural barrier against pests, reducing or completely eliminating the need for pesticides.
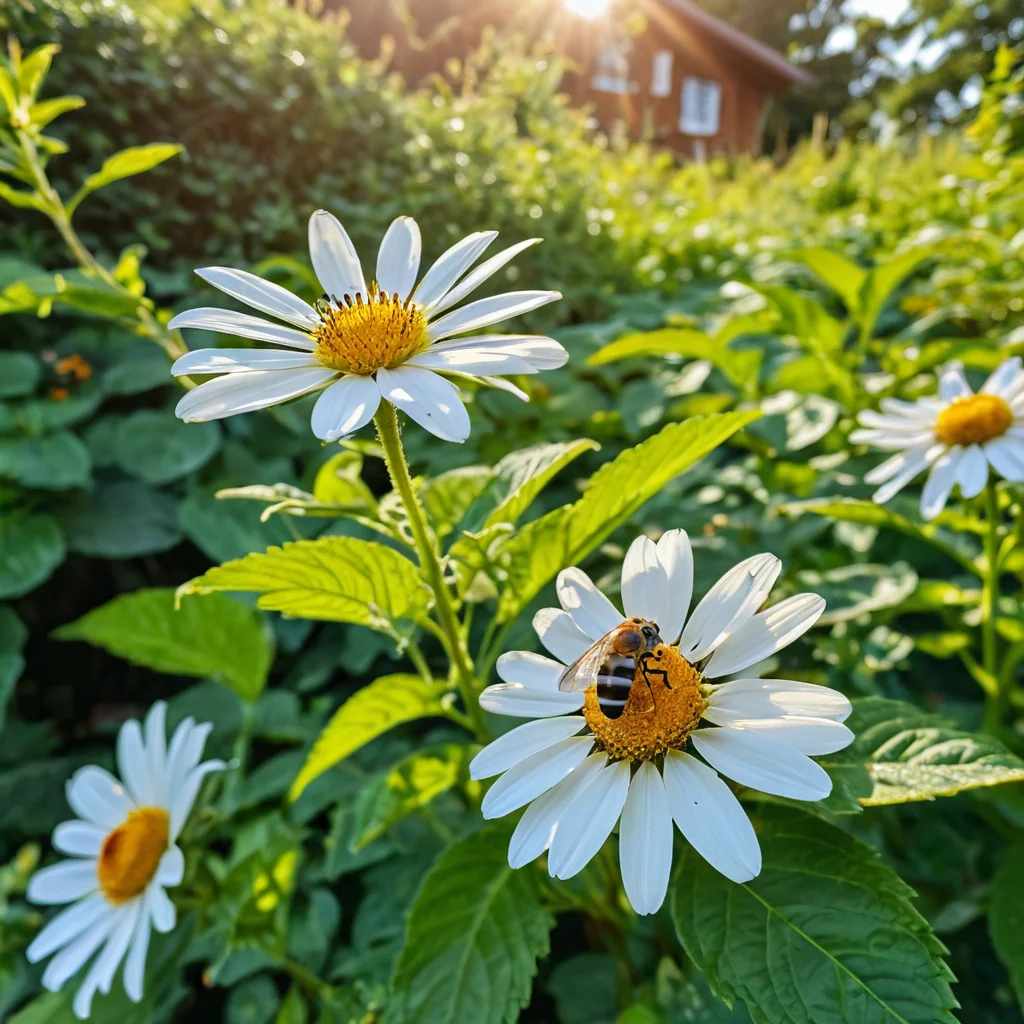
- Pollination: Without pollinating insects, our harvest of many fruit trees, berries, and vegetables would be under threat. Bees, bumblebees, butterflies, hoverflies – they all play a key role in pollination, ensuring fruit set. The greater the diversity of pollinators on your plot, the better the harvest will be.
- Soil Improvement: Some insects, like dung beetles, help decompose organic waste, enriching the soil and improving its structure.
- Bioindicators: The presence of certain species of beneficial insects can serve as an indicator of the health of your ecosystem. If there are many of them, it means your garden is in good condition, there is no excess of pesticides, and there is sufficient plant diversity.
- Environmental Friendliness and Safety: Instead of poisoning your plot with chemicals that harm not only pests but also beneficial insects, birds, animals, and even yourself, you create a natural balance. This makes your garden a safe place for relaxation, children’s play, and pets.
Believe my experience, when the first ladybugs appear on your plot, and bees and bumblebees actively visit the flowers, you feel a special joy and harmony. This means your garden is alive, healthy, and developing according to its natural laws.
Which Beneficial Insects Do You Need and Who Are They?
To purposefully create conditions for beneficial insects, it’s important to know who exactly we want to see in our garden. These little workers are very diverse, and each of them plays its important role. Let’s get acquainted with the main ones:
1. Predatory Insects – Fighters Against Pests
This is perhaps the most well-known group of beneficial insects. They feed on those who damage our plants.
- Ladybugs (Coccinellidae): Our favorite striped and spotted friends! Both larvae and adults are true aphid eaters. One ladybug can eat up to several thousand aphids in its lifetime!
- Lacewings (Chrysopidae): These delicate insects with thin wings are very effective against aphids, thrips, spider mites, and small caterpillars. Their larvae are truly voracious predators.
- Hoverflies (Syrphidae): Often mistaken for wasps or bees due to their yellow and black coloration, but they are completely harmless flies. Their larvae actively feed on aphids, and adults pollinate flowers.
- Praying Mantises (Mantodea): Although not as numerous as ladybugs, they are effective predators that feed on various insects, including harmful ones.
- Rove Beetles (Stenus spp.) and Ground Beetles (Carabidae): These beetles, living in the soil or on plant surfaces, actively hunt slugs, snails, caterpillars, and other soil pests.
2. Pollinators – Guarantees of Harvest
Without them, fruit crops and many ornamental plants would not be able to set fruit and seeds.
- Bees (Apidae): Both honeybees and wild bees are the main pollination workers. They transfer pollen from flower to flower, ensuring fertilization.
- Bumblebees (Bombus): Larger and fuzzier than bees, bumblebees are indispensable for pollinating many crops, especially those that require “buzz pollination” (e.g., tomatoes). They are also active in cool weather.
- Butterflies (Lepidoptera): Not only beautiful but also important as pollinators, especially for flowers with long tubular corollas that other insects cannot reach.
- Moths (Sphingidae, Noctuidae): Often underestimated, they work actively at night, pollinating night-blooming flowers like nicotiana or some types of lilies.
3. Earthworms and Other Soil Dwellers
Although not strictly insects (worms are annelids), they play a colossal role in soil health.
- Earthworms: Their burrows aerate the soil, and the castings they produce (vermicompost) are one of the best organic fertilizers.
- Some types of beetles and their larvae: For example, the larvae of rose chafers can help decompose organic matter in compost.
The greater the diversity of these insects on your plot, the more stable and healthy your garden ecosystem will be. Our task is to create comfortable conditions for them.
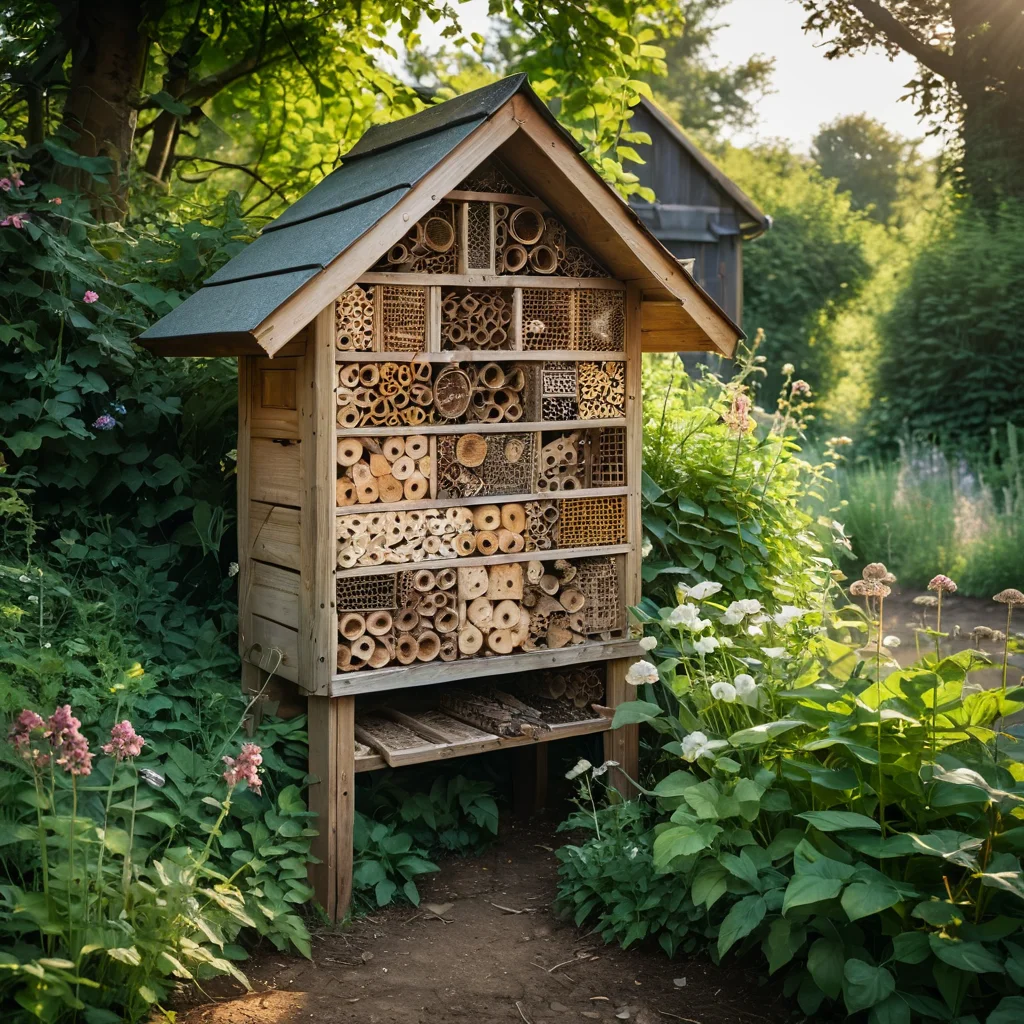
How to Create an ‘Insect Hotel’: Step-by-Step Instructions
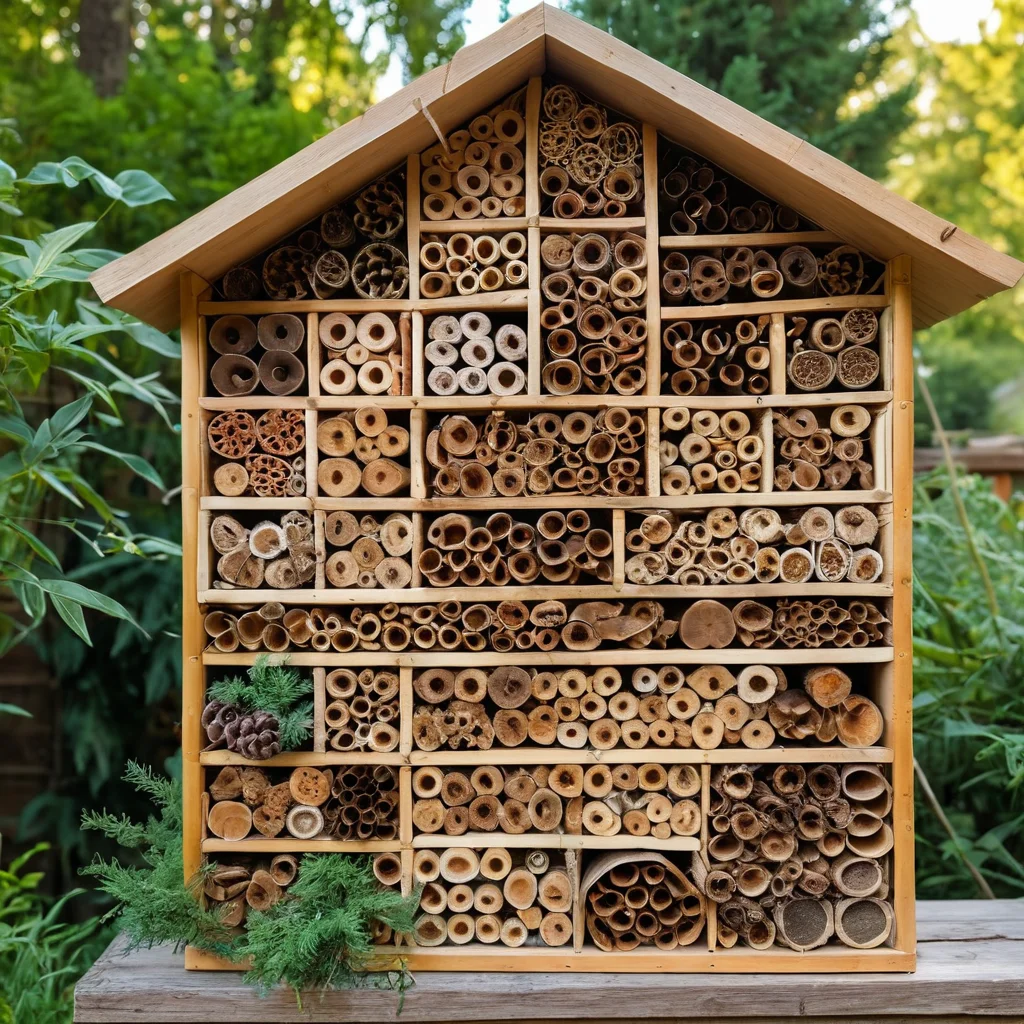
Creating an “insect hotel” or “house for beneficial insects” is a fascinating project that can become a real decoration for your plot and a great activity for the whole family. I always say it’s like building a mini-hotel for our silent helpers. The process is not complicated; the main thing is to approach it with heart and consider the needs of future residents.
Step 1: Choosing a Location
Proper placement is key to success. The location should be:
- Sunny and protected from wind: Most beneficial insects love warmth. A south or southeast facing location is ideal. Make sure the house is not in a draft.
- Near food sources: Place the hotel near flowering plants, shrubs, vegetable beds – places where insects can find food.
- Safe: Away from areas where people often walk or children play, to avoid accidental disturbance. Also, avoid areas where predators might be (e.g., cats).
- Stable: The base on which the hotel will stand should be strong and not prone to erosion.
Step 2: Creating the Frame
The frame can be very diverse – from a simple wooden box to a complex multi-story structure.
- Materials: Use untreated wood (pine, spruce, larch), plywood, bricks. The main thing is that the material is environmentally friendly and does not release harmful substances.
- Dimensions: The size depends on your capabilities and imagination. Start with something small, for example, a box measuring 30x30x30 cm.
- Shape: The classic shape is rectangular, but other options are possible. It’s important that there are many compartments inside for different types of residents.
- Back Wall: It must be present to protect the interior from wind and moisture.
Step 3: Filling the Compartments
This is the most interesting part! Each compartment should be designed for a specific type of insect.
- For solitary bees and mason bees: Fill compartments with hollow plant stems (bamboo, reed, dry wormwood, sunflower) or drill holes 3-10 mm in diameter in wooden blocks. It’s important that the holes are smooth, without burrs, and go all the way through or to a depth of 5-10 cm.
- For ladybugs and lacewings: Use dry leaves, bark, moss, or wood chips rolled into tight spirals or rolls.
- For ground beetles: Leave space with wood chips, bark, and dry leaves.
- For earwigs: You can use small flower pots filled with straw or shavings.
- For bumblebees (if you’re lucky!): Sometimes bumblebees prefer burrows in the ground or small cavities. You can try to create such a compartment by filling it with dry grass.
- Decorative elements: Add cones, stones, bark for variety and aesthetics.
Important: The filling should be dense, but with gaps, so that insects can easily reach their “nests.”
Step 4: Protection from Moisture
The roof is an important element that will protect the interior from rain.
- Material: Use wood, tiles, pieces of slate, or even an old metal lid.
- Slope: The roof should have a slight forward slope so that water drains off and does not accumulate.
- Visor: Make a small visor that extends over the front of the house to provide additional protection from precipitation.
Building such a house is not only a contribution to the health of your garden but also a wonderful opportunity to observe the amazing life of nature up close. Children will be delighted!
Choosing Materials for an Insect Hotel: What’s Best?

The quality and safety of materials are key factors when building an “insect hotel.” We want to attract beneficial inhabitants, not harm them. Therefore, the choice should be conscious. Believe me, even with the simplest and most accessible materials, you can create a comfortable dwelling.
1. Wood
This is perhaps the most popular and versatile material. But there are nuances:
- Types of wood: Natural, untreated wood species are best. Pine, spruce, larch, oak, birch. These species are quite strong and durable.
- Treatment: STRICTLY AVOID! wood treated with antiseptics, varnishes, or paints. Any chemical compounds can be toxic to insects. If you want to protect the wood from rot, use natural oils (like linseed oil) in small quantities and let them dry completely.
- Wooden blocks: Ideal for creating “nests” for solitary bees. Choose hardwoods. It’s important that the wood is dry and without cracks.
2. Hollow Plant Stems
An excellent and natural filler. They should be dry and without internal partitions (except for natural ones).
- Bamboo: An excellent choice, as its stems have natural cavities. Choose stems of different diameters.
- Reed, cattail, wormwood, hogweed (dried!): All these plants have hollow stems that are perfect for houses.
- Sunflower: Its pith dries out after flowering and forms convenient cavities.
- Important: Stems should be cut cleanly, without sharp edges, and packed tightly into the compartments.
3. Natural Materials for Shelter
These materials provide coziness and protection for predatory insects.
- Cones: Spruce or pine cones. They create many small crevices, ideal for shelter.
- Tree bark: It’s best to use pieces of old, peeling bark.
- Dry leaves: Autumn leaves, collected and dried.
- Moss: Dry moss can serve as an excellent filler.
- Straw, hay: Well suited for creating voluminous shelters.
- Wood shavings, chips: Create volume and shelter.
4. Stones and Bricks
They can be used as part of the structure or as filler.
- Bricks: Ordinary clay bricks with holes are an excellent option. Insects like to settle in them.
- Stones: Large, flat stones can serve as a roof or wall.
5. Other Materials
- Clay, mixture of clay and straw: Can be used to create “nests” for some types of bees.
Tip from an experienced gardener: I always try to combine different materials in one house. This increases the chances of attracting a greater variety of insects. For example, one compartment with wooden blocks, another with hollow stems, a third with cones and bark.
What Plants Attract Beneficial Insects to Your Plot?
Having an “insect hotel” by itself is only half the battle. The main thing is that your little helpers have something to eat and somewhere to spend their time. Plants are their home, dining room, and meeting place. A well-chosen selection of plants will make your plot a true paradise for beneficial fauna.
1. Flowers – A Source of Nectar and Pollen
These plants attract both pollinators and predatory insects that hunt those feeding on flowers.
- Umbellifers (Apiaceae): These are a real magnet for insects!
- Dill (especially flowering)
- Parsley (flowering)
- Carrots (flowering)
- Caraway
- Fennel
- Coriander
- Angelica
- Parsnip
- Aster family (Asteraceae):
- Sunflower
- Astrantia
- Echinacea
- Yarrow
- Pyrethrum
- Helenium
- Asters
- Marigolds
- Other attractive flowers:
- Lavender
- Lemon balm
- Mint
- Sage
- Phacelia
- Betony
- St. John’s wort
- Calendula
- Poppy
- Catnip
- Cosmos
- Cornflower
Important: Choose plants with simple flowers, not double ones. Their nectar and pollen are more accessible to insects. Try to have flowers in the garden from spring to autumn, providing a continuous food source.
2. Aromatic Herbs
Many herbs not only delight us with their aroma and taste but also attract beneficial insects.
- Mint
- Lemon balm
- Oregano
- Thyme
- Sage
- Rosemary
- Lavender
Life hack: Don’t rush to pull out “weeds” like nettle or shepherd’s purse. They can also be beneficial for some insect species.
3. Shrubs and Trees
Don’t forget about larger plants either.
- Berry bushes: Raspberry, blackberry, currant, gooseberry – their flowers are very attractive to bees and bumblebees.
- Fruit trees: Apple, cherry, plum, pear trees – their blooming is a real celebration for pollinators.
- Ornamental shrubs: Ninebark, spirea, mock orange (garden jasmine).
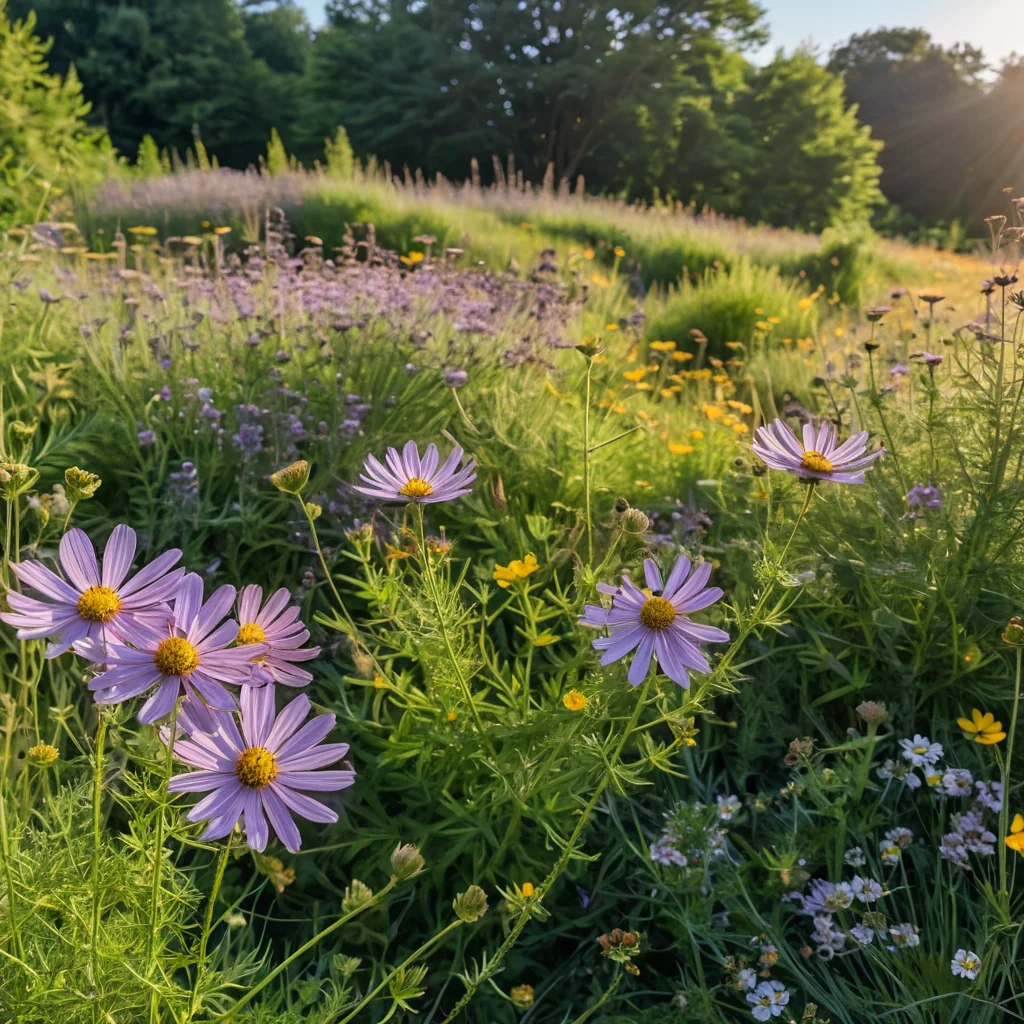
4. Creating “Wild” Zones
Small areas where the grass is mown less often, where wildflowers grow, or where piles of leaves are left, become real reserves for insects.
My personal experience: I always try to plant insects-attracting plants near vegetable beds and fruit trees. For example, dill and calendula thrive among tomatoes, and lavender next to roses. This creates synergy.
How to Create Natural Shelters for Insects in the Garden?
In addition to a stationary “insect hotel,” which is an excellent solution, you can also create natural shelters directly on your plot. These are simple, often inconspicuous elements that will help insects find a safe place to live, overwinter, or reproduce. This approach makes your garden more alive and self-sufficient.
1. Piles of Leaves and Plant Debris
Don’t rush to clear all plant debris in the fall.
- Where: Leave a few piles of fallen leaves, mown grass, or old stems in secluded corners of the garden – under bushes, behind structures, near the fence.
- For whom: Ladybugs, lacewings, ground beetles, as well as various types of beetles and spiders, like to overwinter in such piles.
2. Rock Gardens and Piles of Stones
Stones create a microclimate and many hiding places.
- How: Create a small rock garden or simply leave a pile of large stones in a sunny spot.
- For whom: Ground beetles, spiders, millipedes like to hide between stones. Some insect species may even build their nests there.
3. Old Stumps and Woodpiles
Decomposing wood is a whole world for many organisms.
- Where: If you have old stumps left on your plot, don’t rush to uproot them. You can also stack a small woodpile in a remote, damp corner of the garden.
- For whom: Longhorn beetles, ground beetles, spiders, millipedes, as well as the larvae of many insects find shelter inside and under the bark of stumps and logs.
4. Bunches of Dry Grass and Straw
Simple and effective.
- Where: Tie bunches of dry grass or straw and leave them on the ground or hang them on bush branches.
- For whom: Solitary bees and other insects can use them to build their nests.
5. Small Ponds or Damp Areas
Water is the source of life, and insects are no exception.
- How: Even a small pond, a water container, or simply a patch of damp soil where sedge or moisture-loving grasses grow will attract many beneficial insects that need water for drinking or reproduction (e.g., dragonflies).
6. Neglected Corners
Sometimes the best way to create shelter is to simply let nature take its course.
- What: Leave a small area of the plot with wild grass where flowers can go to seed and give seeds, where beetles can find shelter.
- For whom: This place will become a refuge for many insects that cannot find a corner in a perfectly mown lawn.
My advice: Don’t strive for perfect order across the entire plot. Small “wild” corners, left without much intervention, can become the most biologically active zones. The main thing is that these zones do not spoil the overall appearance of your garden and are located so as not to cause problems.
Caring for an ‘Insect Hotel’ and Surrounding Plants
Creating an “insect hotel” is just the beginning. For it to serve long and well, and for insects to feel like welcome guests, you need to take care of its condition and the surrounding area. The care is not complicated, but it requires attention.
1. Inspection and Cleaning
- Frequency: Inspect the hotel every few months, as well as at the end of the season (in autumn) and before the start of a new one (in spring).
- What to do: Remove accumulated debris (if there is too much), decaying materials that may attract unwanted inhabitants or mold.
- Attention to “nests”: Carefully inspect hollow stems and holes in wood. If they are clogged with dust or dirt, gently clean them (e.g., with a thin stick or wire).
- Repairs: If any parts of the house have fallen apart, repair them.
2. Replacing Fillers
Some materials deteriorate over time and require replacement.
- When: In autumn, after all insects have left their “nests” for winter, you can replace last year’s fillers (e.g., dry leaves, straw) with fresh ones.
- How: Old, worn-out materials can be sent to the compost.
- Important: Don’t replace everything at once! Some old materials can be useful for creating shelters.
3. Caring for the Surrounding Area
The plants around the hotel should be insect-friendly.
- Watering: Ensure sufficient water for the plants, especially during the hot season.
- Fertilizing: Use organic fertilizers.
- Pest Control: If pests appear on neighboring plants, try to use safe control methods (folk remedies, biological preparations). Avoid chemical insecticides that can get into the hotel and harm its inhabitants.
- Flowering plants: Make sure there are plants nearby that will provide insects with food (nectar, pollen).
4. Wintering
For many insects, the hotel is a place to overwinter.
- Do not disturb: In winter, try not to disturb the hotel. Let it be.
- Protection: Make sure it is securely fastened and not exposed to strong winds.
Practical tip: I always place a small water container near the hotel (e.g., a shallow bowl with pebbles) so that insects can drink. Pebbles or small stones are needed so they can safely get to the water and not drown.
Common Mistakes When Creating Insect Houses and How to Avoid Them
Even with the best intentions, you can make mistakes when creating an “insect hotel” that will nullify all your efforts. I have seen many such examples. Let’s look at the most common blunders so you can avoid them and make your house truly attractive to beneficial inhabitants.
1. Using Unsuitable Materials
- Mistake: Using treated wood (varnished, chemically impregnated), plastic, or metal as the main material for “nests” or the frame.
- Consequences: Toxic substances can poison insects, and smooth plastic or metal is not suitable for nesting.
- How to avoid: Always use natural, untreated materials. For “nests” – only dry hollow stems or untreated wooden blocks.
2. Incorrect Orientation and Location
- Mistake: Placing the hotel in shade, in a draft, near noisy areas, or where it will be frequently disturbed.
- Consequences: Insects dislike cold, dampness, and noise. In such conditions, they simply won’t settle.
- How to avoid: Choose a sunny, quiet location protected from the wind. A south or southeast facing location is best.
3. Improper Preparation of “Nests”
- Mistake: Leaving burrs, sharp edges, or cracks in the holes of wooden blocks or stems. Lack of a back wall or holes that are too deep/shallow.
- Consequences: Insects will not be able to get into the nest, or they will damage their wings or legs. The absence of a back wall makes the nest vulnerable to predators and moisture.
- How to avoid: Carefully sand the edges of the holes. Ensure the holes go all the way through or to the required depth (5-10 cm). Be sure to add a back wall.
4. Overly Dense or Sparse Filling
- Mistake: Filling compartments too tightly, without gaps, or, conversely, too sparsely, leaving many empty spaces.
- Consequences: In the first case, it will be difficult for insects to reach their “home”; in the second, they will not feel protected.
- How to avoid: Fill the compartments tightly, but so that small air gaps remain.
5. Lack of Food and Water Sources Nearby
- Mistake: Building the hotel in the middle of a perfectly mown lawn with no flowering plants around.
- Consequences: Even the coziest house will not attract hungry or thirsty insects.
- How to avoid: Be sure to plant insect-attracting plants around the hotel. Don’t forget about a water source (e.g., a shallow container with stones).
6. Excessive Cleanliness and Order
- Mistake: Perfect cleanliness around the hotel, absence of “wild” corners, complete removal of all leaves and stems in autumn.
- Consequences: Insects will not find shelters, places for wintering, or food.
- How to avoid: Leave small “wild” areas in the garden, piles of leaves, old stems. Don’t strive for sterility.
7. Attempting to Populate the Hotel Artificially
- Mistake: Buying “colonies” of beneficial insects and releasing them into the hotel.
- Consequences: In most cases, such attempts are doomed to failure. Insects do not adapt to foreign environments, and they may not be adapted to your conditions.
- How to avoid: Create the conditions, and the insects will come on their own. This is the most natural and effective way.
Creating an “insect hotel” is not a difficult task, but it requires understanding the needs of its future inhabitants. By following these simple rules, you can make your plot not only beautiful but also truly alive, where everyone will find their corner and contribute to the harmony of nature.