
Dear friends, how often have you dreamed of adding a little magic to your dacha corner? The feeling of peace that a light, measured whisper of water brings is incomparable. And no, you don’t need to hire a construction crew or undertake a grand renovation for this! Today, like true decorators, we will create a little wonder – a DIY fountain for your dacha. This is an affordable, incredibly meditative project that even an absolute beginner can handle. Forget about heavy work; we will create beauty from readily available materials, transforming an ordinary corner into an oasis of coziness.
The Magic of Water: Inspiration for a DIY Dacha Fountain

Water is life, movement, and, of course, the best natural relaxant. A small fountain at the dacha serves several important decorative functions:
- Sound Accent: The gentle murmur of water masks city noise and creates an atmosphere of complete solitude. This is your personal sound therapy.
- Visual Dynamics: Even in the most static composition, a fountain adds movement and reflections, drawing the eye.
- Attracting Nature: The fountain will become a favorite drinking spot for birds, adding even more life to your garden.
- Focal Point: A small fountain, placed in a relaxation area or on a terrace, instantly becomes the center of attraction for the entire decorative ensemble.
Our fountain will be mobile or semi-stationary, which is ideal for dacha decor. We won’t be digging deep pits, but will focus on containers: old tubs, large ceramic pots, or even decorative buckets. The main thing is the desire to create and a little imagination!
What You’ll Need to Create a Mini-Waterfall: Materials and Tools
Before diving into the creative process, let’s make sure we have everything we need at hand. The good news is that most materials will either be found at your dacha or are quite inexpensive.
Fountain Base (Container)
Choose a container that will serve as the water reservoir. It must be completely watertight.
- Plastic container (for hidden installation in the ground).
- Large ceramic pot (without drainage holes or with carefully sealed ones).
- Old wooden tub or barrel (must be treated internally with waterproofing).
- Decorative metal or stone basin or bowl.
Fountain Heart (Pump)
This is the most crucial technical element. For a small fountain, a submersible pump of low to medium power (usually from 100 to 600 liters per hour) is suitable. Make sure it has a flow regulator – this will allow you to set an ideal, gentle murmur, rather than a powerful stream.
Consumables and Tools
- Flexible hose or tubing: Select according to the diameter of the pump’s outlet.
- Waterproofing: If using porous materials (wood, old concrete).
- Decorative stones and pebbles: To hide the pump and hose. It’s best to use smooth sea or river stones.
- Sealant and silicone adhesive: For securing hoses and sealing holes.
- Drill with attachments: If you need to drill holes for tubing.
- Extension cord and moisture protection: The pump runs on electricity, so safe access to power is necessary.
From Idea to Implementation: Step-by-Step Instructions for Creating a Fountain

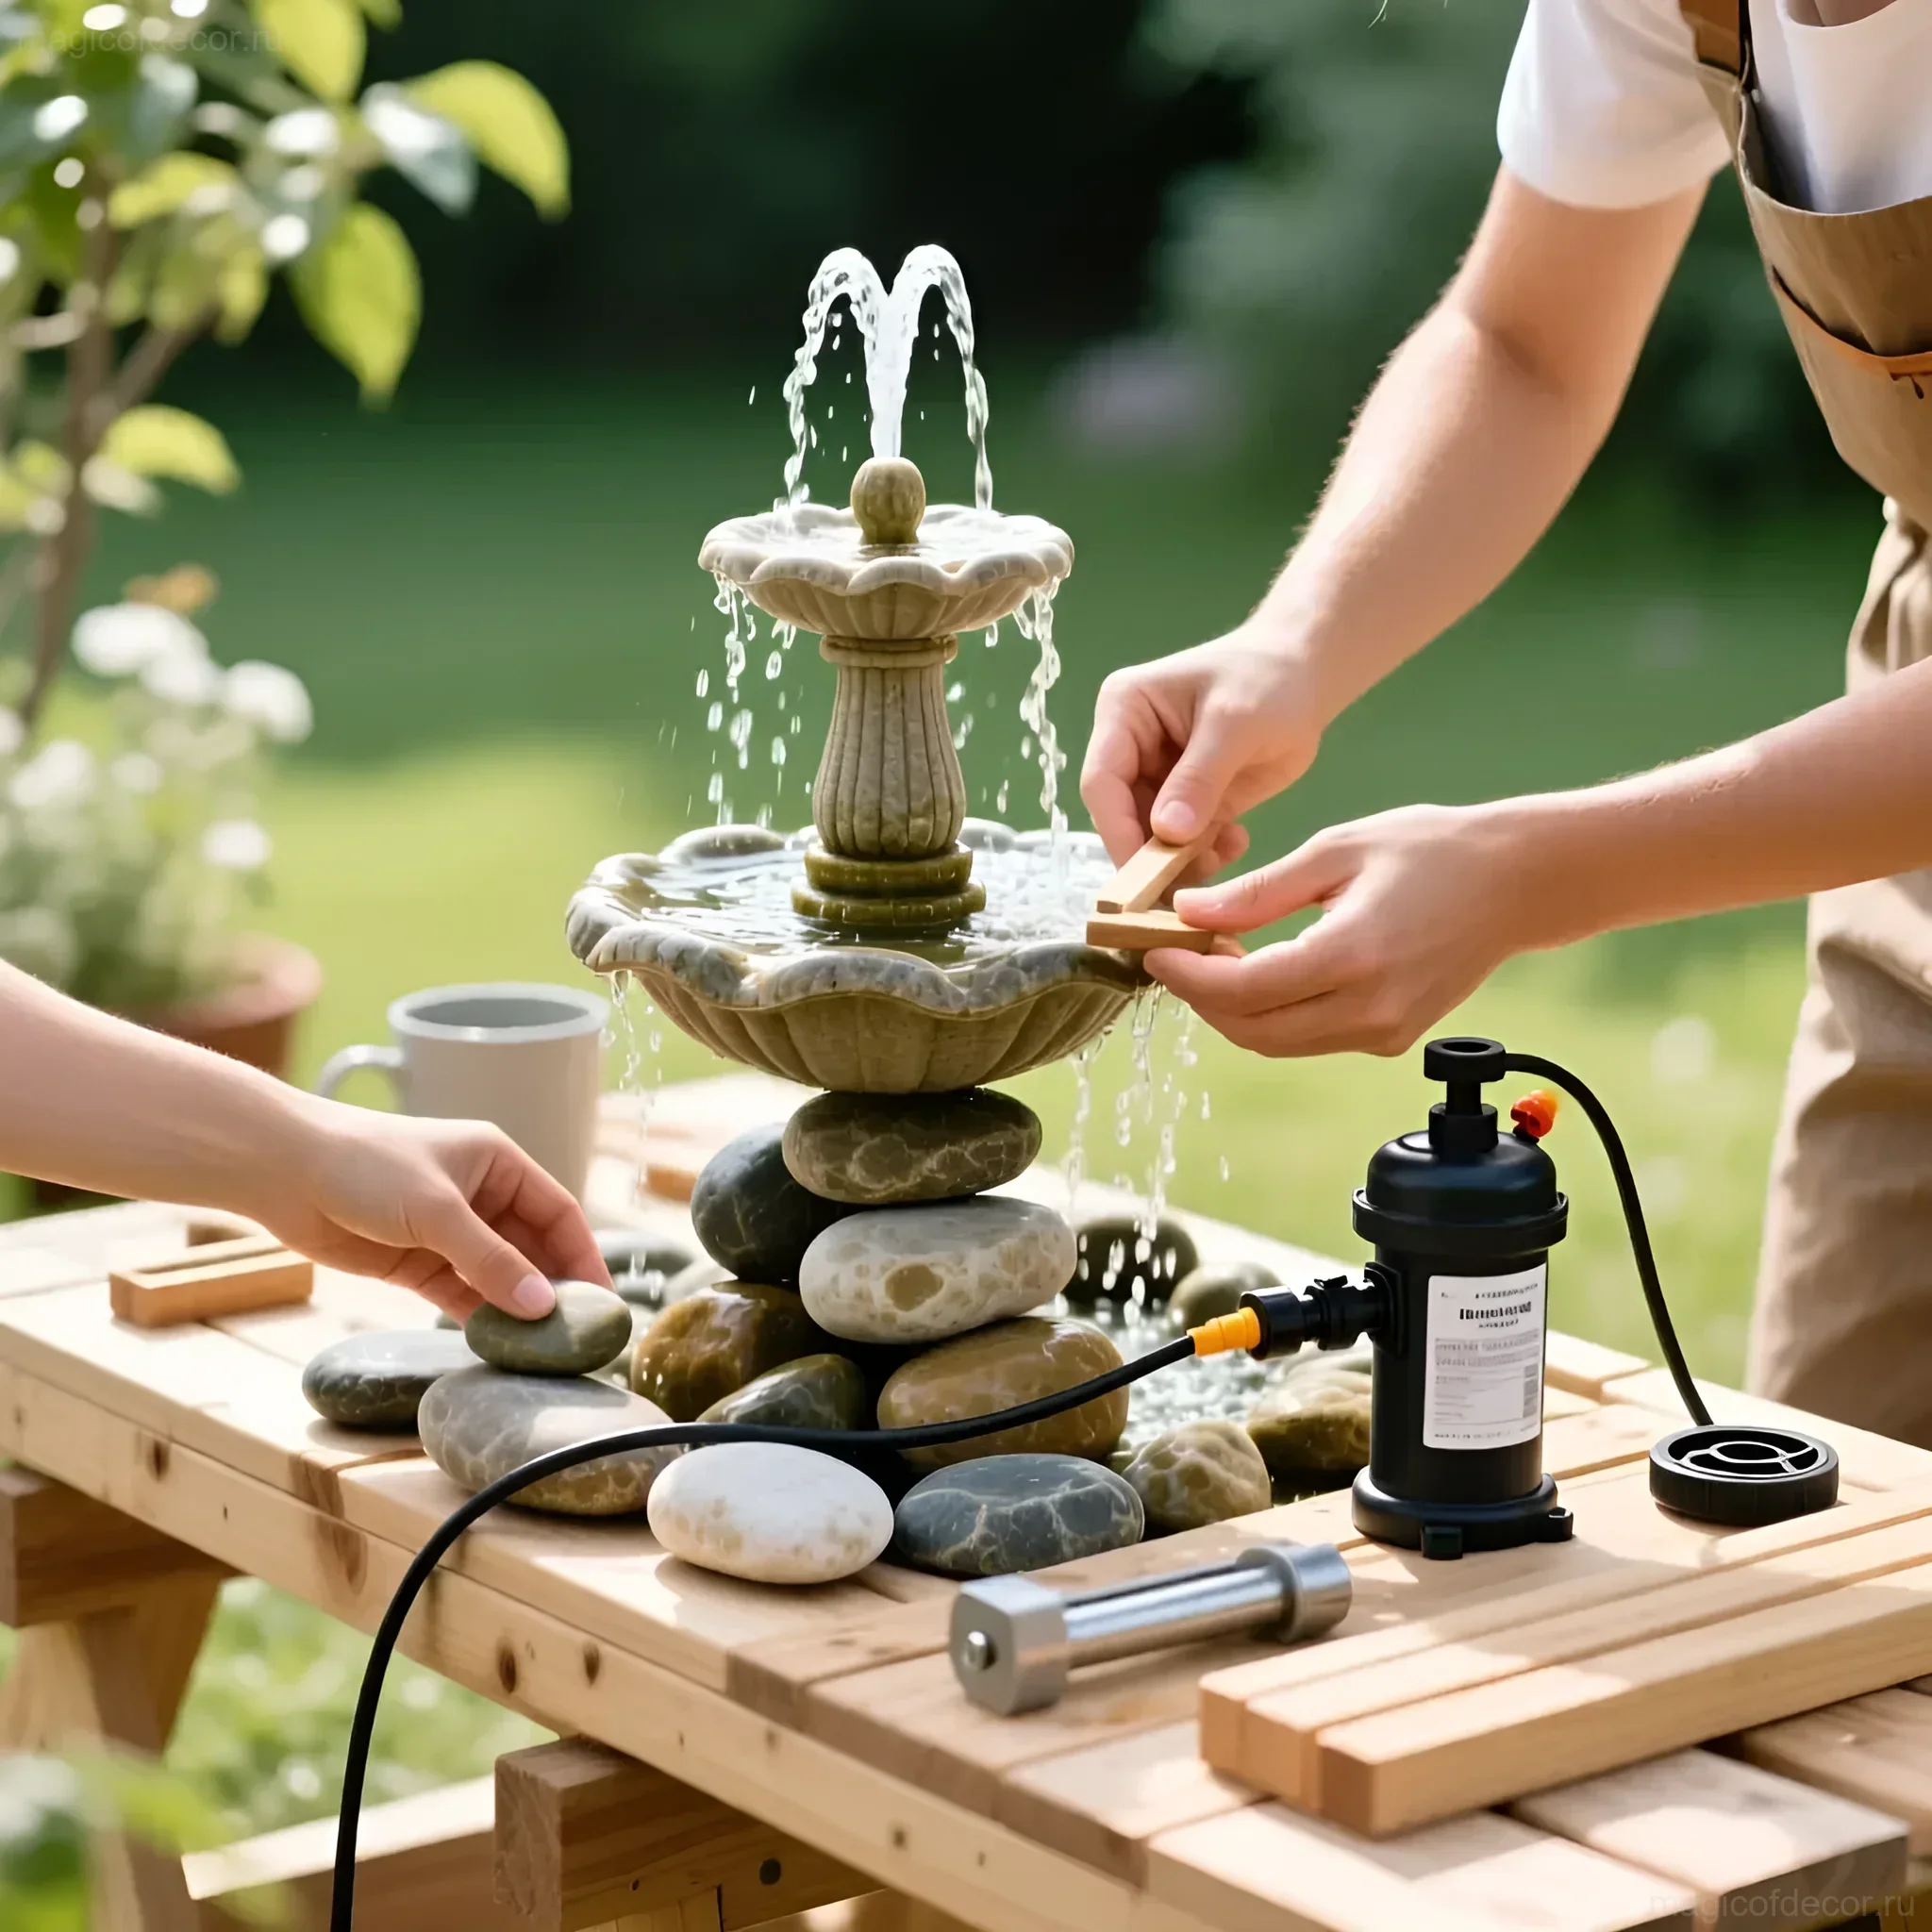
Let’s consider the simplest and most popular option – a fountain in a ceramic pot (or tub). It’s ideal for beginners.
Step 1: Prepare the Container
If your container has drainage holes (and most pots do), they must be thoroughly sealed. Use waterproof sealant or epoxy resin. Let it dry for at least 24 hours.
Step 2: Install the Pump
Place the pump at the bottom of the container. Ensure it is stable. If the bottom is uneven, use a small brick or a flat stone as a stand. Important: the pump must always be fully submerged in water.
Step 3: Lay the Hose
Connect the flexible hose to the pump’s outlet. The hose should be long enough so that its upper edge is above the water level and serves as the source of the stream. You can direct the hose vertically upwards or attach it to a decorative element (e.g., a figurine or a stone with a hole).
Step 4: Hide the Cable
The pump’s power cable must be routed out of the container. If you are using a pot with a wide rim, you can carefully run the cable over the edge, hiding it with stones. If the container is placed in the ground, the cable can be laid underground using a protective corrugated hose.
Step 5: Decorate
Now comes the most enjoyable part. Fill the container with water. Then, start arranging stones and pebbles. Your task is to completely hide the pump and hose, leaving only the upper tip from which the water will flow. Use large stones to create “banks” and small pebbles to fill in gaps.
Step 6: Start and Adjust
Connect the pump to the power outlet. If water doesn’t flow, check if the hose is clogged and if there’s enough water in the container. Adjust the flow rate using the switch on the pump until you achieve the perfect, soft murmur. Congratulations, your mini-waterfall is ready!
Harmony in Details: Best Color Schemes for Your Fountain

Decorating a fountain is not just about stones; it’s about creating a cohesive picture. The color palette plays a key role in how harmoniously your fountain fits into the dacha landscape.
1. “Natural Stream” Style (Natural Tones)
- Container Color: Terracotta, dark concrete, or natural wood.
- Decor: River pebbles, stones in gray-blue and beige tones, slightly covered with moss.
- Plants: Ferns, hostas, water-loving grasses. This style is ideal for shady spots.
- Accent: Choose stones with a matte surface to emphasize naturalness.
2. “Mediterranean Courtyard” Style (Bright Accents)
- Container Color: Glazed ceramic in bright blue, turquoise, or yellow.
- Decor: Light marble chips, white stones.
- Plants: Petunias, lobelia, succulents (if the fountain is in the sun).
- Accent: You can add a few pieces of colored mosaic to the rim of the container.
3. “Minimalism and Zen” Style (Calmness)
- Container Color: Glossy black plastic or dark, almost black stone.
- Decor: Exclusively uniform black or white pebbles. Minimal details.
- Plants: Bamboo (in a separate pot), decorative mosses.
- Accent: Use one large, perfectly smooth stone from which water will flow, creating a mirror-like effect.
Saving Smartly: Budget-Friendly Ideas for a Dacha Fountain
Who said beauty requires big investments? To create a unique fountain, all you need is a pump, and we’ll find or make everything else ourselves!
1. Fountain from Old Car Tires
This is an excellent way to recycle and create a sturdy base. The tire can be used as a hidden reservoir by burying it in the ground. A strong grate or plastic lid with a hole for the hose is placed on top. The entire structure is then disguised with decorative gravel or large stones. Plus: a very large water volume, so you don’t need to refill often.
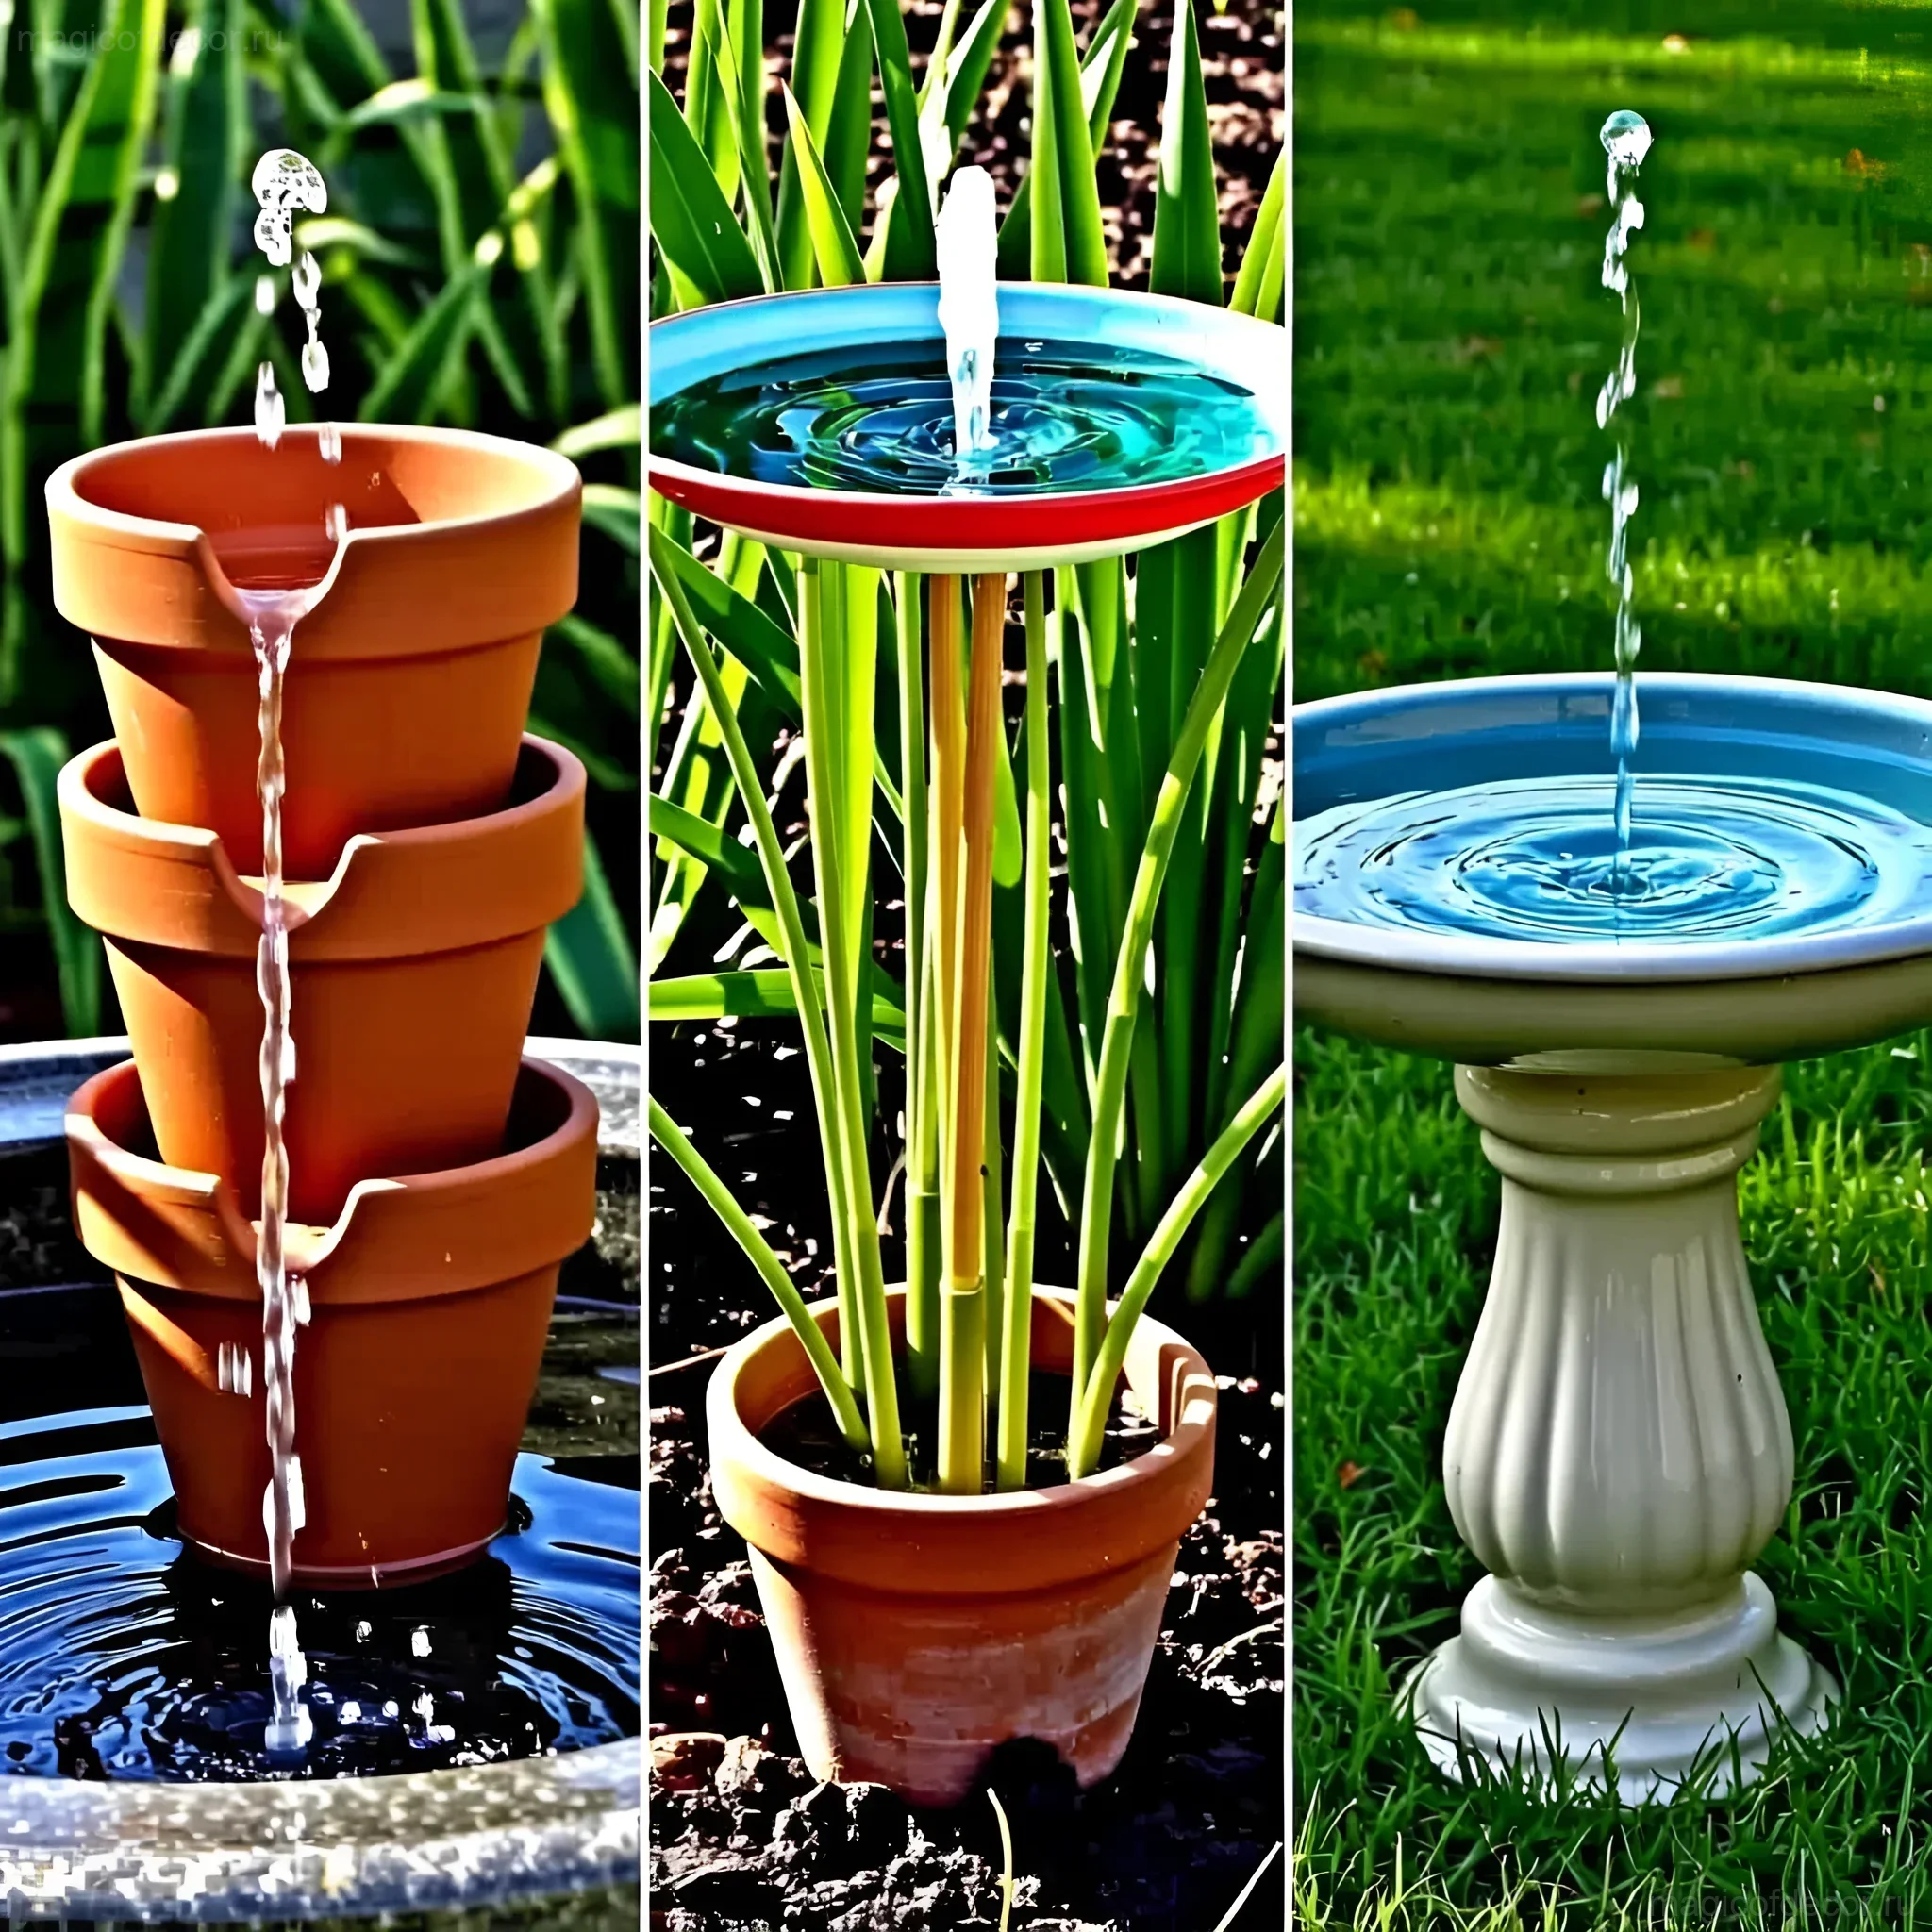
2. Tiered Pot Fountain
You’ll need three to four ceramic pots of different sizes. They are placed on a vertical metal or plastic pipe secured at the base. Water is pumped to the top pot and cascades down. Budget tip: buy pots on sale or use old ones, just repaint them in a uniform color.
3. “Watering Can Waterfall”
You’ll need an old metal watering can and a submersible pump. The pump is hidden at the bottom in a container (bucket or basin). The hose is raised and attached to the watering can’s handle. Water is pumped into the watering can and then “pours” out of the spout back into the reservoir. This creates a very charming and nostalgic effect. DIY trick: The watering can can be aged using patina or rust-effect spray paint.
Creating Ourselves: Simple DIY Fountain Projects for Your Dacha

Let’s look at two specific projects you can complete in a weekend.
DIY Project #1: Tabletop Mini-Fountain in a Planter
This fountain is ideal for a veranda or a small garden table.
- Container: A wide, shallow ceramic planter (40–50 cm in diameter).
- Pump: The lowest power one, for aquariums (100–150 l/h).
- Assembly: Place the pump at the bottom. Put a flat stone slab on top, having drilled a hole in it. The hose is routed through this hole.
- Decor: Arrange large flat pebbles around the stone and a few pieces of glass or mirror to enhance the reflection effect.
- Result: Water will gently rise through the hole and spread over the stone, quietly flowing back into the planter.
DIY Project #2: Wine Barrel Fountain-Tap
This project will add rustic charm to your garden.
- Container: Half of an old wine barrel or a wooden tub.
- Preparation: The barrel must be treated internally with water-repellent varnish or a plastic liner (waterproofing bag) to prevent the wood from rotting.
- Water Supply: The pump is installed at the bottom. The hose is routed upwards and attached to a decorative faucet or a curved copper pipe that mimics an old water tap.
- Decor: Pour light gravel on the bottom of the barrel and add a few aquatic plants in pots (e.g., water lilies for small ponds).
- Tip: Place the barrel on a small wooden pallet to avoid direct contact between the wood and the damp ground.
Fountain Through the Seasons: Seasonal Decor and Care

Your fountain is not just a static object; it’s part of the seasonal decor. By changing accessories, you can easily adapt it to any time of year.
Spring: Awakening and Freshness
In spring, the fountain should symbolize the beginning of new life. Clean it from winter storage, fill it with fresh water, and add bright accents:
- Plant spring flowers around the fountain: crocuses, muscari.
- Place pots with hyacinths or daffodils nearby.
- Use light, pastel-colored stones in the decor.
Summer: Riot of Colors and Coolness
In summer, the fountain is a refuge from the heat and the centerpiece of the composition.
- Add floating candles or small glass balls.
- If the fountain is large enough, you can add aquatic plants (e.g., duckweed or small water lilies).
- Install low-voltage lighting so the water shimmers beautifully in the evening.
Autumn: Gold and Coziness
Autumn decor should be warm and rich.
- Decorate the edges of the fountain with decorative pumpkins and acorns.
- Use stones and pebbles in reddish, burgundy, and ochre shades.
- You can place a composition of potted chrysanthemums nearby.
Winter: Preservation and Festive Mood
For winter, the fountain must be preserved (see the next section). But the empty reservoir can also be decorated:
- If the container remains outdoors, cover it and decorate with spruce branches.
- You can place a New Year’s composition or a battery-powered garland inside the container.
Secrets of Durability: Expert Tips for Dacha Fountain Care
To ensure your mini-waterfall brings you joy for many seasons, follow simple care rules. Remember: proper pump maintenance is the key to its longevity.
1. Water Level Control
Water evaporates, especially on hot days. Never turn on the pump if it is not fully submerged in water! Running it dry will quickly damage it. Check daily and add water as needed.
2. Regular Cleaning
Over time, algae appear in the water, and limescale builds up on stones and walls. This is not only unsightly but also harmful to the pump.
- Weekly: Remove large debris (leaves, twigs).
- Once a month: Completely drain the water, clean the container with a brush, and rinse the stones.
- Pump Cleaning: Disassemble the pump (if the instructions allow) and clean its filter and rotor from slime and buildup. Use a weak vinegar solution to remove limescale deposits.
3. Algae Control
To keep the water clean, you can use special algae-fighting products (algaecides) that are safe for plants and animals, available in pet stores or pond supply sections. If you prefer to avoid chemicals, regularly change the water and ensure the fountain is not exposed to direct sunlight all day (this stimulates algae growth).
4. Winter Preservation – Strictly Mandatory!
As soon as the temperature drops below freezing, the fountain must be prepared for winter:
- Draining: Completely drain all water from the container and hoses.
- Pump: Be sure to remove the pump! Rinse it, dry it, and store it in a warm, dry place (e.g., in a pantry or garage), submerged in a container of water to prevent rubber seals from drying out.
- Container: If the container (especially ceramic or concrete) remains outdoors, it must be completely dry, otherwise, freezing water can crack it. Cover it with a dense material or turn it upside down.
FAQ: Answers to Common Questions About Mini-Fountains
We’ve gathered the most popular questions that arise for beginner decorators.
1. What pump is best for a flower pot fountain?
For small tabletop fountains or cascades of two to three pots, a pump with a flow rate of 150–300 liters per hour is sufficient. Most importantly, look at the maximum water lift height (Hmax); it should be at least 20-30 cm higher than your fountain.
2. Can I use rainwater?
Yes, rainwater is ideal as it is soft and does not contain chlorine or lime, which leave deposits on stones. However, it needs to be filtered to prevent large debris from entering the pump.
3. What should I do if the fountain splashes too much?
This means the pressure is too high. Either adjust the pump’s power (if it has a regulator) or replace the nozzle at the hose outlet with a wider one to make the stream softer and wider, rather than a narrow jet.
4. How to ensure electrical safety outdoors?
Use only outdoor extension cords and outlets with moisture protection (IP44 class and higher). The pump’s cable should be securely hidden and protected from mechanical damage. Never leave wires lying on the ground.
Inspiration in Every Reflection
Creating a small fountain is not just a technical project; it’s meditation embodied in decor. You are creating your own, living corner that will change with the weather and seasons. Remember, the best fountain is one created with love and reflecting your individuality. Don’t be afraid to experiment with stones, plants, and light. Let the murmur of water in your dacha become the most pleasant melody of this summer!