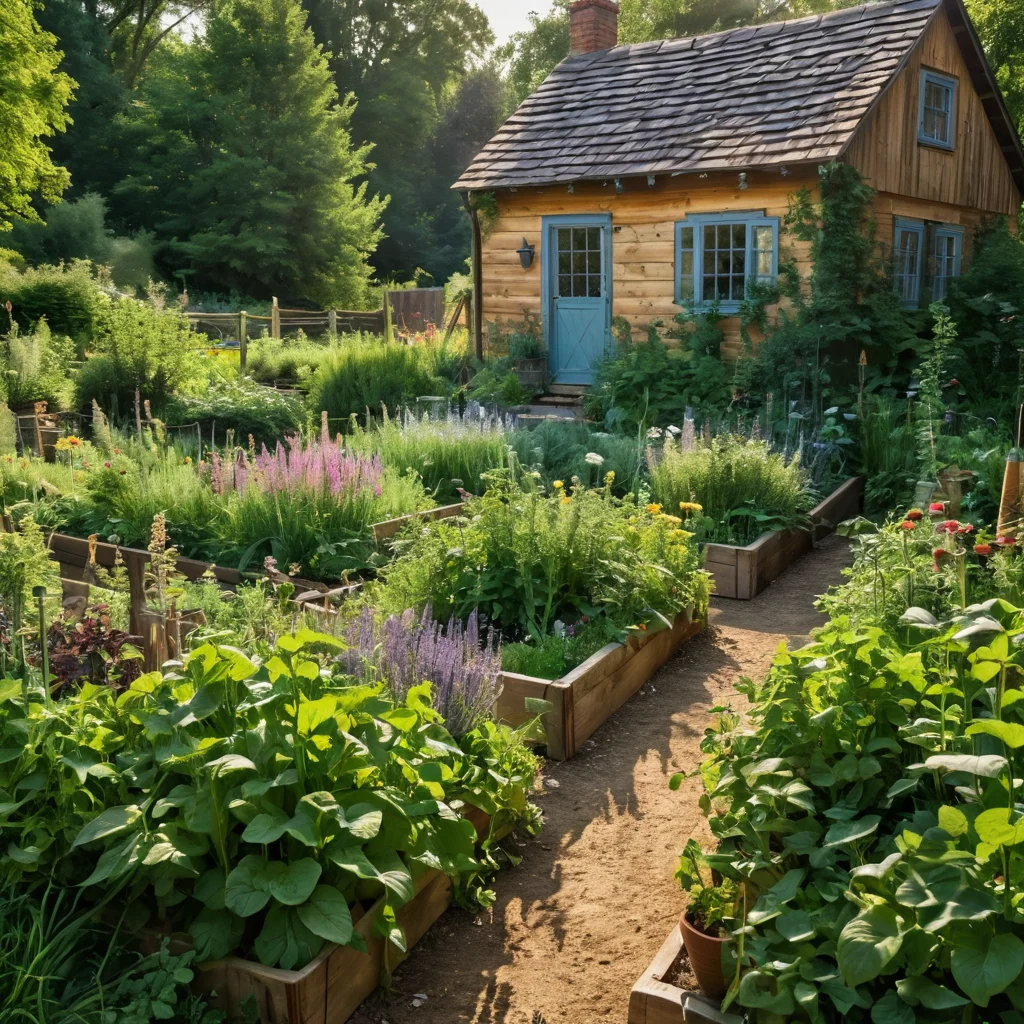
Imagine: morning, dew has not yet managed to dry on the emerald grass, and the air is filled with the subtle aroma of mint and basil. You step out onto the porch to enjoy the silence and anticipation of a new day, and suddenly your gaze falls on a flowerbed. But this is not just a flowerbed with flowers – it’s a real miracle! Bright cornflower petals intertwine with the greenery of aromatic parsley, and juicy wild strawberries ripen among them. This is an edible flowerbed – a place where beauty meets utility, and your garden becomes not only a decoration but also a source of fresh, aromatic ingredients for your kitchen. I always say that a garden is an extension of our home, and an edible flowerbed is a vivid confirmation of this, as it creates coziness, pleases the eye, and feeds us with love.
Why You Need an Edible Flowerbed: Ideas and Inspiration for Your Garden
Lately, more and more gardeners are thinking about making their plot not only beautiful but also as functional as possible. An edible flowerbed is an ideal solution for those who value practicality, love fresh produce, and want to add a little culinary creativity to their lives. Just think about how much pleasure you can get from cutting a bunch of fresh herbs right from the flowerbed before preparing lunch! It’s not only convenient but also incredibly healthy, as you know for sure that no chemicals were used in its cultivation.
An edible flowerbed is not just a bed of herbs; it’s a well-thought-out element of landscape design that can become a real highlight of your garden. It combines:
- Aesthetic Appeal: Properly selected plants with diverse foliage, flowers, and shapes create a captivating composition that is no less impressive than traditional flowerbeds.
- Practical Benefit: You will always have fresh greens, aromatic herbs, and sometimes even berries or small vegetables at hand.
- Development of Culinary Skills: Experiment with new recipes, adding your own homegrown ingredients to dishes.
- Attractiveness to Pollinators: Flowering herbs and vegetables attract bees and butterflies, making your garden lively and filled with the sounds of nature.
- Environmental Friendliness: You grow food for yourself, reducing your carbon footprint and minimizing waste.
- Opportunity for Creativity: Creating an edible flowerbed is an engaging process that allows you to unleash your imagination and make your plot truly unique.
Believe my experience, when you first add a sprig of basil grown with your own hands to a salad or soup, you will feel a completely special satisfaction. It’s not just food; it’s the result of your labor, care, and love for nature. And if you live in the city and only have a small balcony, don’t be discouraged! Many of these ideas are perfect for container gardening.
Types of Edible Flowerbeds: From Classics to Modern Solutions
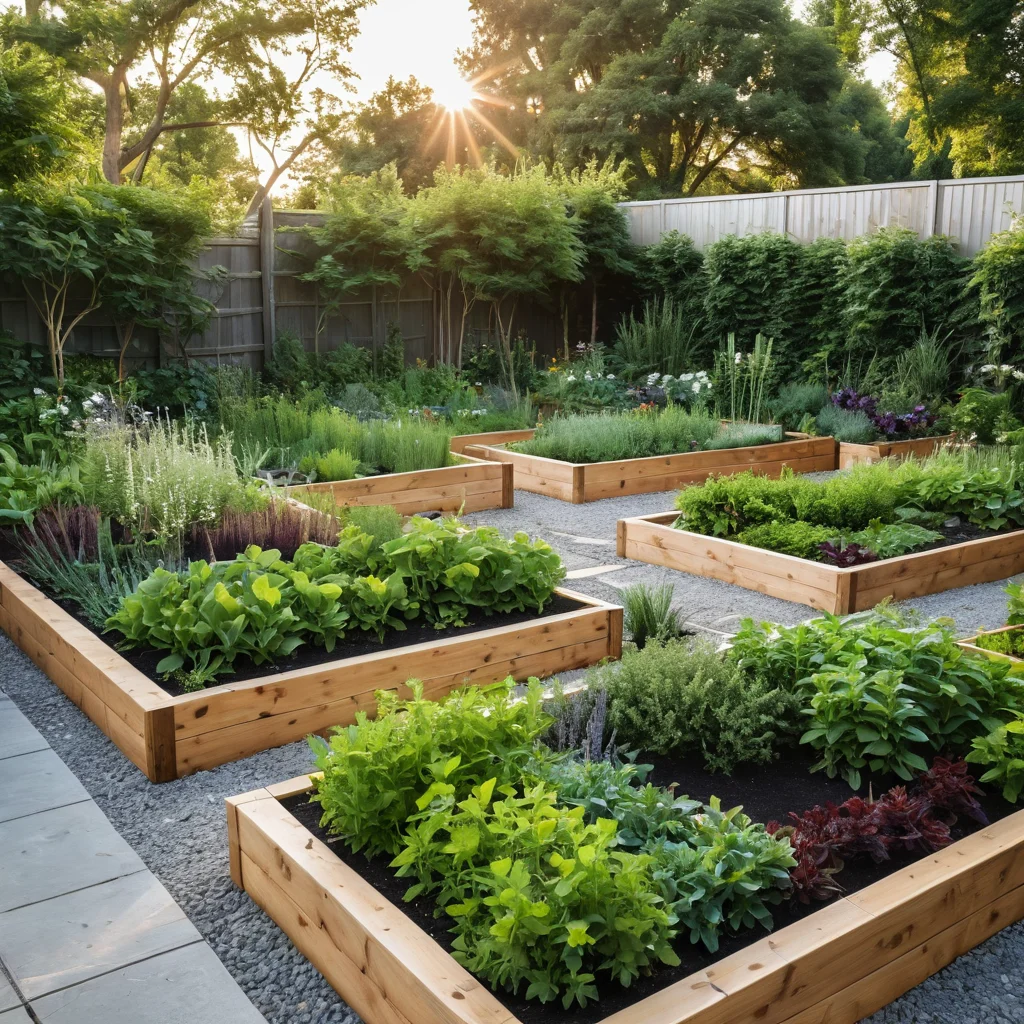
When it comes to edible flowerbeds, many immediately imagine a regular bed with parsley and dill. But this is far from the case! The world of edible flowerbeds is diverse and full of amazing possibilities. We can move away from traditional ideas and create something truly special that will please the eye and enrich your table.
Here are a few popular types of edible flowerbeds that will inspire you to create your own masterpiece:
- Herb Garden: This is perhaps the most popular and simplest option. Here, aromatic herbs are the main stars. Think of plants like:
- Basil (various varieties with different aromas and leaf colors)
- Parsley (curly and flat-leaf)
- Dill
- Mint (different types – peppermint, garden, apple)
- Lemon Balm
- Sage
- Thyme
- Rosemary
- Oregano
- Tarragon
- Mini Vegetable Garden: You can include not only greens but also low-growing vegetable crops in the flowerbed. They look great:
- Lettuce leaves (lettuce, arugula, spinach)
- Radishes (mature quickly and add bright color)
- Dwarf cherry tomato varieties
- Dwarf peppers
- Peas and beans (climbing varieties can be used as a vertical element)
- Carrots (compact varieties)
- Berry Flowerbed: Add sweet notes to your garden. Ideal choices are:
- Garden strawberry (strawberry), especially everbearing varieties
- Dwarf currant varieties
- Blueberry (requires acidic soil, can be a separate element)
- Edible Flowerbed with Flowers: This is a real explosion of color and taste! Many flowers are not only beautiful but also edible, and they attract beneficial insects.
- Nasturtium (flowers and leaves have a pungent taste, like watercress)
- Calendula (petals are added to salads and soups, giving them a golden hue)
- Violets (petals decorate desserts and drinks)
- Marigolds (some varieties are edible, add a spicy aroma to dishes)
- Cornflower (bright blue petals look great in salads)
- Lavender (aromatic flowers are used in baking and desserts)
- Combined Flowerbed: A combination of all the elements listed above. Here, your imagination is unlimited! You can create real culinary landscapes where each element harmoniously complements the others.
- Vertical Edible Flowerbed: Ideal for small plots or balconies. Use multi-tiered structures, hanging planters, or trellises for climbing plants.
When choosing the type of flowerbed, consider your taste preferences, the lighting conditions on your plot, and, of course, how much time you are willing to dedicate to its care. Even the simplest herb flowerbed can bring a lot of joy and benefit!
Choosing Plants for an Edible Flowerbed: Herbs, Vegetables, Berries, and Flowers
Selecting the right plants is perhaps the most important step in creating your edible flowerbed. The appearance, yield, and ease of care all depend on this. I always advise starting with plants that you like and that you will actually use in cooking. But don’t forget about their decorative qualities!
Edible Herbs – The Foundation
Herbs are the heart of any edible flowerbed. They are unpretentious, aromatic, and incredibly beneficial. Here’s what to pay attention to:
- Basil: There are many varieties – green, purple, with lemon or anise aroma. It loves sun and warmth. Purple varieties add a bright accent to the flowerbed.
- Parsley: Flat-leaf (Italian) parsley is more aromatic and looks more decorative than curly parsley. It prefers partial shade.
- Mint: Be careful, mint spreads very aggressively! It’s best to plant it in a confined space (e.g., in a container buried in the ground) or choose varieties that are less prone to expansion. Peppermint is a great choice for tea.
- Lemon Balm: A relative of mint, but with a more delicate lemon aroma. It also likes partial shade and can be quite active in growth.
- Thyme: Low-growing, creeping thyme bushes with small aromatic leaves. Looks great along the edge of the flowerbed. Unpretentious, loves sun.
- Rosemary: An evergreen shrub with a strong spicy aroma. In colder regions, it’s better to grow it as an annual or bring it indoors for winter. Needs a sunny spot and good drainage.
- Sage: Decorative sage varieties with beautiful leaves and flowers will adorn the flowerbed. There are also culinary varieties. Loves sun.
- Oregano: Another aromatic herb that tolerates drought well and loves sun.
Vegetables and Berries – Practical Neighbors
Don’t be afraid to add vegetables and berries to your flowerbed. The main thing is to choose compact varieties and consider their needs.
- Lettuce and Arugula: Grow quickly, can be sown several times a season. Prefer partial shade so the leaves don’t become bitter.
- Radishes: Add bright red or pink accents. Mature quickly, allowing you to enjoy the harvest just a month after sowing. Loves sun, but prefers partial shade in hot weather.
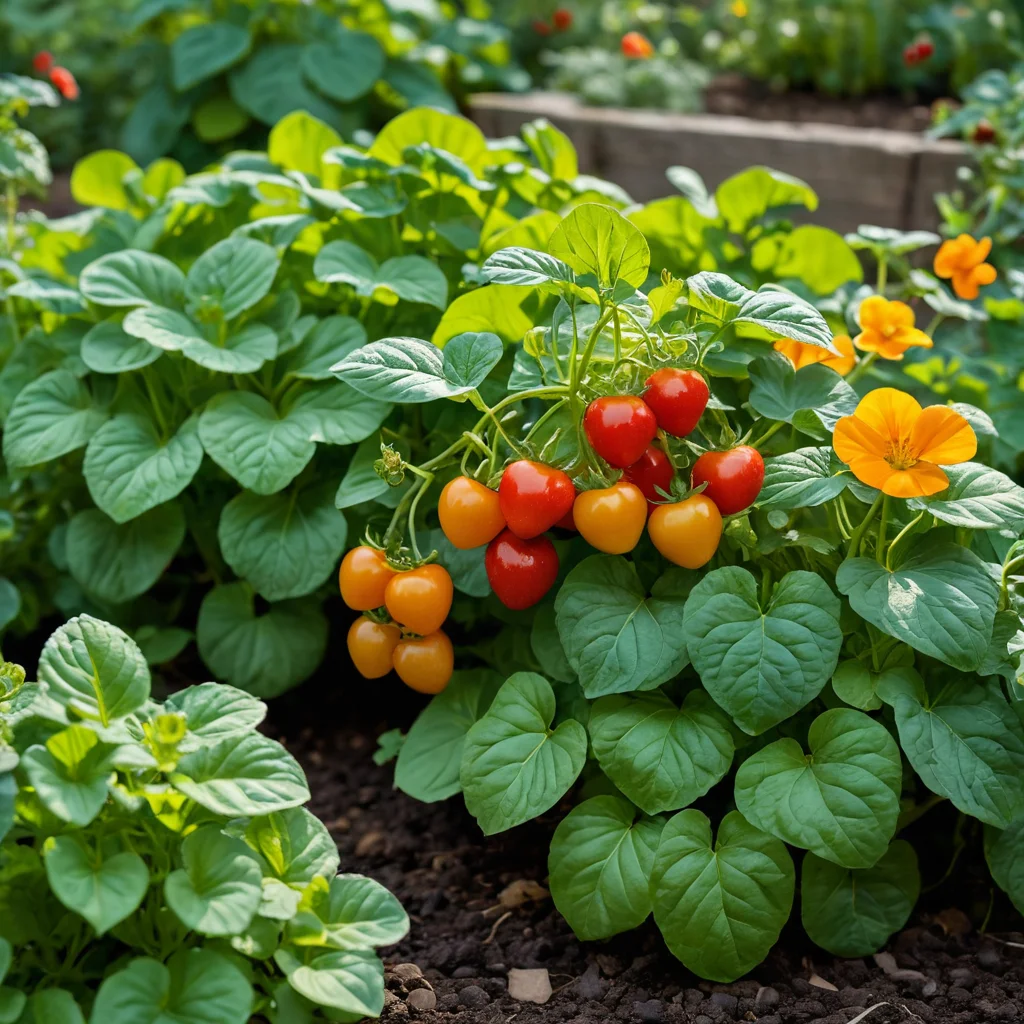
- Cherry Tomatoes and Dwarf Peppers: Choose special low-growing or trailing varieties that won’t take up much space. They will become bright accents and provide a harvest. They need a lot of sun.
- Strawberries: Trailing varieties that beautifully cascade over the edge of the flowerbed, or everbearing varieties that fruit all summer, look especially good. Loves sun and fertile soil.
Decorative and Edible Flowers
Flowers will not only decorate your flowerbed but also attract beneficial insects, and some of them are even edible!
- Nasturtium: Bright flowers and round leaves. The flowers and leaves have a pungent, slightly peppery taste. Looks great cascading over the edges of the flowerbed.
- Calendula: Sunny, cheerful flowers. The petals can be added to salads, soups, and butter. The plant is unpretentious and blooms profusely.
- Marigolds: Bright, long-blooming. Some varieties (e.g., French marigolds) have a pleasant aroma and are edible.
- Cornflower: Delicate blue, pink, or white flowers. The petals can be used to decorate dishes.
- Lavender: Not only beautiful and fragrant but also beneficial. Attracts bees, and its flowers can be used in baking (e.g., in cookies) or for flavoring sugar.
Important Tip: When choosing plants, always pay attention to their requirements for light, moisture, and soil type. Try to group plants with similar needs. And remember that even annual plants can create a beautiful composition for one season!
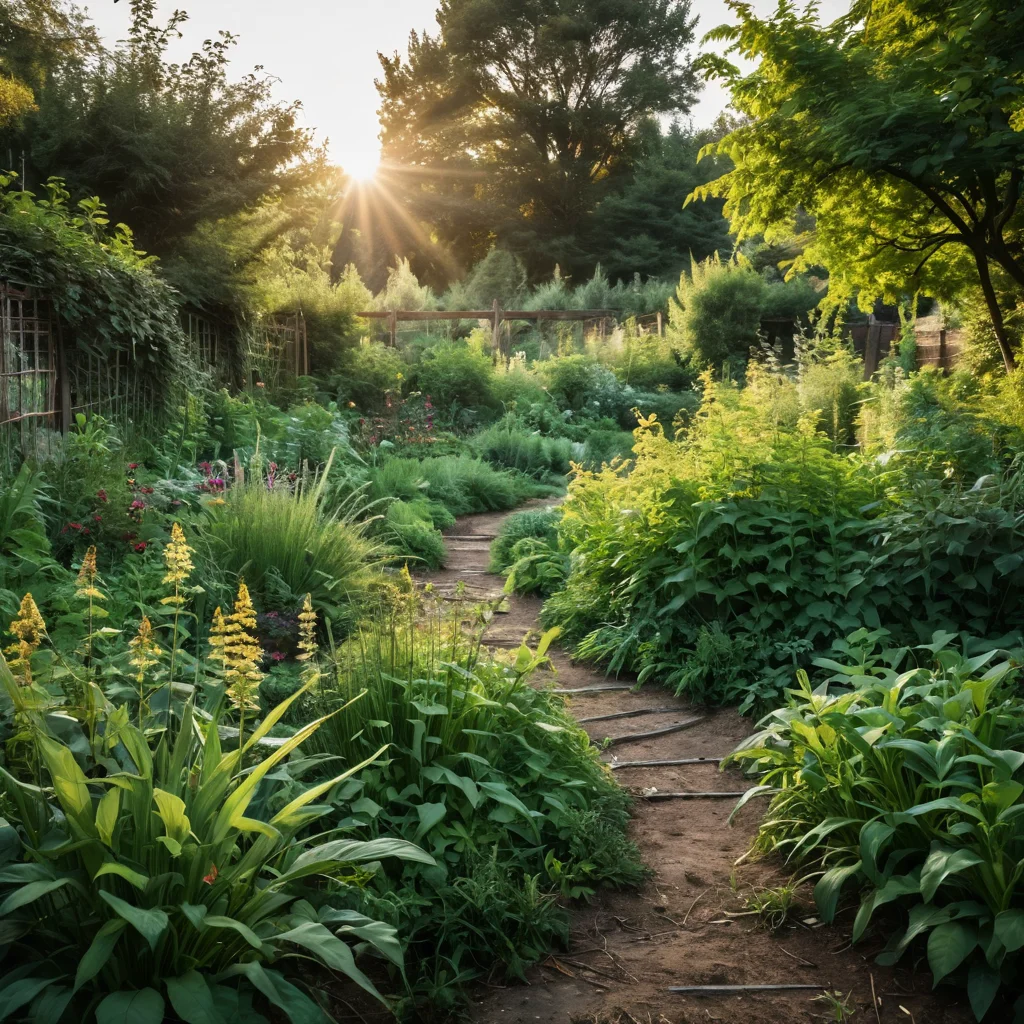
Preparing the Site and Soil for an Edible Flowerbed: A Step-by-Step Guide
Good preparation is the key to success in any endeavor, and creating an edible flowerbed is no exception. For your plants to feel great and reward you with abundant harvests and beauty, it’s important to choose the right location and prepare the soil properly.
Step 1: Choose the Ideal Location
Before you grab a shovel, decide on the location for your future flowerbed. Consider the following factors:
- Sunlight: Most vegetables and herbs love the sun. Ideally, the chosen spot should receive at least 6-8 hours of sunlight per day. However, some plants (e.g., lettuce, parsley, mint, lemon balm) prefer light partial shade, especially during the hot midday hours. Think about what plants you plan to grow and choose a suitable location.
- Water Access: Make sure the location of your future flowerbed is easily accessible with a watering can or hose. If you plan to water plants frequently, it’s best to place the flowerbed near a water source.
- Wind Protection: Strong winds can damage delicate plants and dry out the soil. If possible, choose a location protected from prevailing winds, for example, near a fence, house, or under the canopy of trees (but not in full shade).
- Visual Accessibility: Position the flowerbed so that it pleases your eye. Perhaps it will be a spot near a relaxation area, a terrace, or right by the entrance to the house.
Step 2: Mark the Flowerbed Outline
Once you’ve decided on the location, mark the boundaries of your future flowerbed. You can do this using:
- Garden Hose: Simply lay the hose in the desired shape.
- Rope and Stakes: Stretch a rope between driven stakes to outline the contour.
- Sand or Chalk: Pour a strip of sand or draw with chalk along the border.
The shape can be anything: round, oval, rectangular, irregular. The main thing is that you like it.
Step 3: Remove Sod and Weeds
If there is grass or many weeds growing in the chosen area, they must be removed. There are several methods:
- Mechanical Removal: Using a shovel or trowel, carefully cut away the sod or dig out weeds along with their roots. This method is the most labor-intensive but gives quick results.
- Digging: Thoroughly dig over the soil, removing all weed roots.
- Mulching: You can cover the chosen area with dense cardboard or black plastic for several weeks (or even months). This will help suppress the growth of weeds and sod. Before planting, you can leave the cardboard, as it will decompose over time, or remove it.
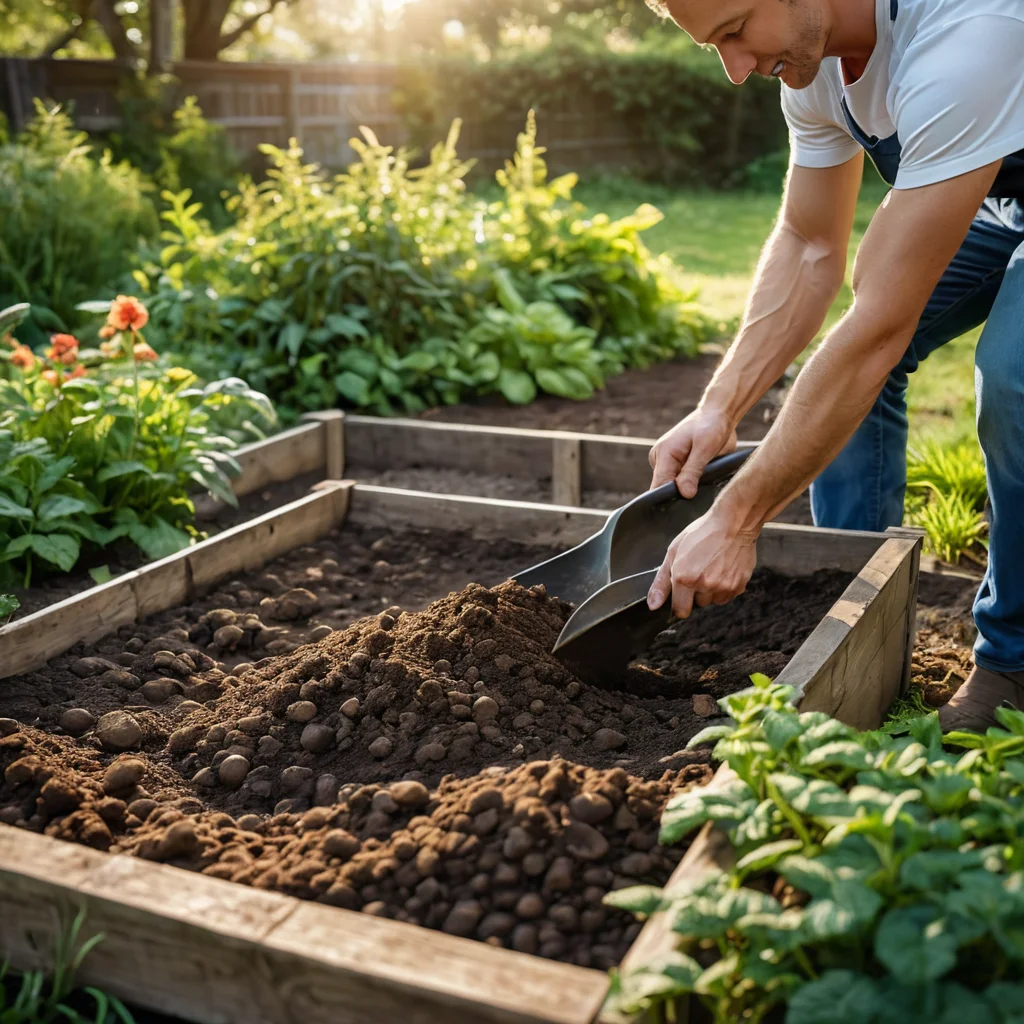
Step 4: Prepare and Improve the Soil
High-quality, fertile soil is the foundation of your plants’ health. In most cases, the soil in garden plots requires improvement.
- Digging: Dig the soil deeply (to the depth of a shovel blade), breaking up large clumps.
- Adding Fertilizers: This is the most important step for improving fertility. You will need:
- Compost or Humus: An excellent source of organic matter. Add 1-2 buckets per square meter.
- Peat: Helps improve soil structure, especially if it is clayey or sandy.
- Complex Mineral Fertilizers: You can use special fertilizers for vegetables or seedlings, following the instructions on the package.
- Wood Ash: A source of potassium and trace elements, has a slight deoxidizing effect.
- Loosening: After adding fertilizers, thoroughly loosen the soil with a rake, evenly distributing all components.
- Leveling: Carefully level the surface of the flowerbed with a rake.
Special Cases:
- Acidic Soil: If the soil is too acidic (which is undesirable for most vegetables and herbs), you can add dolomite flour or lime. This is especially important if you plan to grow blueberries.
- Heavy Clay Soil: To improve its structure, add sand, peat, and compost.
- Sandy Soil: It quickly loses moisture and nutrients. Add clay (a little!), compost, humus, and peat.
Remember that good, loose, fertile soil is a guarantee that your plants will develop well, and it will be easier for you to care for the flowerbed.
How to Create a Beautiful Edible Flowerbed: Design Principles and Plant Combinations
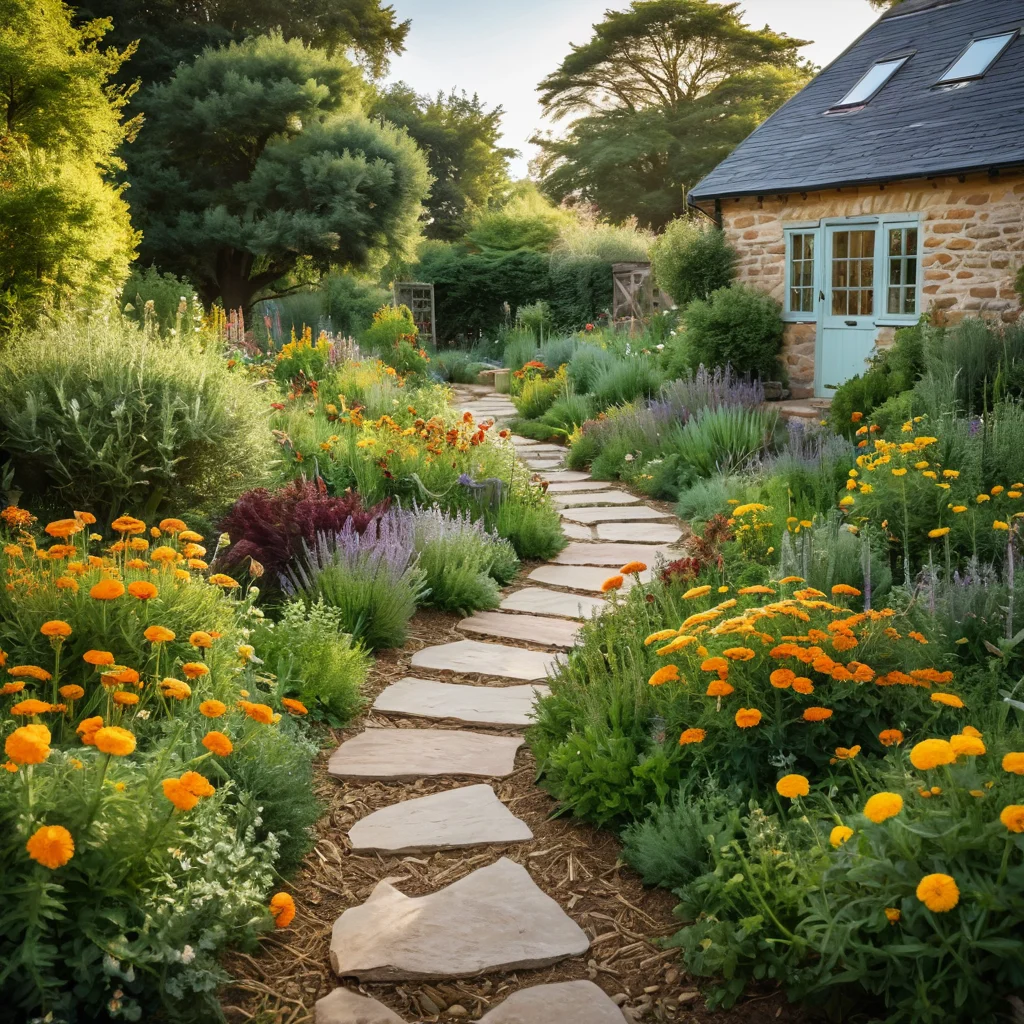
Creating a beautiful edible flowerbed is a true art where practicality meets aesthetics. We want our flowerbed not only to yield a harvest but also to please the eye, harmoniously fitting into the overall garden landscape. I always say that a garden is a canvas, and plants are our paints. Here are some principles that will help you create a harmonious and attractive edible flowerbed:
1. Consider Plant Height
Place taller plants in the center of the flowerbed or at the back (if the flowerbed is adjacent to a fence or wall), and low-growing plants along the edges. This will create a natural pyramid and ensure all plants have access to sunlight.
- Tall: Some tomato varieties, bush beans, compact shrubs (e.g., dwarf currants).
- Medium: Most herbs (basil, sage, rosemary), peppers, cabbage, carrots.
- Short: Lettuces, radishes, strawberries, thyme, parsley, dill.
Example: In the center of the flowerbed, you can plant a few dwarf cherry tomato bushes, surrounded by sage and basil, and along the edge, fragrant thyme and green strawberries.
2. Play with Color and Texture
Combining different leaf colors and flower colors makes the flowerbed more interesting and picturesque.
- Leaf Color: Use contrasting combinations. For example, purple basil next to green lettuce, silver sage next to bright green parsley.
- Flowers: Bright nasturtium, calendula, and cornflower flowers will add color. Plants with small flowers (thyme, oregano) create a more delicate carpet.
- Texture: Combine plants with large leaves (e.g., zucchini leaves, if you decide to plant them in the flowerbed) with small ones (dill, thyme), finely cut ones (parsley) with smooth ones (basil).
Example: A combination of curly parsley, smooth-leaf basil, finely cut dill, and bright nasturtium flowers will create a multi-layered and interesting composition.
3. Create Patterns and Shapes
Don’t be afraid to experiment with the shape of the flowerbed and the arrangement of plants within it. You can create:
- Concentric Circles: Starting with the tallest plant in the center and gradually decreasing the height towards the edges.
- Spirals: Planting plants in a spiral pattern, for example, from the brightest to the least bright.
- Geometric Patterns: Alternating plants of different colors and shapes in a specific order.
- Borders: Use low-growing herbs (thyme, mint) or vegetables (lettuce, radishes) to frame the edge of the flowerbed.
Example: A round flowerbed with several varieties of basil in the center, surrounded by parsley and dill, and with low-growing thyme along the very edge.
4. Use Edible Flowers and Berries as Decorative Elements
Flowers and berries can be not only tasty but also very beautiful. They add brightness and naturalness to the flowerbed.
- Strawberries: Their white flowers and red berries look very effective, especially when they cascade over the edges.
- Nasturtium: Its bright flowers and round leaves make the flowerbed sunny and cheerful.
- Calendula: Sunny flower heads attract attention and can be used as edible decoration.
5. Remember Plant Compatibility
Some plants grow better together, while others do not. Try to:
- Group plants with similar needs for watering and light.
- Avoid planting plants that can inhibit each other. For example, mint is best planted separately as it is very aggressive.
- Use “friendly” combinations: Basil grows well next to tomatoes, parsley next to lettuce, thyme next to most herbs.
The main rule: don’t be afraid to experiment! Creating an edible flowerbed is a process that brings pleasure. Start with a small area, try different combinations, and you will surely find your ideal option that will delight you and your loved ones.
Planting and Caring for an Edible Flowerbed: Watering, Fertilizing, and Pest Protection
So, your flowerbed is ready, the plants are chosen – it’s time to start planting and provide them with proper care. Believe me, it’s not as difficult as it might seem at first glance, and the result will exceed all your expectations!
1. Planting Plants
The planting method depends on the plants you are using:
- Seedlings: Most vegetables (tomatoes, peppers) and some herbs (basil, rosemary) are best planted as seedlings. Make holes in the prepared flowerbed, carefully remove the plant from its pot, trying not to damage the roots, and place it in the hole. Cover with soil and lightly compact.
- Seeds: Herbs (dill, parsley, cilantro), lettuce, radishes, and carrots are best sown directly into the ground. Follow the instructions on the seed packet regarding sowing depth and spacing between plants.
- Dividing Bushes: Perennial herbs like mint or lemon balm can be propagated by dividing the bush.
Important points during planting:
- Spacing: Maintain the recommended spacing between plants so they don’t interfere with each other’s growth and get enough light and air.
- Watering after planting: Water all planted plants thoroughly so the soil settles and the roots get the necessary moisture.
- Mulching: After planting, you can mulch the surface of the flowerbed with a thin layer of compost, straw, or bark. Mulch helps retain moisture, prevent weed growth, and improve soil structure.
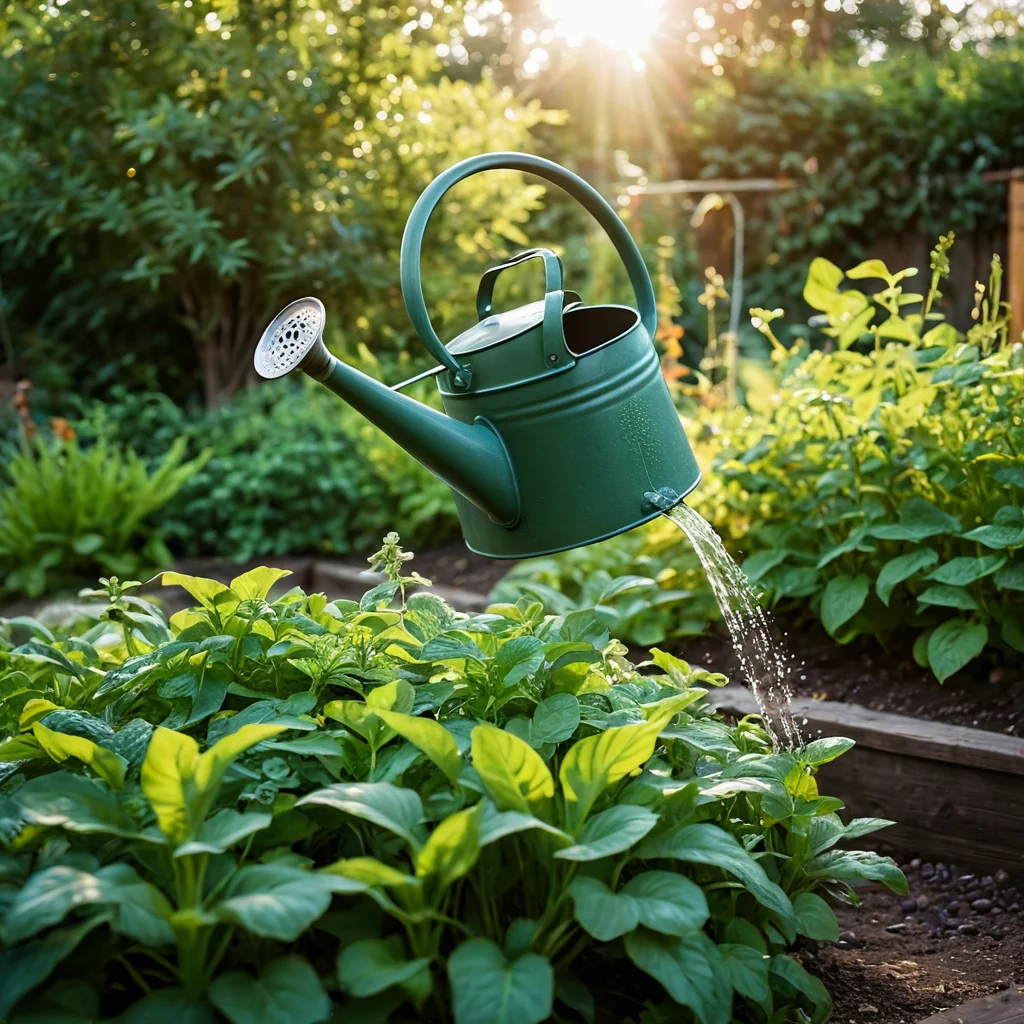
2. Watering
Regular and proper watering is the key to your plants’ health.
- Frequency: Watering frequency depends on the weather, soil type, and plant needs. In hot, dry weather, water more often; in cool weather, less often. Check the soil moisture: if the top layer (2-3 cm) is dry, it’s time to water.
- Time of watering: It’s best to water early in the morning or in the evening when the sun is not too active. This helps avoid leaf scorch and reduces moisture evaporation.
- Method of watering: Try to water at the base of the plants, avoiding getting water on the leaves, especially in sunny weather. Drip irrigation is an ideal option for saving water and ensuring even moisture.
- Depth of watering: Water deeply enough to stimulate root development.
3. Fertilizing
Even in the most fertile soil, plants consume nutrients over time. Regular fertilization will help maintain their health and yield.
- Organic Fertilizers: Compost, humus, and herbal infusions are excellent options for maintaining fertility. You can fertilize 1-2 times per season.
- Mineral Fertilizers: Use complex fertilizers for vegetables or greens, following the instructions. Do not overdo it; an excess of minerals can be harmful.
- Fertilizing Greens: Herbs generally do not require heavy fertilization. Excess nitrogen can lead to nitrate accumulation and worsen taste.
- Fertilizing Berries: Strawberries and other berry crops may need additional potassium and phosphorus for better fruiting.
4. Pest and Disease Protection
An edible flowerbed, like any other, can suffer from pests and diseases. But don’t rush to grab chemical agents!
- Prevention: Regularly inspect plants, remove weeds, and practice crop rotation (if possible).
- Biological Agents: Use products based on natural components (e.g., based on bacteria or fungi) that are safe for humans and beneficial insects.
- Folk Remedies: Infusions of garlic, onion skins, tobacco, and soapy water are time-tested methods for controlling aphids and other pests.
- Attracting Beneficial Insects: Plant nearby species that attract ladybugs and lacewings (e.g., dill, cilantro, chamomile).
- Manual Collection: Large pests (e.g., caterpillars) can be collected by hand.
Important: When using any protective agents, even biological or folk remedies, always read the instructions and follow safety precautions. Remember that your goal is to obtain clean and safe produce.
Harvesting and Using Greens from Your Edible Flowerbed
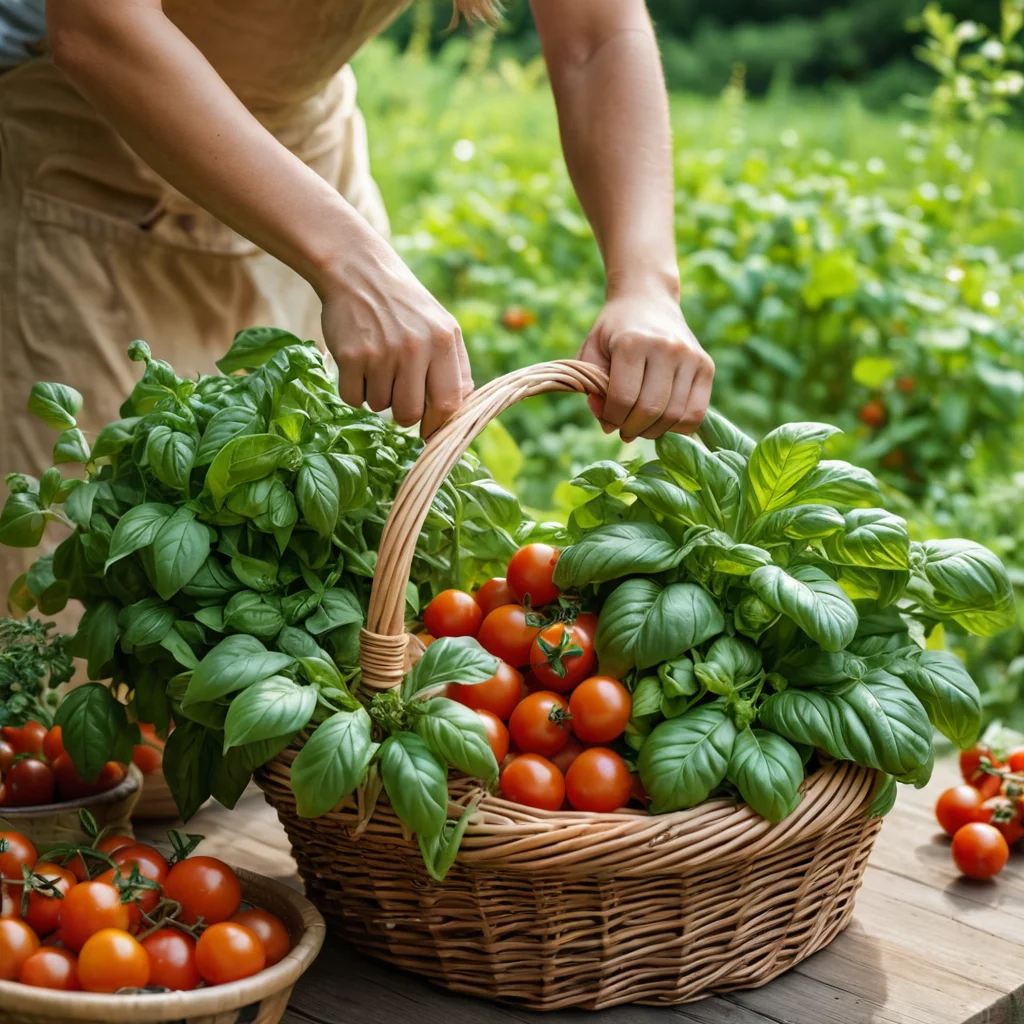
And now comes the most pleasant moment – it’s time to harvest from your own, self-created edible flowerbed! It’s an incomparable pleasure to cut fresh, aromatic greens right before preparing a dish. Believe me, the taste and aroma of produce grown with love are much brighter and richer than those bought in a store.
When and How to Harvest?
- Herbs: Greens can be harvested as needed, as soon as the plants reach the desired size. The best time to harvest is in the morning, after the dew has dried, but before the heat sets in. At this time, herbs contain the maximum amount of essential oils and aroma.
- How to cut: Use a sharp knife or pruners to carefully cut the stems. Try not to pull the plants out by the roots so they can continue to grow. For many herbs (basil, parsley, dill), regular pinching of the tops stimulates further growth and bushiness.
- Vegetables: Vegetables (radishes, lettuce, tomatoes, peppers) are harvested as they ripen. Don’t let radishes overgrow, or they will become fibrous and bitter. Lettuce can be cut whole or individual leaves can be harvested.
- Berries: Strawberries are harvested when fully ripe, when they acquire a rich color and aroma.
- Flowers: Edible flowers (nasturtiums, calendula, cornflowers) are best harvested in the morning, while they are fully open.
How to Use Greens and Vegetables from the Flowerbed?
The possibilities are practically endless! Here are just a few ideas:
- Fresh Salads: Add lettuce leaves, arugula, basil, parsley, and dill to any salad. They will give them freshness and a unique aroma.
- Additions to Main Dishes: Garnish soups, meat and fish dishes, and side dishes with fresh herbs.
- Sauces and Pesto: Classic basil pesto is just the beginning! Experiment with other herbs.
- Drinks: Mint and lemon balm are indispensable for making refreshing summer drinks, teas, and lemonades.
- Baking: Basil, rosemary, thyme, and lavender are perfect for adding to bread, cookies, and muffins.
- Pickling and Preserving: Dry excess herbs for winter use or pickle some vegetables.
- Decorating Dishes: Bright flowers (nasturtium, cornflower) and berries (strawberries) will be a real decoration for any dish, from dessert to appetizer.
How to Keep Freshly Harvested Greens Fresh?
- In the refrigerator: Most herbs can be stored in the refrigerator. It’s best to place the stems in a glass of water (like a bouquet) and cover with a bag, or wrap them in a damp paper towel and place in a zip-lock bag.
- Drying: Tie herbs into small bundles and hang them in a dry, dark, well-ventilated place. After drying, crumble and store in airtight containers.
- Freezing: Herbs can be frozen. Chop the greens, mix with a small amount of water or olive oil, and pour into ice cube trays. After freezing, transfer the cubes to a bag.
Harvesting and using produce from your edible flowerbed is not just a culinary process; it’s an opportunity to feel a deeper connection with nature, to enjoy the taste and aroma of fresh produce grown with your own hands. It’s real magic, accessible to everyone!
Common Mistakes When Creating and Caring for an Edible Flowerbed: How to Avoid Them
Even the most experienced gardeners sometimes make mistakes, especially when it comes to new areas for them, like edible flowerbeds. But don’t be discouraged, because every mistake is a valuable experience! The main thing is to be aware of potential pitfalls and try to avoid them. Believe my experience, knowing these nuances, you can create the perfect edible flowerbed from the first try!
1. Incorrect Location Choice
Mistake: Planting all plants in shade or, conversely, in scorching sun, without considering their needs.
How to avoid: Before creating the flowerbed, carefully study the light requirements of each plant. Place sun-loving crops in sunny areas and shade-tolerant ones in partial shade. Don’t forget about wind – strong gusts can harm young plants.
2. Ignoring Soil Needs
Mistake: Planting in unprepared, poor, or too heavy soil.
How to avoid: Always improve the soil before planting. Add compost, humus, peat, and complex mineral fertilizers. Consider the soil’s acidity, especially if you plan to grow plants that prefer acidic environments (e.g., blueberries).
3. Overcrowding the Flowerbed
Mistake: Trying to fit as many plants as possible into a small area. This leads to competition for light, water, and nutrients, as well as poor air circulation, which promotes disease development.
How to avoid: Maintain the recommended spacing between plants. It’s better to plant fewer, but give each plant enough space to develop. Remember that plants will grow over time!
4. Incorrect Watering
Mistake: Overwatering, leading to root rot, or insufficient watering, causing plants to wilt.
How to avoid: Water regularly, but avoid waterlogging. Check soil moisture before watering. It’s better to water thoroughly but less often than frequently and sparingly. Water at the base, avoiding getting water on the leaves in sunny weather.
5. Using Aggressive Plants Without Restrictions
Mistake: Mindlessly planting mint, lemon balm, or horseradish, which quickly take over and suppress other plants.
How to avoid: These plants are best grown in separate containers buried in the ground, or used as borders, by containing their root systems.
6. Lack of Design Planning
Mistake: Chaotic planting without considering plant height, color, and shape, leading to an unaesthetic appearance of the flowerbed.
How to avoid: Plan the composition in advance. Group plants by height, combine colors and textures, create patterns. Use low-growing plants for borders.
7. Ignoring Pests and Diseases
Mistake: Waiting until the problem becomes serious and then trying to solve it with strong chemicals that can end up in food.
How to avoid: Regularly inspect plants. Use preventive measures and safe biological or folk remedies to combat pests and diseases. Attract beneficial insects to your garden.
8. Planting Incompatible Plants
Mistake: Planting plants next to each other that inhibit each other or have completely different care requirements.
How to avoid: Research plant compatibility. Try to group plants with similar needs.
Creating an edible flowerbed is an exciting process that brings not only aesthetic pleasure but also practical benefits. Don’t be afraid to experiment, learn from your mistakes, and your garden will surely reward you with lush blooms, fragrant greens, and a delicious harvest!